Have you ever wanted to dive deep into your car’s data, like a digital mechanic? Or maybe you’re working on a cool project that needs real-time engine information? That’s where the Freematic OBD adapter and Arduino come in, creating a powerful combination for DIY car diagnostics and innovative projects. But how do you actually connect these two tech tools?
This guide will walk you through the process, step-by-step, making it easier than navigating the Pacific Coast Highway in a brand new Ford Mustang.
Understanding the Connection: Why Freematic and Arduino?
Before we get our hands greasy, let’s understand why this pairing is so powerful.
From a mechanic’s perspective, the Freematic OBD adapter acts like a key, unlocking the treasure chest of data hidden within your car’s computer. It reads information from your vehicle’s Electronic Control Unit (ECU), which controls everything from engine timing to emissions.
Now, imagine you could take that data and use it to build your own custom car diagnostics tools, or even control parts of your car with a program. That’s where Arduino comes in. This open-source platform allows you to create interactive electronic projects. When combined with a Freematic OBD adapter, it’s like giving your Arduino a direct line to your car’s brain.
Making the Connection: A Step-by-Step Guide
1. Gather Your Equipment
Think of this as prepping your workspace before starting a car restoration project:
- Freematic OBD Adapter: Choose the one compatible with your car model (e.g., Freematic OBD-II UART for most modern vehicles).
- Arduino Board: An Arduino Uno is a great starting point.
- Jumper Wires: These are your connection bridges.
- Computer with Arduino IDE: This is where you’ll write and upload code.
2. Connect the Freematic OBD Adapter to Your Car
Just like plugging in a diagnostic tool at a garage in downtown Los Angeles, connect the Freematic OBD adapter to your car’s OBD-II port. It’s usually located under the dashboard on the driver’s side.
3. Connect the Freematic Adapter to the Arduino
Now, let’s wire the adapter to your Arduino board:
- Freematic TX to Arduino RX: This allows data to flow from the adapter to the Arduino.
- Freematic RX to Arduino TX: This sends data from the Arduino to the adapter.
- Freematic VCC to Arduino 5V: This powers the adapter.
- Freematic GND to Arduino GND: This establishes a common ground.
4. Install the Necessary Libraries
Head over to the Arduino IDE on your computer. You’ll need to install libraries that allow the Arduino to understand and communicate with the Freematic adapter. The “SoftwareSerial” library is a common one.
5. Write Your Arduino Code
Here’s where you’ll write the code that tells your Arduino how to interact with the OBD data. You can find sample code online to get you started. The code will depend on what you want your project to do. For instance, you can write code to display engine RPM on an LCD screen, log data to an SD card, or even send data to the cloud.
6. Upload and Test!
Upload your code to the Arduino board and test your connection. If everything is set up correctly, you should see data flowing between your car and the Arduino!
Troubleshooting and Further Exploration
Just like troubleshooting a car problem, sometimes things might not work perfectly right away. Double-check your wiring, ensure the correct libraries are installed, and verify that your code is error-free. Online forums and communities are fantastic resources for getting help.
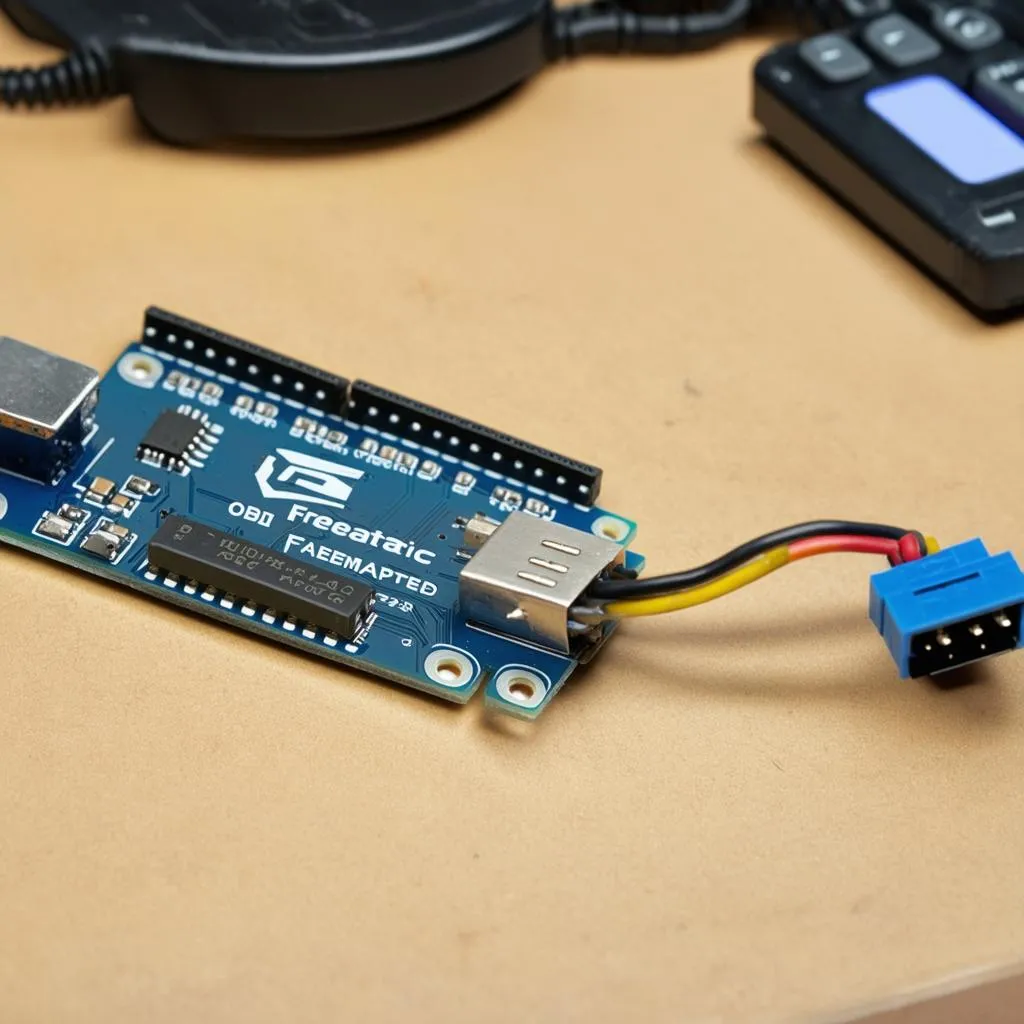 Connecting Freematic OBD Adapter to Arduino
This setup opens up a world of possibilities. Want to build a custom dashboard display for your classic Chevrolet Camaro? Go for it! How about logging fuel efficiency data on your next road trip across Arizona? You got it!
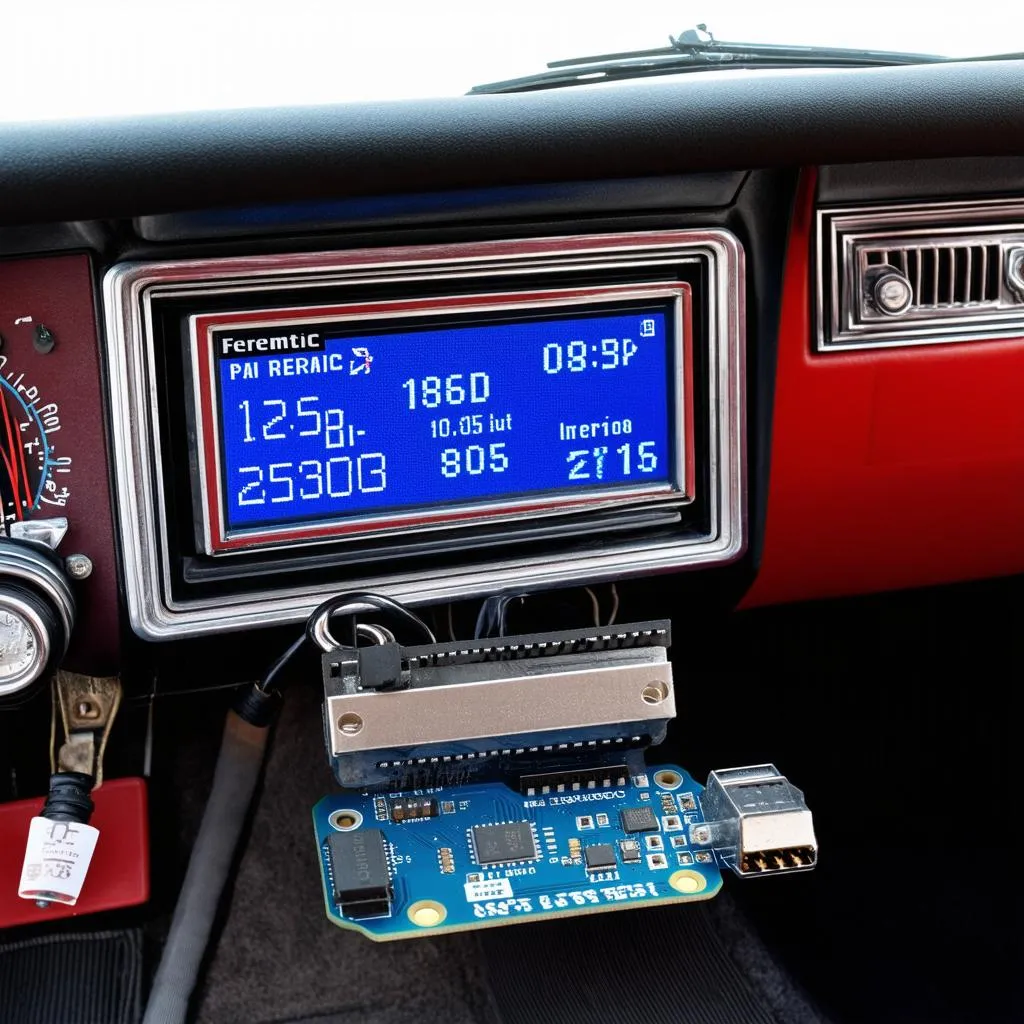 Custom Car Dashboard with Arduino and Freematic OBD-II
Frequently Asked Questions
Q: Can I use any OBD-II adapter with Arduino?
While many OBD-II adapters are compatible, it’s best to use one specifically designed to work with microcontrollers like the Freematic OBD adapter.
Q: What kind of data can I access with this setup?
You can access a wealth of data, including engine RPM, speed, coolant temperature, fuel level, and even diagnostic trouble codes.
Q: Is it legal to connect devices to my car’s OBD-II port?
In most places, it’s legal to connect devices to the OBD-II port for personal use. However, avoid making modifications that could impact your car’s emissions system or safety features without consulting a qualified mechanic.
Need a Hand?
Feeling a bit overwhelmed? Don’t worry; we’re here to help! Our team of automotive tech experts is just a WhatsApp message away at +84767531508. We’re available 24/7 to assist you with any questions, troubleshooting, or even custom project guidance.
Keep the Engine Running
Connecting your Freematic OBD adapter to an Arduino unlocks a world of possibilities for DIY car diagnostics, data logging, and innovative automotive projects. With a bit of patience and the right guidance, you’ll be cruising down the information superhighway in no time!
Be sure to check out our other articles on automotive technology and DIY projects on Tech Car USA. We’re passionate about empowering car enthusiasts of all levels to take control of their vehicles and explore the exciting world of automotive technology.
We’d love to hear about your projects! Share your experiences, questions, and innovative ideas in the comments below. Let’s build something amazing together!