For automotive technicians and car enthusiasts, accurate vehicle diagnostics are paramount. Modern vehicles are increasingly complex, relying on sophisticated communication networks to operate. At the heart of this diagnostic process is the OBD2 (On-Board Diagnostics II) cable, and when it comes to reliability and performance, the Snap-on OBD2 cable stands out as a crucial tool. This guide from techcarusa.com will delve into the world of automotive data cables, focusing on the essential Snap-on OBD2 cable, its functionalities, and how it ensures seamless vehicle communication for effective diagnostics.
Understanding OBD2 Cables and Ethernet in Modern Vehicles
The automotive landscape has evolved significantly, with Ethernet technology now playing a vital role in vehicle communication. Think of automotive Ethernet as a high-speed data highway within your car, allowing various control units and components to communicate rapidly. It’s exponentially faster than the older CAN Bus systems, which is essential for today’s advanced safety systems and data-rich applications.
Just like the traditional CAN Bus systems are accessed through the OBD-II diagnostic link connector, Ethernet-equipped vehicles also utilize this standard 16-pin connector. However, to tap into these advanced communication networks, your diagnostic equipment and, crucially, your OBD2 cable must be designed to support Ethernet communication protocols. This is where the Snap-on OBD2 cable engineering becomes critical.
Snap-on has engineered specific OBD2 cables, often referred to as DA-4E or DA-4EA cables, to seamlessly interface with these modern Ethernet systems. When using a compatible Snap-on diagnostic tool and the correct Snap-on OBD2 cable, the connection to Ethernet-based vehicle systems is typically automatic.
However, if your diagnostic tool or OBD2 cable lacks Ethernet compatibility, you might encounter prompts to connect a specialized cable. Messages like, “Use the DA-4EA Ethernet adapter cable. This vehicle is equipped with an Ethernet communication system,” are common indicators. Always heed these prompts and ensure you are using the recommended Snap-on OBD2 cable to avoid communication errors and ensure accurate diagnostic readings. Using an incorrect or incompatible cable can lead to communication failures or misleading diagnostic data.
To guarantee proper communication with Ethernet-equipped vehicles, always follow the on-screen instructions on your Snap-on diagnostic tool and utilize the Snap-on data cable marked “DA-4E” or “DA-4EA”. Substituting with a different, non-compatible cable is highly discouraged and can lead to diagnostic inaccuracies. Snap-on explicitly supports Ethernet communication for specific models from manufacturers like Jaguar, Land Rover, and Volvo, highlighting the importance of using the correct Snap-on OBD2 cable for these brands.
Connecting Your Snap-on OBD2 Cable: A Step-by-Step Guide for OBD-II/EOBD Vehicles
For most OBD-II/EOBD compliant vehicles, connecting your Snap-on OBD2 cable is a straightforward process. It’s imperative to always use the data cable supplied with your Snap-on diagnostic tool or genuine Snap-on accessory cables to guarantee compatibility and prevent damage. Remember that the total length of the data cable should not exceed 114.17 inches (2.9 meters).
Interestingly, your Snap-on diagnostic tool will automatically power on once the Snap-on OBD2 cable is connected to a vehicle with a 12VDC supply at the data link connector (DLC). A helpful LED indicator on the vehicle DLC end of the Snap-on OBD2 cable illuminates when power is being supplied, confirming a successful connection. If this LED fails to light up, double-check your cable connections and then inspect the DLC power circuit in the vehicle.
Follow these steps for connecting your Snap-on DA-4E OBD2 cable to OBD-II/EOBD vehicles:
| Step | Description |
|---|---|
| 1. | Connect the 26-pin end of the Snap-on DA-4E data cable to your Snap-on diagnostic tool. Ensure the arrow on the connector is facing upwards, aligning with the display side of the tool. |
Image 1: Connecting Snap-on DA-4E OBD2 cable to diagnostic tool, arrow indicating correct orientation.
The supplied Snap-on OBD2 cable includes a very useful feature: an LED flashlight integrated into the vehicle DLC connector end. Powered by the diagnostic tool’s battery, this flashlight is invaluable for locating the often-obscure vehicle DLC, especially in dimly lit environments.
Image 2: Snap-on DA-4E OBD2 cable LED flashlight illuminating vehicle DLC connector for easy location.
| Step | Description |
|---|---|
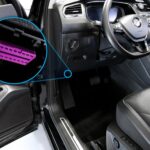
| 2. | Connect the 16-pin (J-1962) end of the Snap-on DA-4E cable to the vehicle’s DLC. |
Image 3: Connecting the 16-pin end of Snap-on DA-4E OBD2 cable to the vehicle’s DLC (Diagnostic Link Connector).
During the vehicle identification process, your Snap-on diagnostic tool may display on-screen cable connection instructions, which can be particularly helpful, especially if the DLC location is not immediately obvious.
Connecting Your Snap-on OBD2 Cable to OBD-I Vehicles
For older OBD-I (pre-OBD-II/EOBD) compliant vehicles, the connection process is slightly different. You can utilize your supplied Snap-on OBD2 cable in conjunction with the optional DA-5 adapter and a manufacturer-specific OBD-I adapter.
Here’s a breakdown of the connection sequence for OBD-I vehicles:
| Step | Description |
|---|---|
| a. | Connect the 26-pin end “A” of the Snap-on OBD2 cable to your Snap-on diagnostic tool. |
| b. | Connect the 16-pin end “B” of the Snap-on OBD2 cable to the DA-5 adapter “C”. |
| c. | Connect one end of the manufacturer-specific OBD-I adapter “D” to the DA-5 adapter. |
| d. | Connect the other end of the manufacturer-specific OBD-I adapter “E” to the vehicle’s OBD-I diagnostic port. |
It’s important to note that some OBD-I adapters come equipped with a power jack. These adapters must be connected to the vehicle battery using an accessory power cable “F” to ensure proper operation. If the OBD-I adapter lacks a power jack, an external power connection is not needed.
Image 4: Snap-on OBD-I data cable connection setup using DA-5 adapter and manufacturer-specific adapter for older vehicles.
The image below illustrates a typical OBD-I adapter with a power jack. This type of adapter requires a connection to the vehicle battery, using one of the power cable options shown.
Image 5: Typical Snap-on OBD-I adapter with power jack requiring connection to vehicle battery for power supply.
| Item No. | Description |
|---|---|
| 1. | Battery Clamps (for Accessory Power Cable) |
| 2. | Accessory Power Cable (Battery clamp type) |
| 3. | Power Cable Connection |
| 4. | Connection to DA-5 Adapter |
| 5. | Typical OBD-I Adapter (with power jack) |
| 6. | Connection to Vehicle |
| 7. | Accessory Power Cable (Power port type) |
Again, for OBD-I connections, always rely on genuine Snap-on data cables and accessories with your diagnostic tool. The total data cable length restriction of 114.17 inches (2.9 meters) also applies to OBD-I setups.
Expanding Your Diagnostic Capabilities with Optional Snap-on OBD-I Adapters and Cables
Snap-on offers a range of optional OBD-I data cables and adapters to further enhance your diagnostic capabilities when working with older vehicles.
To purchase any of these optional accessories and software, contact your Snap-on sales representative.
Conclusion: The Snap-on OBD2 Cable – Your Partner in Vehicle Diagnostics
In conclusion, the Snap-on OBD2 cable is more than just a wire; it’s a critical component in the vehicle diagnostic process. Whether you’re working on the latest Ethernet-equipped models or older OBD-I vehicles, using the correct Snap-on OBD2 cable and accessories ensures reliable communication, accurate data, and efficient diagnostics. Invest in the right Snap-on OBD2 cable for your diagnostic needs and unlock the full potential of your Snap-on diagnostic tools. Explore the range of Snap-on OBD2 cables and adapters to find the perfect match for your automotive repair tasks and keep your diagnostics precise and effective.