Is your OBD2 port not powering up your devices? A non-functional OBD2 port can prevent you from using essential car diagnostic tools, GPS trackers, and other plug-in accessories. One common culprit behind a dead OBD2 port is a blown fuse. This guide will walk you through the steps to diagnose and fix an OBD2 port fuse issue, ensuring you can get your devices powered and your car communicating again.
Understanding the OBD2 Port and Power
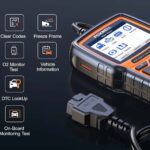
The On-Board Diagnostics II (OBD2) port is a vital interface in modern vehicles. Located typically under the dashboard on the driver’s side, it provides access to your car’s computer system for diagnostics, emissions testing, and performance monitoring. Pin 16 of the OBD2 port is specifically designated to provide battery power, usually 12V, to connected devices. If your plug-and-play device, like a tracker or diagnostic scanner, isn’t powering on when connected to the OBD2 port, the first thing to suspect is a power problem.
Initial Checks for OBD2 Port Power
Before diving into fuses, let’s rule out simple connection issues:
Verify Device Connection
Sometimes, the simplest solutions are overlooked. Ensure your device is firmly and fully plugged into the OBD2 port. A loose connection can prevent power from reaching the device. Unplug and reconnect your device, making sure it’s securely seated in the port.
Check Extension Cables (If Used)
If you’re using an OBD2 extension cable, the issue might lie within the cable or its connections. Follow these steps to isolate the problem:
Inspect the Cable-to-OBD2 Port Connection
- Turn off your engine.
- Disconnect the extension cable from your vehicle’s OBD2 port.
- Wait for 5 minutes, then plug the cable back in firmly.
- Try your device again. If it powers on now, the initial connection was likely the problem.
Inspect the Cable-to-Device Connection
If the device still doesn’t power on:
- Turn off your engine.
- Disconnect your device from the extension cable.
- Wait 5 minutes, then reconnect the device to the cable securely.
- Test your device. If it now works, the connection between the cable and device was likely loose.
Test the Device Directly
To determine if the issue is with your device or the OBD2 port/cable, try plugging the device directly into the OBD2 port, bypassing any extension cables:
- Disconnect the extension cable from both the OBD2 port and your device.
- Plug your device directly into the vehicle’s OBD2 port.
- Check if your device powers on.
If the device works when plugged directly into the OBD2 port, the problem is likely with the extension cable itself or its fuse (if it has one). If the device still doesn’t power on, the issue could be with the OBD2 port fuse in your car or the device itself.
Investigating the OBD2 Port Fuse
Many OBD2 ports are protected by a fuse in your vehicle’s fuse box. This fuse is designed to protect the car’s electrical system and the devices connected to the OBD2 port from power surges or shorts. If this fuse blows, your OBD2 port will lose power.
Locate and Check the OBD2 Port Fuse
- Consult your vehicle’s owner’s manual. The manual will contain a fuse box diagram indicating the location of fuses and their designations.
- Identify the fuse related to the OBD2 port or auxiliary power. In some vehicles, it might be labeled as “OBD,” “Accessory,” “Cigar Lighter,” or “Auxiliary Outlet” as the OBD2 port often shares a fuse with other accessory circuits.
- Locate the fuse box. Fuse boxes are typically found under the dashboard, in the glove compartment, or under the hood.
- Inspect the fuse. Use a fuse puller (often found in the fuse box) or needle-nose pliers to remove the fuse. Examine the fuse wire. If the wire inside is broken or the fuse looks burnt, it’s blown and needs replacement.
Replacing a Blown Fuse
- Use the correct replacement fuse. Check your owner’s manual or the fuse box diagram for the correct fuse amperage rating. Never use a fuse with a higher amperage rating as this can damage your vehicle’s electrical system. A common fuse type is a 3A mini-blade fuse, readily available at auto parts stores.
- Install the new fuse. Push the new fuse firmly into the fuse slot.
- Test your OBD2 port. Plug in your device to see if it now powers on.
Using a Multimeter to Test OBD2 Port Power
If replacing the fuse doesn’t solve the problem, or if you want to confirm power delivery before replacing fuses, use a digital multimeter to test the OBD2 port directly.
- Set your multimeter to DC voltage (DCV) mode.
- Locate pins 16, 4, and 5 on the OBD2 port. (Refer to the image above or online OBD2 port pinout diagrams). Pin 16 is power (+12V), pin 4 is chassis ground, and pin 5 is signal ground.
- Connect the red lead (positive) of your multimeter to pin 16.
- Connect the black lead (negative) of your multimeter to pin 4 or 5 (ground).
- Check the voltage reading. You should see approximately 12V if the OBD2 port is receiving power. A reading of 0 volts indicates a power issue, likely a blown fuse or wiring problem.
For a visual guide on how to check car fuses with a multimeter, refer to this helpful video: how to check car fuses with a multimeter.
Further Troubleshooting
If you’ve checked the fuse and tested the OBD2 port with a multimeter and still have no power, there might be a more complex wiring issue or a problem with the OBD2 port itself. In these cases:
- Inspect wiring: Look for any visible damage to the wiring around the OBD2 port and fuse box.
- Check for shorts: A short circuit in the OBD2 port wiring could be causing fuses to blow repeatedly.
- Professional diagnosis: If you are uncomfortable with electrical troubleshooting, it’s best to take your vehicle to a qualified mechanic or automotive electrician for professional diagnosis and repair.
Still Having Trouble?
If you’ve gone through these troubleshooting steps and your OBD2 port is still not working, it’s time to seek expert assistance. Contact a certified mechanic or your device’s support team for further troubleshooting and potential repairs.
When contacting support, be ready to provide:
- Vehicle year, make, and model.
- Details of the device you are trying to connect.
- A summary of the troubleshooting steps you’ve already taken.
By following these steps, you can systematically diagnose and resolve a “Obd2 Port Not Working Fuse” issue, getting your devices powered and your car back online.