So, you’re diving into the exciting world of Honda engine swaps and aiming to boost the power of your 92-00 Civic? One crucial aspect that often pops up, especially when dealing with newer engines, is understanding the distributor and its connection to your car’s brain – the ECU (Engine Control Unit). Specifically, if you’re working with an OBD2 (On-Board Diagnostics II) engine and harness, you’ll need to get familiar with Obd2 Distributor Pinouts to ensure a smooth and successful swap.
This guide is your go-to resource for navigating the wiring complexities of engine swaps in 92-00 Honda Civics, with a special focus on distributor compatibility and pinouts when using OBD2 components. We’ll break down the essentials, making sure you’re equipped to handle the wiring like a pro, whether you’re upgrading a VTEC or non-VTEC model.
Let’s get those wires crossed correctly – figuratively speaking, of course!
Decoding OBD1 and OBD2 Engine Swaps: Distributor Edition
Engine swaps in 92-00 Civics often involve mixing and matching parts from different generations, particularly when it comes to the engine and the car’s existing electronics. The key differentiator here is OBD – the diagnostic system your car uses. Older Civics are typically OBD1, while newer engines might be OBD2. This difference impacts everything, including your distributor.
Why is the Distributor Important in Engine Swaps?
The distributor’s job is to send high-voltage pulses to the spark plugs in the correct firing order, timed perfectly with the engine’s rotation. For this to happen seamlessly, the distributor needs to communicate with the ECU. This communication happens through a specific set of wires and pins – the distributor pinout.
OBD1 vs. OBD2 Distributors: What’s the Pinout Difference?
OBD1 and OBD2 systems use different connectors and pin configurations for their distributors. Simply put, an OBD2 distributor won’t directly plug into an OBD1 wiring harness, and vice versa. This is where understanding OBD2 distributor pinouts and potential adapter solutions becomes critical.
Let’s dive into specific scenarios you might encounter during your swap:
Swapping an OBD1 Engine/ECU into an OBD1 Civic
If you’re keeping it old school and swapping an OBD1 engine into your OBD1 Civic, things are generally more straightforward.
(Note: For all 92 Civics, the VTEC wiring is pre-run to the ECU harness on the shock tower. Using a 92-95 EX/Si engine harness simplifies VTEC connections.)
*D16Z6/D15B(JDM)/Mini Me using P28 ECU**
- DX/LX – D15B7: You’ll need to wire up the VTEC solenoid and VTEC pressure switch to the P28 ECU. Everything else should be plug and play. (See Figure 1 for OBD1 ECU wiring).
- CX – D15B8: Similar to DX/LX, wire up VTEC solenoid and pressure switch. If your CX is not a 4-wire O2 sensor model, you’ll need to wire the additional O2 connections to the ECU (Figure 1).
- VX – D15Z1: VTEC wiring as above. For knock sensor and IAB wiring, refer to Figure 1 (though with a chipped P28 ECU, IAB and knock sensor wiring might not be necessary). If your VX has a 7-wire O2 sensor, you’ll need to convert it to a 4-wire setup (diagram available at http://www.hybridautomotive.com/tech/o2/).
B16A3/B17A/B18C1/B18C(OBD1 JDM) using chipped P28/P30/P61/P72 ECU
- EX/Si – D16Z6: VTEC is plug and play. Knock sensor and IAB wiring might be needed (Figure 1), but often unnecessary with a chipped P28 ECU.
- DX/LX – D15B7: VTEC, knock sensor, and IAB wiring as above.
- CX – D15B8: VTEC, knock sensor, and IAB wiring as above. 4-wire O2 sensor wiring may be needed for some CX models.
- VX – D15Z1: Reuse existing VTEC wiring. 7-wire to 4-wire O2 conversion might be needed.
B18A(OBD1)/B18B in DX/CX/VX/EX using P74/P75 ECU/all chipped OBD1 ECU’s
- LX/DX/EX – D15B7/D16Z6: Plug and play.
- CX/VX – D15B8/D15Z1: Plug and play, except for potential 4-wire O2 sensor wiring for 1-wire CX models and 7-wire to 4-wire O2 conversion for VX models.
Tackling OBD2 Engines with OBD1 ECUs in OBD1 Vehicles
This scenario introduces the OBD2 distributor pinout challenge. When you install an OBD2 engine but want to use an OBD1 ECU (perhaps for tuning or simplicity), distributor compatibility becomes a key concern.
(Note: Again, 92 Civics benefit from pre-run VTEC wiring.)
D16Y8 using P28
- EX/Si/VX – D16Z6/D15Z1: Mostly plug and play for wiring. VTEC is plug and play. The OBD2 D16Y8 distributor, however, won’t directly bolt onto the older head. While you can mount it using only some bolts, the ideal solution for distributor compatibility is to use an OBD2A or OBD2B to OBD1 distributor adapter harness. Alternatively, you can reuse your original Z6/Z1 distributor. Note that the knock sensor won’t be used with the P28 ECU. You’ll also need to relocate the Intake Air Temperature (IAT) sensor (Figure 3) or use a Z6/Z1 intake manifold. Reuse Z6 injectors and alternator. The Crankshaft Position Sensor (CKF) on the Y8 engine won’t be used and should be tied out of the way. VX models may need 5-wire to 4-wire O2 conversion.
- LX/DX/CX – D15B7/D15B8: Similar wiring steps as above, needing to wire VTEC solenoid and pressure switch (Figure 1). Reuse the DX/CX distributor as it will bolt up. For using the Y8 distributor, the OBD2A or OBD2B to OBD1 adapter harness is again needed. IAT sensor relocation (Figure 3) or CX/DX manifold use is required. DX injectors can be reused, while CX might benefit from EX/SI/DX injectors for better flow. Reuse CX/DX alternator. CKF sensor is not used.
B16A2/B18C1 (OBD2)/B18C5 using chipped P28/P30/P72
- EX/SI/VX – D16Z6/D15Z1: Mostly plug and play wiring, VTEC plug and play. Knock sensor is not used with P28 but may be with other ECUs. To use the OBD2 A2/C1/C5 distributor, you’ll need an OBD2A or OBD2B to OBD1 adapter harness to address the OBD2 distributor pinout differences. IAT sensor relocation (see pic) is needed. Reuse Z6 injectors. VX models might need EX/SI/DX injectors and 5-wire to 4-wire O2 conversion. Use an OBD1 B-series alternator. CKF sensor is not used.
- DX/CX – D15B7/D15B8: Wire up VTEC. Knock sensor not used with P28. OBD2 distributor adapter harness is needed for A2/C1/C5 distributors due to OBD2 distributor pinout. IAT sensor relocation (see pic). Reuse DX injectors; CX models may need EX/SI/DX injectors. Use OBD1 B-series alternator. CKF sensor not used. 1-wire to 4-wire O2 conversion for CX.
B18B/B20B/Z(OBD2) using P75 ECU
- EX/SI/VX/DX/CX – D16Z6/D15Z1/D15B7/D15B8: Mostly plug and play wiring. For the distributor, use an OBD1 B18 distributor for direct plug-in, or an OBD2 LS distributor with an adapter harness to manage the OBD2 distributor pinout. OBD1 B-series alternator is needed. Injector recommendations as per model (EX/SI/DX injectors can be reused for EX/SI/DX models; VX/CX models may need EX/DX/SI injectors). CKF sensor is not used. 1-wire to 4-wire O2 for CX; 7-wire to 4-wire O2 for VX.
OBD0 Engine into OBD1 Vehicle with OBD1 ECU
If you’re going even further back and using an OBD0 engine in an OBD1 Civic, distributor compatibility is less of a direct issue but other wiring adjustments are needed.
B18A (OBD0) using P75 OBD1 ECU
- EX/SI/DX/CX/VX – D16Z6/D15Z1/D15B7/D15B8: Mostly plug and play wiring. OBD0 and OBD1 alternators are plug-compatible. Injector recommendations similar to above (reuse EX/SI/DX injectors; VX/CX may need EX/SI/DX injectors). The fan switch location is different on OBD0 engines (back of the block) and needs rewiring from the thermostat housing to the block (Figure 4). O2 sensor conversions for VX and CX as needed.
OBD2 Engine into OBD2 Vehicle with OBD2 ECU
When sticking with OBD2 for both engine and car, distributor issues are minimized, but wiring might still be needed for certain features.
(NOTE: 96-98 OBD2A and 99-00 OBD2B engine and dash harnesses are NOT interchangeable due to different ECU connectors (Figure 11)).
D16Y8 using P2P ECU
- DX/LX/CX – D16Y7: Mostly plug and play wiring. VTEC solenoid, VTEC pressure switch, and knock sensor wiring are needed (Figure 6 for OBD2A, Figure 7 for OBD2B). Idle Air Control Valve (IACV) wiring needs conversion from 3-wire to 2-wire (Figures 6 & 7). Secondary O2 sensor wiring might need lengthening. IAT sensor relocation (Figure 8).
- HX – D16Y5: Mostly plug and play. Reuse VTEC solenoid and pressure switch. 5-speed models need knock sensor wiring (Figures 6, HX models are OBD2A). 7-wire to 4-wire O2 conversion (eastcoasthondas.com – eastcoasthondas Resources and Information.).
B16A2/B18C1/B18C5 using P30(OBD2A)/P2T/P72
- EX – D16Y8: Mostly plug and play. Reuse VTEC, pressure switch, knock sensor wiring. Secondary O2 might need extending. IAB wiring for B18C1/P72 (Figures 6 & 7). IAT sensor relocation (Figure 8). Round style IAT conversion possible (Figure 9).
- DX/LX/CX – D16Y7: Wiring for VTEC, pressure switch, knock sensor, and 3-wire to 2-wire IACV (Figures 6 & 7). Secondary O2 extension. IAT relocation (Figure 8). Round IAT conversion possible.
- HX – D16Y5: Reuse VTEC, pressure switch. Knock sensor wiring for 5-speed models (Figure 6). 7-wire to 4-wire O2 conversion.
B18B/B20B/Z using OBD2A P75 (Avoid 00-01 P75 due to immobilizer)
- EX/HX – D16Y8/D16Y5: Plug and play. 7-wire to 4-wire O2 for HX.
- DX/LX/CX – D16Y7: 3-wire to 2-wire IACV wiring (Figures 6 & 7). Secondary O2 extension. IAT relocation (Figure 8).
OBD1 Engine into OBD2 Vehicle with OBD1 ECU
This setup requires careful attention to wiring and component compatibility, including the distributor.
D16Z6 using P28 ECU
- DX/LX/CX – D16Y7: Mostly plug and play wiring. VTEC solenoid and pressure switch wiring (Figure 1). 3-wire to 2-wire IACV (Figures 6 & 7). IAT sensor relocation or OBD1 style IAT rewire (Figures 8 & 9). CKF, EVAP purge, and secondary O2 are eliminated. A D16Z6 distributor will need an adapter to fit OBD2. Use Z6 injectors (remove “clips” for plug and play – Figure 10). Reuse Y7 alternator.
- HX – D16Y5: VTEC plug and play. IAT relocation or OBD1 IAT rewire. CKF, EVAP purge, EGR, and secondary O2 eliminated. 7-wire to 4-wire O2 conversion. D16Z6 distributor adapter needed. Z6 injectors (remove clips). Reuse Y7 alternator.
- EX – D16Y8: Similar to HX. VTEC plug and play. Knock sensor wiring (Figure 1). IAT relocation or OBD1 rewire. CKF, EVAP purge, EGR, secondary O2 eliminated. D16Z6 distributor adapter needed. Z6 injectors (remove clips). Reuse Y7 alternator.
B16A2/B18C1/B18C5 using OBD1 P30
- DX/LX/CX – D16Y7: Wiring for VTEC, pressure switch, knock sensor (Figure 1), and 3-wire to 2-wire IACV (Figures 6 & 7). IAT relocation or OBD1 IAT rewire. CKF, EVAP purge, secondary O2 eliminated. For 96-98 Civics, use an OBD2 B-series VTEC distributor or OBD2A to OBD1 adapter. For 99-00, use OBD2B to OBD1/2 adapter and OBD1/2 B-series DOHC VTEC distributor. B-series injectors (remove clips – Figure 10). OBD2 B-series alternator or adapter.
- HX – D16Y5: VTEC plug and play. IAT relocation or OBD1 IAT rewire. CKF, EVAP purge, EGR, secondary O2 eliminated. 7-wire to 4-wire O2. OBD2 VTEC distributor or OBD2A to OBD1 adapter. B-series injectors (remove clips). OBD2 B-series alternator or adapter.
- EX – D16Y8: VTEC plug and play. Knock sensor wiring (Figure 1). IAT relocation or OBD1 IAT rewire. CKF, EVAP purge, EGR, secondary O2 eliminated. For 96-98, OBD2 B-series VTEC distributor or OBD2A to OBD1 adapter. For 99-00, OBD2B to OBD1/2 adapter and OBD1/2 B-series DOHC VTEC distributor. B-series injectors (remove clips) or Y8 injectors. OBD2 B-series alternator or OBD2-1 adapter.
B18A/B using OBD1 P75
- DX/LX/CX – D16Y7: 3-wire to 2-wire IACV wiring (Figures 6 & 7). Secondary O2 extension. IAT relocation (Figure 8). CKF, EVAP purge, EGR, secondary O2 eliminated. OBD2 B18B distributor or OBD2A to OBD1 adapter. For 99-00 Civic, OBD2B to OBD1 distributor adapter with OBD1 or OBD2 B18A/B distributor. B18A/B injectors (remove clips). OBD2 B-series alternator or OBD2-1 adapter.
- EX/HX – D16Y8/Y5: IAT relocation or OBD1 IAT rewire. CKF, EVAP purge, EGR, secondary O2 eliminated. For 96-98, OBD2 B18B distributor or OBD2A to OBD1 adapter. For 99-00, OBD2B to OBD1/2 adapter and OBD1/2 B-series DOHC VTEC distributor. B18A/B injectors (remove clips). OBD2 B-series alternator or OBD2-1 adapter. 7-wire to 4-wire O2 for HX.
Figure 1 (OBD1 ECU Wiring)
Figure 2 (JDM VTEC solenoid)
 JDM VTEC Solenoid for Honda Engines
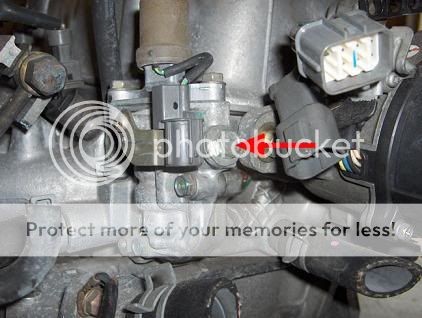
Figure 3 (OBD1 IAT sensor in intake arm)
Figure 4 (OBD0 fan switch/OBD1 fan switch)
Figure 5 (OBD1 Shocktower harness)
Figure 6 (OBD2A hybrid pinouts)
Figure 7 (OBD2B hybrid pinouts)
Figure 8 (OBD2 IAT into intake arm)
Figure 9 (Round style IAT)
Figure 10 (OBD2-OBD1 Injector Clip Modification)
Figure 11 (OBD2 Harness Comparison)
Conclusion: Distributor Pinouts and a Successful Honda Swap
Successfully navigating engine swaps in 92-00 Honda Civics requires attention to detail, especially when mixing OBD generations. Understanding OBD2 distributor pinouts and how they differ from OBD1 is paramount when using newer engines in older cars, or vice versa.
Remember these key takeaways:
- Distributor Compatibility: OBD1 and OBD2 distributors are not directly interchangeable due to different pinouts.
- Adapter Harnesses: OBD2 to OBD1 distributor adapter harnesses are essential for using an OBD2 distributor with an OBD1 ECU.
- Pinout Diagrams: Always refer to pinout diagrams (like those in Figures 6 and 7) when wiring up components, especially when modifying harnesses.
- Model Specifics: Pay close attention to your specific Civic model (DX, LX, EX, CX, VX, HX) and the engine/ECU combination you are using, as wiring needs can vary.
By carefully considering distributor pinouts and utilizing the right adapters and wiring techniques, you can overcome the challenges of engine swaps and get your Honda Civic running stronger than ever. Happy swapping!