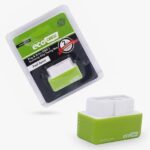
For car enthusiasts and DIY electronics hobbyists, accessing real-time vehicle data can unlock a world of interesting projects. This guide outlines how to create a simple yet effective coolant temperature display using readily available components: an Obd2 Bluetooth Module, an Arduino microcontroller, and an LCD screen. By tapping into your car’s On-Board Diagnostics (OBD2) system, you can wirelessly retrieve and display crucial engine data like coolant temperature. This project serves as a fantastic introduction to automotive diagnostics and embedded systems.
Parts You’ll Need
To embark on this project, gather the following components. These are commonly available online and are quite affordable, making this a budget-friendly endeavor.
- OBD2 Bluetooth Module: This is the key interface to your car’s data. The ELM327 chip within these modules translates the various OBD2 protocols into a standard serial communication format. Look for a Bluetooth version for wireless connectivity.
- Arduino Uno (or compatible): The microcontroller brain of the operation. The Arduino Uno is popular for its ease of use and extensive community support.
- HC-05 Bluetooth Module: This module facilitates Bluetooth communication between the OBD2 adapter and the Arduino.
- LCD I2C Display: A 16×2 LCD display with an I2C interface simplifies wiring and allows for clear temperature readings.
Arduino and Component Connections
Wiring is straightforward. Here’s how to connect the components to your Arduino Uno:
-
HC-05 Bluetooth Module:
- HC-05 TX pin to Arduino RX pin
- HC-05 RX pin to Arduino TX pin
- HC-05 VCC to Arduino 5V
- HC-05 GND to Arduino GND
-
LCD I2C Display:
- LCD SDA pin to Arduino SDA pin (A4 on Uno)
- LCD SCL pin to Arduino SCL pin (A5 on Uno)
- LCD VCC to Arduino 5V
- LCD GND to Arduino GND
Note: When uploading code to the Arduino, it’s advisable to disconnect the HC-05 TX and RX pins to prevent communication conflicts during programming.
HC-05 Bluetooth Module Configuration
To establish a reliable Bluetooth link between the HC-05 module and the OBD2 Bluetooth adapter, you might need to configure the HC-05 as a Bluetooth master to connect to the OBD2 module (slave). This is done using AT commands.
-
Enter AT Command Mode: Typically, you enter AT command mode by holding down the button on the HC-05 module while powering it up. The LED on the HC-05 should blink slowly (e.g., every 2 seconds) in AT command mode.
-
Connect via Serial: Use the Arduino Serial Monitor or a terminal program to communicate with the HC-05 module through the Arduino. Ensure the baud rate is set correctly (often 38400 or 9600 for AT commands).
-
AT Command Setup (Example):
AT+RESET(Resets the module)AT+ROLE=1(Sets HC-05 as master)AT+CMODE=0(Sets to connect to a specific address)AT+BIND=[OBD2 Bluetooth Module Address](Replace[OBD2 Bluetooth Module Address]with the Bluetooth address of your OBD2 adapter, e.g.,AT+BIND=1234,56,789c72)AT+INIT(Initializes Bluetooth)AT+PAIR=[OBD2 Bluetooth Module Address],20(Attempts pairing with a 20-second timeout)AT+LINK=[OBD2 Bluetooth Module Address](Attempts to establish the Bluetooth link)
Note: You’ll need to find the Bluetooth address of your specific OBD2 Bluetooth module. This is often found in the documentation that comes with the module or by using a Bluetooth scanning app.*
LCD I2C Display Setup and Libraries
For the LCD I2C display, you’ll need to include the appropriate Arduino libraries in your sketch.
-
Install Libraries: You’ll likely need the
LiquidCrystal_I2Clibrary. This can usually be installed through the Arduino Library Manager (Sketch > Include Library > Manage Libraries…). -
Include Libraries in Code: Add the following lines at the beginning of your Arduino sketch:
#include <Wire.h> #include <LiquidCrystal_I2C.h> -
Initialize LCD: Initialize the LCD object in your code. The I2C address (e.g.,
0x3For0x27) might vary depending on your specific LCD I2C module. You may need to experiment to find the correct address.LiquidCrystal_I2C lcd(0x3F, 16, 2); // Adjust address if needed -
Initialize LCD in
setup(): In yoursetup()function, initialize the LCD:lcd.init(); lcd.backlight(); lcd.print("Coolant Temp:");
With the hardware connected and configured, you can now focus on writing the Arduino code to read data from the OBD2 Bluetooth module, process it, and display the coolant temperature on the LCD. This project provides a foundation for further exploration into vehicle diagnostics and custom car electronics.
