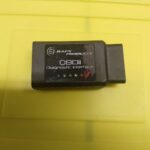
It can be incredibly frustrating when your OBD2 scanner refuses to connect to your vehicle’s ECU (Engine Control Unit), especially when you’re trying to diagnose a check engine light or other car problems. This article will delve into the common reasons behind OBD2 connection failures and provide you with practical solutions to get your scanner communicating with your car again.
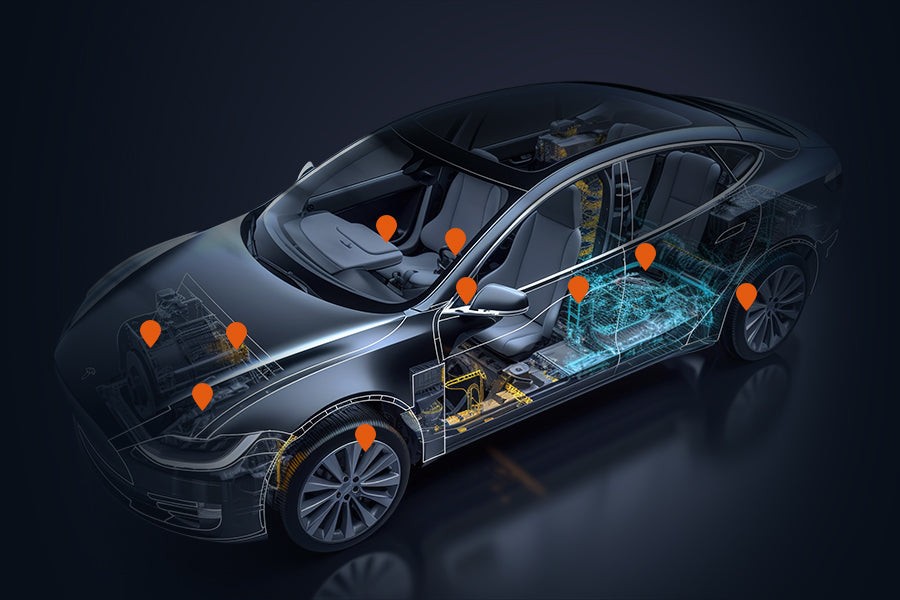
Understanding why your OBD2 scanner is failing to connect to the ECU is the first step towards effective troubleshooting. OBD2 (On-Board Diagnostics II) systems are designed to monitor your vehicle’s performance and provide crucial diagnostic information through a standardized port, typically located under the dashboard. However, establishing this connection isn’t always seamless. Several factors can prevent your OBD2 scanner from linking up with your car’s computer:
- Power Issues: A weak car battery or lack of power to the OBD2 port itself will prevent the scanner from initializing and connecting.
- OBD2 Port Damage: Physical damage to the OBD2 port, or obstructions within it, can block the scanner from making a proper electrical connection.
- Scanner Incompatibility: Not all OBD2 scanners are universally compatible. Your scanner might not be designed to communicate with your specific vehicle’s make, model, or communication protocol.
- Blown Fuse: A blown fuse in the vehicle’s electrical system can cut off power to the OBD2 port, rendering it inactive.
- Incorrect Communication Protocol: Modern vehicles use various communication protocols (like CAN, ISO 9141, KWP2000). If your scanner isn’t set to the correct protocol, or cannot automatically detect it, connection will fail.
- Scanner Software Problems: Outdated or corrupted software on your OBD2 scanner can lead to communication errors and prevent connection to the ECU.
Diagnosing Common OBD2 Connection Problems
Let’s explore each potential cause in more detail to help you pinpoint the reason why your OBD2 scanner won’t connect to the ECU.
Power Supply Issues: Is Your Car Battery the Culprit?
Start by ensuring your vehicle’s battery is adequately charged and in good health. A weak battery can cause a multitude of electrical issues, including preventing the OBD2 port from receiving sufficient power. Use a multimeter to check the voltage at your OBD2 port. Ideally, it should read around 12 volts when the ignition is in the accessory or “on” position.
Inspecting for a Faulty OBD2 Port: Physical Damage and Obstructions
Carefully examine the OBD2 port for any visible physical damage. Look for bent or broken pins inside the port. Also, check for any foreign objects, dirt, or debris that might be lodged inside and preventing a clean connection. Corrosion on the pins can also hinder connectivity.
Scanner Compatibility: Does Your Scanner Speak Your Car’s Language?
Verify that your OBD2 scanner is compatible with your vehicle’s make and model year. Some vehicles, particularly those with advanced systems or specific brands, may require specialized scanners or adapters. Consult your scanner’s user manual or the manufacturer’s website for compatibility information.
Blown Fuses: Checking Your Vehicle’s Electrical System
Locate your vehicle’s fuse box (refer to your owner’s manual for its location). Check the fuse that is associated with the OBD2 port or auxiliary power outlets (as they are often on the same circuit). If the fuse is blown, replace it with a new fuse of the correct amperage. A blown fuse is a common cause of a non-functional OBD2 port.
Communication Protocol Mismatches: Setting Up Your Scanner Correctly
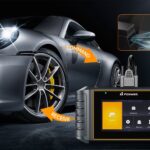
Modern vehicles utilize different communication protocols for their OBD2 systems. Your scanner needs to be set to the correct protocol to communicate effectively. Refer to your vehicle’s repair manual or online resources to determine the correct protocol for your car. Some advanced scanners, like the Foxwell NT809, can automatically detect the correct protocol, simplifying this step.
Software Issues: Keeping Your Scanner Up-to-Date
Outdated scanner software can be a source of connection problems. Connect your OBD2 scanner to a computer and check for software updates from the manufacturer. Follow the instructions to update the firmware and software to the latest version. Regular updates often include bug fixes and improved compatibility with newer vehicles.
Step-by-Step Guide to Troubleshooting OBD2 Scanner Connection Failures
A systematic approach is crucial when troubleshooting why your OBD2 scanner won’t connect to the ECU. Using a reliable diagnostic tool like the Foxwell NT809 can significantly streamline this process. Here’s a step-by-step guide to help you diagnose and resolve the issue:
Step 1: Power Check at the OBD2 Port
Turn your vehicle’s ignition to the “accessory” or “on” position (without starting the engine). Use a multimeter, or the voltage check feature on a tool like the Foxwell NT809, to test for power at the OBD2 port. You should be getting approximately 12 volts. If there’s no power, suspect a blown fuse or wiring issue.
Step 2: Thoroughly Inspect the OBD2 Port
Visually examine the OBD2 port for any physical damage, bent pins, corrosion, or obstructions. Use compressed air to gently blow out any dust or debris. The robust connector on scanners like the Foxwell NT809 is designed to establish a good connection even in slightly worn ports.
Step 3: Verify Scanner and Vehicle Compatibility
Double-check that your OBD2 scanner is officially compatible with your vehicle’s make, model, and year. Consult the scanner’s compatibility list on the manufacturer’s website. The Foxwell NT809, for example, boasts broad vehicle coverage, minimizing compatibility issues.
Step 4: Locate and Check Vehicle Fuses
Consult your vehicle’s owner’s manual to locate the fuse box and identify the fuse related to the OBD2 port or auxiliary power. Inspect the fuse to see if it’s blown. Replace any blown fuses with a new one of the correct amperage rating.
Step 5: Set the Correct Communication Protocol on Your Scanner
Refer to your vehicle’s service manual or online resources to determine the correct OBD2 communication protocol (CAN, ISO 9141, KWP2000, etc.). Manually set your scanner to this protocol if necessary. Note that some scanners, like the Foxwell NT809, are designed to automatically detect the protocol.
Step 6: Update Your OBD2 Scanner Software
Connect your scanner to a computer with internet access and check for software updates on the manufacturer’s website. Download and install any available updates for your scanner’s firmware. The Foxwell NT809 supports convenient Wi-Fi updates.
Step 7: Reset Your OBD2 Scanner
Sometimes, a simple reset can resolve temporary glitches. Turn off your scanner, disconnect it from the OBD2 port and any power source, wait a few minutes, and then reconnect and try again. The user-friendly interface of tools like the NT809 makes this reset process straightforward.
Advanced Tips for Resolving OBD2 Scanner Connection Problems
If the basic troubleshooting steps haven’t solved the issue, consider these additional tips and best practices:
Ensure a Secure Physical Connection
Double-check that the OBD2 connector is firmly and correctly plugged into your vehicle’s OBD2 port. A loose connection can cause intermittent or complete communication failure.
Inspect the OBD2 Port Wiring Harness
Examine the wiring harness leading to the OBD2 port for any signs of damage, such as frayed wires, cuts, or loose connections. Damage to the wiring can disrupt the communication path between the scanner and the ECU.
Clean the OBD2 Port Contacts
Use an electrical contact cleaner to carefully clean the pins inside the OBD2 port. Over time, dirt, oxidation, and corrosion can accumulate and impede proper electrical contact.
Test Your Scanner on Another Vehicle
To rule out a problem with the scanner itself, try connecting it to a different vehicle that is known to be OBD2 compliant. If the scanner connects successfully to another car, the issue is likely with your original vehicle’s OBD2 system.
Try a Backup OBD2 Scanner
If you have access to another OBD2 scanner, try using it with your vehicle. This can help you determine if the problem lies with your original scanner or with your vehicle’s OBD2 system.
Check for Hidden Fuses or Inline Fuses
Some vehicles may have additional hidden fuses or inline fuses specifically for the OBD2 port. Consult your vehicle’s service manual or a professional mechanic to check for these less obvious fuses.
Stay Updated on Scanner Software
Regularly check your scanner manufacturer’s website for software updates. These updates often include bug fixes, enhanced vehicle compatibility, and new features that can improve connection reliability.
Seek Advice from Automotive Communities
Join online automotive forums and communities dedicated to vehicle diagnostics. You can often find valuable advice and solutions from other users who have experienced similar OBD2 connection issues.
Consider Vehicle-Specific Procedures
Some vehicle makes or models might have specific procedures or requirements for OBD2 scanner connection. Consult your vehicle’s service manual for any specific instructions that may apply.
Utilize Professional-Grade Diagnostic Tools
If basic OBD2 scanners fail to connect, consider using a professional-grade diagnostic tool. These advanced tools often have more robust communication capabilities and can bypass issues that simpler scanners cannot.
Battery Health is Crucial
Ensure your vehicle’s battery is in good condition and fully charged. A weak battery can cause voltage drops that interfere with OBD2 communication.
ECU or OBD2 Port Calibration/Reprogramming
In rare cases, the ECU or OBD2 port itself may require professional calibration or reprogramming. This typically requires specialized equipment and expertise and should be performed by a qualified technician.
By following these expanded troubleshooting tips, you can significantly increase your chances of successfully diagnosing and resolving “my OBD2 won’t connect to ECU” issues. Remember that a methodical and step-by-step approach is key to pinpointing the root cause of the problem.
Conclusion: Getting Your OBD2 Scanner Connected
Troubleshooting OBD2 scanner connection problems often involves a process of elimination. However, with patience and a systematic approach, you can usually resolve most connection issues. By ensuring solid connections, checking for physical damage, updating software, and utilizing both basic and advanced diagnostic techniques, you can typically get your OBD2 scanner communicating with your vehicle’s ECU.
If you’ve exhausted these troubleshooting steps and your OBD2 scanner still won’t connect, it’s always wise to seek assistance from a qualified professional mechanic. They have specialized tools and expertise to diagnose more complex electrical or ECU issues.
Successfully resolving OBD2 connection problems ensures reliable and accurate vehicle diagnostics, helping you maintain your car’s performance and address issues promptly.
FAQs: My OBD2 Won’t Connect to ECU – Quick Answers
Q: Why is my OBD2 scanner failing to connect to the ECU?
A: Common causes include loose connections, scanner incompatibility, a faulty ECU, or power supply problems to the OBD2 port.
Q: What are the first steps to troubleshoot OBD2 scanner connection issues?
A: Begin by checking all physical connections, verifying scanner compatibility with your vehicle, and trying to restart both the vehicle and the scanner.
Q: Can updating the software on my OBD2 scanner fix connection problems?
A: Yes, updating your scanner’s software can often resolve compatibility issues and communication glitches. Always keep your scanner’s software up to date.