Want to take control of your Kawasaki motorcycle’s diagnostics? It’s easier than you might think, especially with the right Kawasaki Obd2 Adapter 4 Pin. Despite some online confusion, connecting a standard OBD2 reader to your Kawasaki, such as the V650 model, is indeed possible and quite straightforward once you understand the essentials of the 4-pin connector. This guide will walk you through the process, focusing on creating your own adapter cable for reliable connection and accurate data.
Kawasaki motorcycles, while not using the standard 16-pin OBD2 connector found in cars, often utilize a 4-pin diagnostic port. This port provides access to your bike’s Engine Control Unit (ECU) and valuable diagnostic information. Locating this 4-pin connector is usually the first step. On models like the Versys 650 (V650), you’ll typically find it conveniently located under the seat.
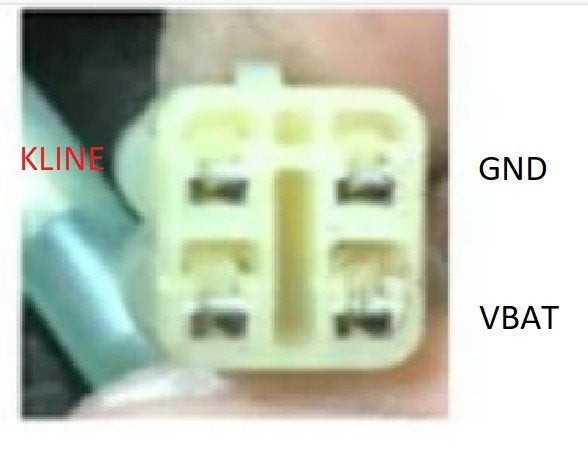
To interface with this 4-pin Kawasaki diagnostic port using a generic OBD2 reader, you’ll need to create a simple adapter cable. This involves understanding the pinout of both the Kawasaki 4-pin connector and the standard 16-pin OBD2 connector. Here’s a breakdown of the Kawasaki 4-pin connector as viewed on the bike, with the key at the top and looking from the front:
KLine  GND
LLine VBAT
And here’s how to connect this to a standard OBD2 car-style connector:
- Kawasaki GND (Black/Yellow wire) connects to OBD2 pins 4 & 5 (Ground).
- Kawasaki K Line (Pink/Blue or Purple/Violet wire) connects to OBD2 pin 7 (K Line).
- Kawasaki VBAT (Brown/White wire) connects to OBD2 pin 16 (12V Battery Voltage).
- Kawasaki L Line (LG/BK wire) may be connected to OBD2 pin 15 (L Line) if your OBD2 connector socket has an L Line available, otherwise leave it unconnected.
Creating your own patch cable offers the most reliable solution. While premade cables might exist, their compatibility and wiring accuracy can be uncertain. By making your own, you ensure the correct connections for your specific Kawasaki model. An unused OBD2 socket and a 4-pin Honda plug (or similar compatible connector) are ideal components for this DIY cable.
A detailed view of the Kawasaki V650 motorcycle’s 4-pin OBD2 diagnostic socket, showing pin labels KLine, GND, LLine, and VBAT for clear identification.
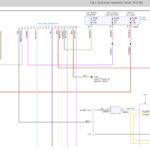
An example of a homemade Kawasaki OBD2 adapter cable, illustrating the wiring connections between a 4-pin motorcycle connector and a standard 16-pin OBD2 female socket.
Once your adapter cable is তৈরি, you can connect it to your Kawasaki’s 4-pin port and plug in your OBD2 reader. Ensure your OBD2 dongle supports the KWP2000 (ISO9141) protocol, which is commonly used in Kawasaki motorcycles of certain years. Using a smartphone app like Torque, you can then access real-time data from your bike’s ECU.
A functional prototype setup demonstrating the Kawasaki OBD2 adapter cable connected to a motorcycle, with an OBD2 dongle ready for diagnostic data access.
The Torque app interface showing real-time data from a connected Kawasaki motorcycle, including a coolant temperature reading, illustrating the diagnostic capabilities.
With a successful connection, you’ll gain access to valuable information, such as coolant temperature readings, which are not typically displayed on the stock Kawasaki instrument panel. You can also read and clear diagnostic trouble codes, helping you understand and address any issues your motorcycle might be experiencing.
Unlock the diagnostic potential of your Kawasaki with a 4-pin OBD2 adapter. This simple modification allows you to use standard OBD2 readers for valuable insights into your motorcycle’s performance. By understanding the Kawasaki OBD2 adapter 4 pin configuration and creating your own cable, you gain the power to diagnose issues, monitor vital signs like coolant temperature using apps like Torque, and maintain your bike effectively. Explore the world of motorcycle DIY diagnostics today!