For enthusiasts and mechanics working with Japanese Domestic Market (JDM) Toyota vehicles, accessing the Engine Control Unit (ECU) for diagnostics and data monitoring can sometimes present unique challenges. While many modern vehicles adhere to OBD2 standards, some JDM Toyota ECUs utilize the ISO14230-4 (5 baud init) protocol, which isn’t universally supported by all OBD2 tools and applications. This article sheds light on navigating this compatibility issue, focusing on the Jdm Toyota Obd2 Pinout and how to successfully establish a connection for diagnostics.
It’s important to note that while OBD2 compliance became widespread, the adoption of specific protocols varied. In the case of some JDM Toyota models, the ISO14230-4 protocol was implemented. This can be a hurdle because many generic OBD2 scanners, particularly older or budget-friendly models, and even some popular Android OBD2 apps, may lack full support for this specific protocol. However, with the right tools and understanding of the jdm toyota obd2 pinout, you can effectively interface with these ECUs.
We’ve personally verified this configuration on several non-OBD1 JDM ECUs, including:
- ST215 3S-GTE A/T (89661-21330)
- ZZT231 2ZZ-GE M/T (89666-20060)
These successful connections demonstrate the feasibility of accessing data from these ECUs using readily available technology, provided you understand the nuances of the protocol and the jdm toyota obd2 pinout.
Understanding the OBD2 Port and JDM Toyota Wiring
In scenarios like engine swaps involving JDM Toyota engines, you might need to ensure or even create an OBD2 port connection. Interestingly, in some cases, like the Celica (ZZT231) mentioned, the North American OBD2 port wiring was already compatible, even though the North American 2ZZ-GE used a different OBD2 protocol. This highlights that the physical jdm toyota obd2 pinout can be consistent even when communication protocols differ.
The standard OBD2 port pinout is crucial for establishing a connection. For JDM Toyota ECUs using ISO14230-4, the key pins are as follows:
- Pin 4 & 5: Grounds. It’s worth noting that in some cases, ensuring these grounds are properly connected to the ECU grounds might be necessary to resolve connection issues.
- Pin 16 (B+): 12V Power. This pin provides power to the OBD2 tool. For diagnostic purposes and to prevent battery drain, it’s generally advisable not to power this pin constantly unless needed for active diagnostics.
- Pin 7 (K-Line/SIL): This is the Signal Interface Line (SIL) and connects to the corresponding pin on the engine ECU. The specific ECU pin for the SIL will vary depending on the ECU model, emphasizing the importance of consulting the correct jdm toyota obd2 pinout diagram for your specific ECU.
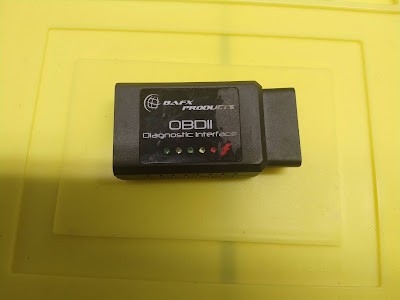
To interface with these JDM Toyota ECUs, an ELM327 Bluetooth OBD2 dongle is a viable option. We successfully used a BAFX PRODUCTS OBDII Diagnostic Interface. While other ELM327 dongles may work with varying degrees of success, if you already own different models, experimenting with them is recommended before purchasing a new one.
Utilizing Car Gauge Lite App for Connection
Among the Android OBD2 applications tested, “Car Gauge Lite” proved to be effective in communicating with JDM Toyota ECUs using the ISO14230-4 protocol. While it might not be the most visually refined app, its functionality in this specific scenario is noteworthy.
Before launching the app, ensure your OBDII Bluetooth device is paired within your Android device’s Bluetooth settings. This initial pairing is crucial for the app to recognize and connect to the dongle.
The free “Lite” version of Car Gauge Lite is ad-supported, which can be intrusive. However, it’s recommended to test the Lite version to confirm connectivity with your JDM Toyota ECU before investing in the paid, ad-free version.
Within the Car Gauge Lite app’s preferences, a specific setting needs to be enabled for successful communication with ISO14230-4 ECUs. This setting likely configures the app to correctly initiate and maintain communication using the 5 baud init protocol.
Connecting to Your JDM Toyota ECU: Step-by-Step
With the ELM327 dongle plugged into your car’s OBD2 port and the ignition key in the “ON” position (or engine running), follow these steps within the Car Gauge Lite app:
- Initiate a Bluetooth connection within the app. You’ll likely encounter a series of dialog boxes prompting for selections.
- Carefully select your Bluetooth OBD2 device. Remember that the MAC address of your ELM327 dongle will be unique. You may need to refer to your Android Bluetooth settings to identify the correct device if you have multiple Bluetooth devices paired.
Successful ECU Connection and Data Display
Upon successful completion of these steps, you should establish a connection with your JDM Toyota ECU! Car Gauge Lite, like many modern OBD2 apps, allows for extensive dashboard customization. You can personalize the displayed data fields to monitor the parameters most relevant to your needs.
By understanding the jdm toyota obd2 pinout and utilizing compatible tools and applications like Car Gauge Lite, accessing diagnostic information from JDM Toyota ECUs using the ISO14230-4 protocol becomes achievable, empowering you to monitor and maintain your vehicle effectively.