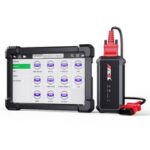
Understanding your vehicle’s health is crucial in modern car ownership. OBD2 scanners have become indispensable tools for both car enthusiasts and professional mechanics. These devices offer a window into your car’s onboard computer, helping you diagnose issues from the comfort of your garage. If you’re new to the world of automotive diagnostics, you might be wondering, “how do I even turn this thing on?” The good news is, it’s remarkably straightforward. This guide will walk you through the simple steps to get your OBD2 scanner up and running, ensuring you can quickly start diagnosing your vehicle’s condition.
Turning on an OBD2 scanner isn’t like powering up a regular electronic device. It doesn’t have a typical power button. Instead, OBD2 scanners are powered directly by your vehicle. The process is essentially about establishing a connection between the scanner and your car’s computer system. Here’s how to do it:
-
Locate the OBD2 Port: The first step is to find your vehicle’s OBD2 port. This port is standardized and is typically located within the passenger compartment of your car. Common locations include under the dashboard on the driver’s side, near the steering column, or sometimes concealed behind a small panel beneath the dashboard. Refer to your vehicle’s owner’s manual if you are having trouble locating it. It’s a 16-pin, D-shaped connector, so it’s quite distinctive once you know what to look for.
-
Ensure Vehicle Ignition is OFF: Before plugging in your OBD2 scanner, make sure your vehicle’s ignition is turned off. This is a safety precaution and ensures a stable connection when you plug in the device. You don’t need to disconnect the car battery, simply ensure the engine is off and the key is not in the ignition, or at the “off” position.
-
Plug the OBD2 Scanner into the Port: Now, take your OBD2 scanner and carefully align the connector with the OBD2 port in your vehicle. Push it in firmly until it’s securely connected. You should feel a snug fit. Do not force it if it doesn’t connect easily; double-check the alignment.
-
Turn the Vehicle Ignition to “ON” (Engine OFF): Once the scanner is securely plugged in, turn your vehicle’s ignition to the “ON” position. This means turning the key to the position just before you would start the engine. In many modern cars with push-button start, this is typically achieved by pressing the start button without pressing the brake pedal. This action powers up your car’s electrical system and, consequently, the OBD2 port and your scanner.
-
Observe the Scanner Powering Up: With the ignition in the “ON” position, your OBD2 scanner should automatically power on. Most scanners will have a screen that illuminates, indicating it’s receiving power from the vehicle. You might see a brand logo, a welcome screen, or directly go to the main menu, depending on the model of your scanner.
-
Start Diagnostic Scan (If Necessary): Some advanced scanners might require you to manually initiate a scan after powering on. Follow the on-screen prompts or your scanner’s user manual to begin a vehicle diagnostic scan. Basic scanners usually start reading data automatically once connected and powered.
That’s it! Turning on an OBD2 scanner is as simple as connecting it to your car’s OBD2 port and turning your ignition to the “ON” position. There are no buttons to press for power – it’s all about the connection to your vehicle’s system.
Once your scanner is on and connected, you can begin to explore its functions, such as reading diagnostic trouble codes (DTCs), viewing live data, and performing other diagnostic tests, depending on the capabilities of your specific scanner model. Remember to always consult your OBD2 scanner’s user manual for detailed instructions and features specific to your device. With this guide, you’re now ready to confidently turn on your OBD2 scanner and take the first step towards understanding and maintaining your vehicle’s health.
