That unsettling moment when your check engine light illuminates can trigger immediate concern. It’s crucial to understand that driving with an active check engine light is generally not advisable. Fortunately, resetting it yourself is often straightforward using an OBD2 code reader.
This guide, brought to you by techcarusa.com, your trusted source for automotive expertise, will walk you through the simple steps to clear those OBD2 codes and switch off your check engine light. By following these instructions, you can potentially address minor issues independently, saving time and avoiding unnecessary trips to the mechanic.
Think of this process as being as user-friendly as operating your smartphone. Let’s dive into how you can regain control and understanding of your vehicle’s health.
To effectively reset your check engine light, you’ll need an OBD2 reader, commonly referred to as an OBD2 scanner or scan tool. It’s important to note that basic, entry-level code readers might only read diagnostic trouble codes (DTCs) but lack the capability to erase them. Therefore, ensure you acquire an OBD2 reader that specifically states it can both read and clear codes.
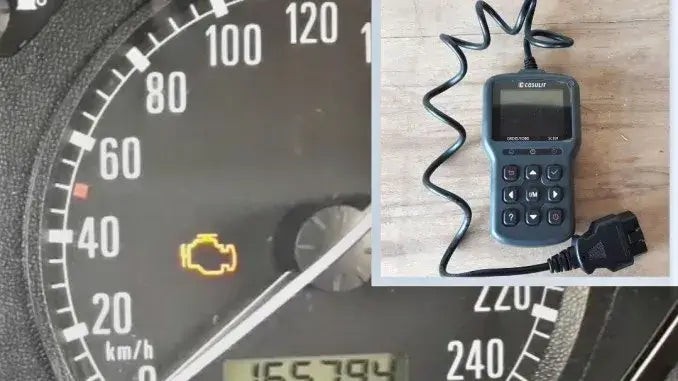
A reliable OBD2 reader, such as the CGSULIT SC301, is a great option. For in-depth information, you can read a review of the CGSULIT SC301 OBDII code reader.
How to Reset the Check Engine Light with a Code Reader: A Step-by-Step Guide
While prior familiarity with using an OBD2 code reader can be beneficial, it’s certainly not a prerequisite. Even if you’re a complete novice, this guide will equip you with the knowledge to confidently reset your OBD2 codes.
If you’re entirely new to OBD2 scanners, we recommend checking out a dedicated article on how to use an OBD2 scanner in five easy steps for a more detailed introduction.
Step 1: Locate the OBDII Port
The first step is to find the OBDII port in your vehicle. This port is standardized and is typically located within the passenger compartment, usually under the dashboard on the driver’s side. Refer to your vehicle’s owner’s manual if you have trouble locating it, but it’s often easily visible and accessible.
Step 2: Connect the OBD Code Reader
Once you’ve found the OBDII port, take your OBD2 code reader and firmly plug the connector into the port. Ensure it’s securely connected to establish a proper communication link between the scanner and your vehicle’s computer system.
Step 3: Turn On the Ignition
With the OBD2 reader connected, you need to turn on your vehicle’s ignition. This means turning the key to the “ON” position, just before you would start the engine. This action powers up the vehicle’s electrical system and allows the OBD2 scanner to communicate with the car’s computer. You do not need to start the engine at this stage.
Step 4: Allow the OBD Code Reader to Scan for Codes
Now that everything is connected and powered up, navigate the menu of your OBD2 code reader to initiate a scan. The specific wording may vary depending on your device, but look for options like “Scan,” “Read Codes,” or “Diagnostic Scan.” Select the appropriate option and let the scanner perform its diagnostic process. This process involves the tool communicating with your car’s computer to retrieve any stored error codes.
Step 5: Read and Interpret the Error Codes
After the scan is complete, the OBD2 reader will display a list of diagnostic trouble codes (DTCs). There might be just one code, or there could be multiple. It is crucial to understand that simply clearing the codes without investigating them is not recommended.
Take the time to read and interpret each error code. This step is vital as it informs you about the nature and severity of the problem triggering the check engine light. Ignoring the underlying issue and just resetting the light is a temporary fix and the light will likely reappear if the problem persists.
Most OBD2 tools have a built-in DTC library, allowing you to look up the meaning of the codes directly on the device. Alternatively, you can easily search for the codes online using a search engine.
Step 6: Clear the Check Engine Light
Once you have reviewed and understood the error codes, and if you believe the issue is minor or has been addressed (like tightening a loose gas cap, which often triggers a code), you can proceed to clear the check engine light.
Navigate back to the main menu or “Tools” menu on your OBD2 reader and locate the option to clear codes. This might be labeled as “Erase Codes,” “Clear DTCs,” or “Reset Check Engine Light.” Select this option.
You will likely be prompted to confirm your decision to clear the codes. Carefully read the prompt and select “Yes” or “Confirm” to proceed with clearing the error codes and resetting the check engine light.
Step 7: Return to the Main Menu
After successfully clearing the codes, use the “Escape” or “Return” button on your OBD2 reader to navigate back to the initial or main menu of the device. This ensures you’re at a neutral starting point before disconnecting.
Step 8: Disconnect the OBD Code Reader
Now that the codes have been cleared, carefully disconnect the OBD2 code reader from the OBDII port under your dashboard. Gently pull the connector straight out, being mindful not to damage the port or the scanner’s connector. If your OBD2 reader has a power button, turn it off before disconnecting.
Step 9: Turn Off the Ignition
Return your vehicle’s ignition key to the “OFF” position. This step ensures that the vehicle’s electrical systems are fully powered down after the diagnostic and reset process.
Step 10: Start the Engine and Verify the Light is Off
Finally, start your engine as you normally would. Once the engine is running, check your dashboard. If the reset was successful and the underlying issue was resolved or minor, the check engine light should now be off.
To further confirm, let the engine run and reach its normal operating temperature. You can also start and stop the engine a few more times to ensure the check engine light does not reappear immediately.
Conclusion
As you’ve seen, resetting your check engine light using an OBD2 code reader is a relatively simple procedure. The entire process usually takes just five to ten minutes, depending on your familiarity with the tool and the specific OBD2 scanner you are using. Mastering this skill empowers you to take a proactive role in your vehicle’s maintenance.
However, remember that while clearing the check engine light is easy, understanding the underlying error codes is paramount. Always prioritize diagnosing and addressing the root cause of the problem, especially if the error code indicates a serious issue. Clearing codes without fixing the problem is only a temporary solution.
Learning to reset OBD2 codes is an invaluable skill for any car owner, particularly when undertaking DIY repairs. It allows you to confirm that your repairs have resolved the issue and prevents you from driving with a persistent check engine light after successfully completing a fix. By using an OBD2 scanner, you gain greater insight into your vehicle’s health and can confidently manage minor issues, contributing to both vehicle longevity and peace of mind.