Monitoring your vehicle’s performance in real-time can be incredibly insightful, whether you’re diagnosing a problem, optimizing fuel efficiency, or just satisfying your inner gearhead. Live logging with an OBD2 scanner and the Torque app is a popular and effective way to achieve this. In this guide, we’ll delve into how to live log using the Torque app with a focus on leveraging the capabilities of the Kiwi 3 OBD2 scanner.
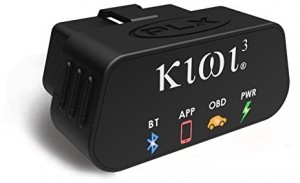
For those seeking a reliable and high-performance OBD2 adapter, the PLX Devices Kiwi 3 Bluetooth OBD2 OBDII Diagnostic Scan Tool stands out as an excellent choice. While it may represent a slightly larger investment compared to generic scanners, the Kiwi 3 offers superior speed, consistent connectivity, and dependable support from a US-based company – features often lacking in cheaper alternatives. Many users have reported success with budget-friendly options, but for those prioritizing quality and a hassle-free experience, the Kiwi 3 is a worthwhile upgrade. Its low-profile design allows you to leave it plugged into your OBDII port without it being obtrusive.
The Kiwi 3 isn’t just about build quality; it’s engineered for performance. It’s advertised as the smallest, fastest, and most versatile OBD adapter on the market, designed to seamlessly interface with your car’s computer. Here’s a breakdown of its key features that make it ideal for live logging:
- Kiwi OBD App Compatibility: While it works flawlessly with Torque, PLX Devices offers its own “Kiwi OBD” app, specifically designed to maximize the hardware’s accelerated capabilities. This demonstrates the manufacturer’s commitment to performance and user experience.
- Discreet Size: Protruding just 0.68″ from the OBD port, its minimal footprint makes it virtually unnoticeable once installed.
- Exceptional Speed: Boasting speeds up to four times faster than competitors, the Kiwi 3 ensures rapid data acquisition, crucial for accurate live logging.
- Ultra-Low Power Consumption: With incredibly low power draw in both active (0.2W) and sleep (0.05W) modes, you can confidently leave the Kiwi 3 plugged in continuously without draining your car battery.
- Cross-Platform Compatibility: Kiwi 3 is universally compatible with iOS, Android, and Windows Mobile, offering unparalleled flexibility for users with different devices.
- Broad Vehicle Compatibility: It supports all cars and light trucks sold in the US post-1996, covering the vast majority of modern vehicles.
Now, let’s get into the steps for live logging on Torque Pro (or Torque Lite) using your Kiwi 3 OBD2 reader:
Steps to Live Log with Torque and Kiwi 3:
-
Plug in your Kiwi 3: Locate your vehicle’s OBDII port (usually under the dashboard on the driver’s side) and securely plug in the Kiwi 3 adapter.
-
Download and Install Torque App: If you haven’t already, download and install either Torque Pro (paid version with more features) or Torque Lite (free version) from the Google Play Store on your Android device.
-
Pair Kiwi 3 with your Android Device:
- Enable Bluetooth on your Android device.
- Go to your Android device’s Bluetooth settings and scan for available devices.
- You should see “Kiwi 3” in the list of available Bluetooth devices. Tap on it to pair. You may be prompted for a pairing code; usually, this is “1234” or “0000,” but the Kiwi 3 should pair automatically without needing a code.
-
Configure Torque to Connect to Kiwi 3:
- Open the Torque app.
- Go to “Settings” (usually accessible via the menu button on your device).
- Select “OBD2 Adapter Settings.”
- Choose “Connection Type” and select “Bluetooth.”
- Select “Choose Bluetooth Device” and pick “Kiwi 3” from the list.
-
Set up Live Data Gauges:
- Return to the main screen of Torque.
- Swipe left to access an empty dashboard panel.
- Long-press on an empty space on the dashboard and select “Add Display.”
- Choose the gauge type you prefer (e.g., Dial, Graph, Digital Display).
- Select the sensor you want to monitor (e.g., Engine RPM, Coolant Temperature, Speed, MAF Sensor).
- Repeat this process to add all the parameters you want to live log.
-
Start Live Logging:
- Once your gauges are set up, Torque will automatically start displaying live data as soon as it establishes a connection with your Kiwi 3 and your vehicle’s ECU.
- Start your vehicle’s engine. You should now see real-time data streaming on your Torque dashboard.
- To record a log file, go to the main menu in Torque, and look for “Data Logging” or “Record Data.” Start the recording before you begin driving or performing the actions you want to log.
- Stop the recording when you are finished. Torque will save the log file, usually in CSV format, which you can later analyze.
Benefits of Live Logging:
- Performance Analysis: Analyze engine performance under various driving conditions.
- Diagnostic Insights: Identify potential issues by monitoring sensor readings for anomalies.
- Fuel Efficiency Optimization: Observe fuel consumption metrics to improve driving habits.
- Track Modifications: Evaluate the impact of performance modifications on your vehicle.
Conclusion:
Live logging with Torque and a reliable OBD2 scanner like the Kiwi 3 provides a powerful window into your vehicle’s operation. By following these steps, you can effectively monitor, diagnose, and optimize your car’s performance. While the Kiwi 3 represents a premium option, its speed, reliability, and ease of use make it an excellent investment for anyone serious about automotive diagnostics and data analysis. Whether you’re a seasoned mechanic or a car enthusiast, mastering live logging is a valuable skill, and the Kiwi 3 and Torque combination offers a seamless and effective way to get started.
