Swapping engines in your 1992-2000 Honda Civic can unlock a new level of performance and driving excitement. However, navigating the intricacies of wiring, especially when dealing with different OBD (On-Board Diagnostics) generations, can be daunting. This comprehensive guide focuses on Honda Civic Obd2 Wiring Diagrams, providing you with the essential information to confidently tackle your engine swap project. Whether you’re upgrading to a more powerful VTEC engine or dealing with OBD1 to OBD2 conversions, understanding the wiring is paramount for a successful and smooth running vehicle.
This guide is designed for DIY mechanics and Honda enthusiasts looking for clear, accurate, and SEO-optimized information. We’ll break down the complexities of Honda Civic OBD2 wiring, ensuring you have the knowledge to perform your engine swap efficiently and effectively.
(Note: This guide primarily focuses on B and D series engine swaps, the most common for 92-00 Civics. While H and F series swaps are less frequent, the fundamental wiring principles discussed here will still be applicable. K and J series swaps are beyond the scope of this article but involve more complex wiring and ECU considerations.)
Understanding OBD Systems in Honda Civics
Before diving into specific wiring diagrams, it’s crucial to understand the different OBD systems present in 92-00 Honda Civics:
- OBD0 (On-Board Diagnostics 0): Primarily found in pre-92 Honda Civics and some early 92 models. OBD0 systems are relatively basic and lack the diagnostic capabilities of later systems.
- OBD1 (On-Board Diagnostics 1): Used in 1992-1995 Honda Civics. OBD1 offered improved diagnostics and engine management compared to OBD0.
- OBD2 (On-Board Diagnostics 2): Mandated in the USA for all 1996 and newer vehicles, including 1996-2000 Honda Civics. OBD2 is a more advanced system with standardized diagnostic codes and enhanced monitoring capabilities. OBD2 is further divided into OBD2A (1996-1998 Civics) and OBD2B (1999-2000 Civics), which have slight differences in ECU connector configurations.
Understanding your Civic’s original OBD system and the OBD system of your swap engine is the first step in determining the necessary wiring modifications.
OBD1 Engine/ECU Swaps into OBD1 Civic (1992-1995)
For those keeping it OBD1 to OBD1, the swaps are generally more straightforward. Here’s a breakdown for common scenarios:
1. D16Z6/D15B(JDM)/Mini-Me using P28 ECU
- EX/Si – D16Z6: VTEC wiring is typically plug and play as 92-95 EX/Si models already have VTEC wiring run to the ECU harness on the shock tower. Using a 92-95 EX/Si engine harness will simplify the VTEC connection.
- DX/LX – D15B7: You will need to wire up the VTEC solenoid and VTEC pressure switch to the P28 ECU. All other wiring should be plug and play. Refer to Figure 1 (OBD1 ECU Wiring) for wiring details.
- CX – D15B8: Similar to DX/LX, VTEC solenoid and pressure switch wiring to the P28 ECU is required (Figure 1). If your CX is not a 4-wire O2 sensor model, you’ll also need to wire the additional 3 O2 sensor connections to the ECU (Figure 1).
- VX – D15Z1: VTEC wiring is similar to above. For Knock Sensor and IAB (Intake Air Bypass) wiring, see Figure 1. If using a chipped P28 ECU, IAB and Knock Sensor wiring are often not necessary. VX models with 7-wire O2 sensors will need conversion to 4-wire O2 sensors (http://www.hybridautomotive.com/tech/o2/).
Figure 1: OBD1 ECU Wiring Diagram and Pin Removal
2. B16A3/B17A/B18C1/B18C (OBD1 JDM) using chipped P28/P30/P61/P72 ECU
- EX/Si – D16Z6: VTEC is plug and play. Knock Sensor and IAB wiring (Figure 1) may be needed if not using a chipped P28 ECU.
- DX/LX – D15B7: VTEC, Knock Sensor, and IAB wiring (Figure 1) may be required. If using a P28 ECU, IAB and Knock Sensor wiring may be bypassed.
- CX – D15B8: VTEC, Knock Sensor, and IAB wiring (Figure 1) may be needed. For non 4-wire O2 CX models, wire the additional O2 connections (Figure 1).
- VX – D15Z1: Reuse existing VTEC wiring. For 7-wire O2 VX models, convert to 4-wire (http://www.hybridautomotive.com/tech/o2/).
3. B18A (OBD1)/B18B in DX/CX/VX/EX using P74/P75 ECU/all chipped OBD1 ECUs
- LX/DX/EX – D15B7/D16Z6: Plug and play.
- CX/VX – D15B8/D15Z1: Plug and play. For 1-wire O2 CX models, wire in 3 additional wires for a 4-wire O2 sensor (Figure 1). For 7-wire O2 VX models, convert to 4-wire (http://www.hybridautomotive.com/tech/o2/).
OBD2 Engine/OBD1 ECU Swaps into OBD1 Vehicle (1992-1995)
Swapping an OBD2 engine into an OBD1 Civic requires more wiring adaptation to make the newer engine communicate with the older OBD1 ECU.
1. D16Y8 using P28 ECU
- EX/Si/VX – D16Z6/D15Z1: Mostly plug and play for basic functions. VTEC is plug and play. Knock sensor will not be used with the P28 ECU. The EX/Si/VX distributor might not directly bolt to the Y8 head. You can either use it with some legs unbolted, or use the Y8 distributor with an OBD2A or OBD2B to OBD1 adapter harness. Relocate the Intake Air Temperature (IAT) sensor to the intake arm (Figure 3) or use a Z6/Z1 intake manifold. Reuse Z6 injectors as Y8 injectors won’t plug in correctly. For VX, use EX/SI/DX injectors for similar flow rates. Reuse the Z6/Z1 alternator. The Crankshaft Position Sensor (CKF) on the Y8 will not be used. For VX models, convert the 5-wire O2 sensor to 4-wire (http://www.hybridautomotive.com/tech/o2/).
- LX/DX/CX – D15B7/D15B8: Mostly plug and play. VTEC solenoid and pressure switch wiring are needed (Figure 1). Reuse the DX/CX distributor. For Y8 distributor, use an OBD2A or OBD2B to OBD1 adapter harness. Relocate IAT sensor to the intake arm (Figure 3) or use a CX/DX manifold. DX injectors can be reused. For CX, upgrade to EX/SI/DX injectors. Reuse the CX/DX alternator. CKF sensor on Y8 is not used.
Figure 2: JDM VTEC Solenoid Bolt
 JDM VTEC Solenoid Bolt
(Note: Figure 2 highlights the VTEC pressure switch bolt on JDM D15B engines. If your JDM D15B lacks a VTEC pressure switch, you’ll need to install one from a 90-01 Civic/Integra/Accord.)
2. B16A2/B18C1 (OBD2)/B18C5 using chipped P28/P30/P72
- EX/SI/VX – D16Z6/D15Z1: Mostly plug and play, VTEC plug and play. Knock sensor is not used with P28 ECU, but will be for others. For A2/C1/C5 distributor, use an OBD2A or OBD2B to OBD1 adapter harness. Relocate IAT sensor to the intake arm. Reuse Z6 injectors. For VX, use EX/SI/DX injectors. Use an OBD1 B-series alternator. CKF sensor is not used. For VX, convert 5-wire O2 to 4-wire (http://www.hybridautomotive.com/tech/o2/).
- DX/CX – D15B7/D15B8: Mostly plug and play. VTEC wiring is needed (Figure 1). Knock sensor not used with P28 ECU, but will be for others. For A2/C1/C5 distributor, use an OBD2A or OBD2B to OBD1 adapter harness. Relocate IAT sensor to intake arm. Reuse DX injectors. For CX, upgrade to EX/SI/DX injectors. Use an OBD1 B-series alternator. CKF sensor not used. For 1-wire O2 CX models, convert to 4-wire using Figure 1.
3. B18B/B20B/Z (OBD2) using P75 ECU
- EX/SI/VX/DX/CX – D16Z6/D15Z1/D15B7/D15B8: Mostly plug and play. For the distributor, use an OBD1 B18 distributor or an OBD2 LS dizzy with an adapter harness. Use an OBD1 B-series alternator. For EX/SI/DX, reuse injectors. For VX/CX, use EX/DX/SI injectors. CKF sensor is not used. For 1-wire O2 CX, convert to 4-wire (Figure 1). For 7-wire O2 VX, convert to 4-wire (http://www.hybridautomotive.com/tech/o2/).
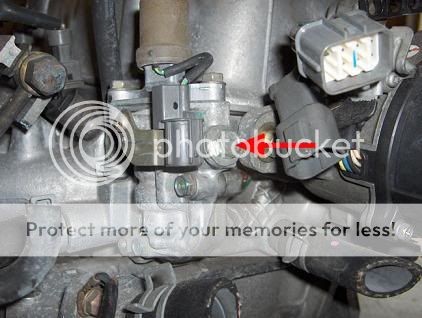
Figure 3: OBD1 IAT Sensor Relocation in Intake Arm
(Note: Figure 3 illustrates relocating the OBD1 Intake Air Temperature sensor into the intake arm, a common practice when swapping OBD2 engines into OBD1 vehicles because OBD2 manifolds often lack a designated IAT sensor location.)
OBD0 Engine into OBD1 Vehicle using OBD1 ECU (1992-1995)
Swapping older OBD0 engines into OBD1 Civics is less common but still feasible.
1. B18A (OBD0) using P75 OBD1 ECU
- EX/SI/DX/CX/VX – D16Z6/D15Z1/D15B7/D15B8: Mostly plug and play. OBD0 and OBD1 alternator plugs are compatible. Reuse EX/SI/DX injectors; for CX/VX, use EX/SI/DX injectors. The OBD0 fan switch is located on the back of the block, unlike OBD1 which is on the thermostat housing. Rewire the fan switch from the thermostat housing to the back of the block (Figure 4). For VX 7-wire O2 and CX 1-wire O2, convert to 4-wire using Figure 1 and (http://www.hybridautomotive.com/tech/o2/).
Figure 4: OBD0 and OBD1 Fan Switch Comparison
(Note: Figure 4 compares the different locations of the fan switch between OBD0 and OBD1 engines, highlighting the wiring modification needed for OBD0 engine swaps into OBD1 vehicles.)
Figure 5: OBD1 Shocktower Harness
(Note: Figure 5 shows the OBD1 shock tower harness plug, relevant for understanding VTEC wiring integration in 92-95 Civics.)
OBD2 Engine into OBD2 Vehicle using OBD2 ECU (1996-2000)
Swapping within the OBD2 family (OBD2A to OBD2A or OBD2B to OBD2B) is generally the most straightforward. Important: Do not mix 96-98 OBD2A and 99-00 OBD2B engine and dash harnesses as ECU connectors differ (Figure 11).
1. D16Y8 using P2P ECU
- DX/LX/CX – D16Y7: Mostly plug and play. VTEC solenoid, VTEC pressure switch, and knock sensor wiring are required (Figure 6 for OBD2A, Figure 7 for OBD2B). The Idle Air Control Valve (IACV) needs wiring from 3-wire to 2-wire (Figure 6 & 7). The secondary O2 sensor wiring may need extending if using an EX catalytic converter. Relocate IAT sensor to the intake arm (Figure 8).
- HX – D16Y5: Mostly plug and play. Reuse VTEC solenoid and pressure switch. 5-speed models need knock sensor wiring (Figure 6 – all HX models 96-00 are OBD2A). 7-wire O2 needs conversion to 4-wire (http://www.eastcoasthondas.com/blog/tech-articles/how-to-obd2a-obd2b-civic-hx-5-wire-o2-sensor-to-4-wire-o2-sensor-conversion).
2. B16A2/B18C1/B18C5 using P30(OBD2A)/P2T/P72
- EX – D16Y8: Mostly plug and play. Reuse VTEC solenoid, pressure switch, and knock sensor wiring. Secondary O2 may need extending. For B18C1, IABs need wiring to the P72 ECU (Figure 6 & 7). Relocate IAT sensor to the intake arm (Figure 8). For B18C1/C5, convert to round style IAT and place the connector on the manifold (Figure 9).
- DX/LX/CX – D16Y7: Mostly plug and play. VTEC solenoid, pressure switch, and knock sensor wiring are needed (Figure 6 & 7). IACV needs 3-wire to 2-wire conversion (Figure 6 & 7). Secondary O2 wiring may need extending. Relocate IAT sensor to the intake arm (Figure 8). For B18C1/C5, convert to round style IAT (Figure 9).
- HX – D16Y5: Mostly plug and play. Reuse VTEC solenoid and pressure switch. 5-speed HX models need knock sensor wiring (Figure 6). 7-wire O2 to 4-wire conversion is needed (http://www.eastcoasthondas.com/blog/tech-articles/how-to-obd2a-obd2b-civic-hx-5-wire-o2-sensor-to-4-wire-o2-sensor-conversion).
3. B18B/B20B/Z using OBD2A P75 (Avoid 00-01 P75 due to immobilizer)
- EX/HX – D16Y8/D16Y5: Plug and play. For HX, 7-wire O2 to 4-wire conversion (http://www.eastcoasthondas.com/blog/tech-articles/how-to-obd2a-obd2b-civic-hx-5-wire-o2-sensor-to-4-wire-o2-sensor-conversion).
- DX/LX/CX – D16Y7: Mostly plug and play. IACV needs 3-wire to 2-wire conversion (Figure 6 & 7). Secondary O2 wiring may need extending. Relocate IAT sensor to intake arm (Figure 8).
Figure 6: OBD2A Hybrid Pinouts (1996-1998)
(Note: Figure 6 provides OBD2A (1996-1998 Civic) hybrid pinouts, crucial for wiring modifications in OBD2A engine swaps. It also shows OBD2 pin removal techniques.)
Figure 7: OBD2B Hybrid Pinouts (1999-2000)
(Note: Figure 7 details OBD2B (1999-2000 Civic) hybrid pinouts, essential for wiring in OBD2B engine swaps. It also includes OBD2 pin removal guidance.)
Figure 8: OBD2 IAT Sensor Relocation in Intake Arm
(Note: Figure 8 demonstrates OBD2 IAT sensor relocation to the intake arm, similar to OBD1, necessary when the OBD2 manifold lacks an IAT sensor port.)
Figure 9: Round Style IAT Sensor
(Note: Figure 9 showcases the round style Intake Air Temperature (IAT) sensor, an alternative for certain OBD2 swaps, allowing manifold mounting.)
OBD1 Engine into OBD2 Vehicle using OBD1 ECU (1996-2000)
This swap type involves downgrading the OBD system, often done for ECU tuning flexibility.
1. D16Z6 using P28 ECU
- DX/LX/CX – D16Y7: Mostly plug and play. VTEC solenoid and pressure switch wiring needed (Figure 1). IACV needs 3-wire to 2-wire conversion (Figure 6 & 7). Relocate IAT sensor to the intake arm (Figure 8) or rewire to OBD1 style (Figure 9). CKF, EVAP purge, and secondary O2 are eliminated. D16Z6 distributor needs an adapter. Use Z6 injectors (remove injector “clips” for plug and play – Figure 10). Reuse Y7 alternator.
- HX – D16Y5: VTEC plug and play. Relocate IAT sensor (Figure 8) or rewire to OBD1 style (Figure 9). CKF, EVAP purge, EGR, and secondary O2 are eliminated. 7-wire O2 to 4-wire conversion (http://www.eastcoasthondas.com/blog/tech-articles/how-to-obd2a-obd2b-civic-hx-5-wire-o2-sensor-to-4-wire-o2-sensor-conversion). D16Z6 distributor needs an adapter. Use Z6 injectors (remove clips – Figure 10). Reuse Y7 alternator.
- EX – D16Y8: VTEC plug and play. Relocate IAT sensor (Figure 8) or rewire to OBD1 style (Figure 9). CKF, EVAP purge, EGR, and secondary O2 are eliminated. D16Z6 distributor needs adapter. Use Z6 injectors (remove clips – Figure 10). Reuse Y7 alternator.
2. B16A2/B18C1/B18C5 using OBD1 P30
- DX/LX/CX – D16Y7: Mostly plug and play. VTEC solenoid, pressure switch, and knock sensor wiring needed (Figure 1). IACV 3-wire to 2-wire conversion (Figure 6 & 7). Relocate IAT sensor (Figure 8) or rewire to OBD1 style (Figure 9). CKF, EVAP purge, and secondary O2 are eliminated. For 96-98 Civics, use an OBD2 B-series VTEC distributor or OBD2A to OBD1 distributor adapter. For 99-00, use OBD2B to OBD1/2 distributor adapter and OBD1/2 B-series DOHC VTEC distributor. Use B-series injectors (remove clips – Figure 10). Use OBD2 B-series alternator or OBD2-1 alternator adapter.
- HX – D16Y5: VTEC plug and play. Relocate IAT sensor (Figure 8) or rewire to OBD1 style (Figure 9). CKF, EVAP purge, EGR, and secondary O2 are eliminated. 7-wire O2 to 4-wire conversion (http://www.eastcoasthondas.com/blog/tech-articles/how-to-obd2a-obd2b-civic-hx-5-wire-o2-sensor-to-4-wire-o2-sensor-conversion). Use OBD2 VTEC distributor or OBD2A to OBD1 distributor adapter. Use B-series injectors (remove clips – Figure 10). Use OBD2 B-series alternator or OBD2-1 alternator adapter.
- EX – D16Y8: VTEC plug and play. Knock sensor wiring needed (Figure 1). Relocate IAT sensor (Figure 8) or rewire to OBD1 style (Figure 9). CKF, EVAP purge, EGR, and secondary O2 are eliminated. For 96-98 Civics, use OBD2 B-series VTEC distributor or OBD2A to OBD1 adapter. For 99-00, use OBD2B to OBD1/2 adapter and OBD1/2 B-series DOHC VTEC distributor. Use B-series injectors (remove clips – Figure 10) or Y8 injectors. Use OBD2 B-series alternator or OBD2-1 alternator adapter.
3. B18A/B using OBD1 P75
- DX/LX/CX – D16Y7: Mostly plug and play. IACV 3-wire to 2-wire conversion (Figure 6 & 7). Secondary O2 wiring may need extending. Relocate IAT sensor (Figure 8). CKF, EVAP purge, EGR, and secondary O2 are eliminated. Use OBD2 B18B distributor or OBD2A to OBD1 adapter. For 99-00 Civic, use OBD2B to OBD1 distributor adapter with OBD1 or OBD2 B18A/B distributor. Use B18A/B injectors (remove clips – Figure 10). Use OBD2 B-series alternator or OBD2-1 alternator adapter.
- EX/HX – D16Y8/Y5: Relocate IAT sensor (Figure 8) or rewire to OBD1 style (Figure 9). CKF, EVAP purge, EGR, and secondary O2 are eliminated. For 96-98 Civics, use OBD2 B18B distributor or OBD2A to OBD1 adapter. For 99-00, use OBD2B to OBD1/2 adapter and OBD1/2 B-series DOHC VTEC distributor. Use B18A/B injectors (remove clips – Figure 10). Use OBD2 B-series alternator or OBD2-1 alternator adapter. For HX, 7-wire O2 to 4-wire conversion (http://www.eastcoasthondas.com/blog/tech-articles/how-to-obd2a-obd2b-civic-hx-5-wire-o2-sensor-to-4-wire-o2-sensor-conversion).
Figure 10: Injector Clip Removal
(Note: Figure 10 illustrates removing injector clips, a minor modification often needed for injector compatibility in certain swaps.)
Figure 11: OBD2A vs OBD2B Harness Comparison
(Note: Figure 11 visually compares OBD2A and OBD2B harnesses, emphasizing the ECU connector differences and the importance of not mixing these systems.)
Conclusion
This guide provides a comprehensive overview of Honda Civic OBD2 wiring diagrams and considerations for various engine swaps in 92-00 models. Understanding your OBD system and the specific wiring modifications required for your engine swap is crucial for a successful project. Always refer to the detailed wiring diagrams and instructions provided in this guide and consult reliable sources for any specific questions related to your swap. With careful planning and attention to detail, you can confidently tackle your Honda Civic engine swap and enjoy the enhanced performance of your vehicle. Remember to always prioritize safety and consult with experienced mechanics if you are unsure about any aspect of the wiring process.