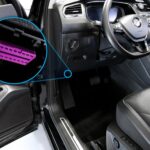
The Arduino DUE is a powerful microcontroller board, especially when it comes to automotive applications that require Controller Area Network (CAN) bus communication. This guide will walk you through using the due_can library and examples to set up free-running CAN and delve into OBD2 Parameter IDs (PIDs) for vehicle diagnostics and data acquisition. This library is designed for continuous message transmission and reception, ideal for applications needing real-time data, such as data logging and custom dashboards.
Installation Guide
To get started with the due_can library and examples, follow these steps:
-
Download Arduino IDE: Ensure you have the Arduino IDE version 1.6.x or later. Download it from the official Arduino website. This version is necessary for Arduino DUE support.
-
Download the
due_canLibrary: Obtain the library files from the Togglebit GitHub repository: Togglebit GitHub. Download the zip file containing thedue_canlibrary and example code. -
Create the CAN Library Folder: Navigate to your Arduino libraries folder. Typically, this is located in your Arduino installation directory under
libraries. For example, on Windows, it might beC:Program Files (x86)Arduinolibraries. Create a new folder named “CAN” within thislibrariesdirectory. -
Extract Library Files: Unzip the downloaded Togglebit repository and copy all the files (including
.c,.h, and.inofiles) directly into the newly created “CAN” folder (C:Program Files (x86)ArduinolibrariesCAN). -
Install Arduino SAM Boards: Open the Arduino IDE 1.6x. Go to
Tools -> Boards -> Boards Manager. Search for and install the “Arduino SAM (32-bit ARM Cortex-M3) Boards” hardware support package. This is essential for programming the Arduino DUE. -
Select Arduino DUE Board: After installation, go to
Tools -> Boardand select “Arduino Due (Programming Port)” as your target board. -
Explore Examples: Open any of the example
.inofiles provided in the library. This will automatically create a new sketch folder. You will also find a “CAN” folder underFile -> Examples, containing example sketches demonstrating the library’s functionalities. -
Verify and Upload: You are now set to verify, compile, and upload the examples to your Arduino DUE board.
Understanding Free Running CAN
Free Running CAN is a communication approach where CAN messages are transmitted periodically at a fixed rate, regardless of whether there’s new data to send or not. This is in contrast to event-driven CAN, where messages are only sent when a specific event occurs. The due_can library facilitates this through a scheduler, allowing you to define transmission rates for different CAN frames.
Here’s a basic example of setting up free-running CAN to transmit a message at 5 times per second:
//create the CANport acqisition schedulers
cAcquireCAN CANport0(CAN_PORT_0);

//define a CANFrame object
cCANFrame RAW_CAN_Frame1;

//start CAN ports, set the baud rate here
CANport0.initialize(_500K);

//then set the ID and transmission rate
RAW_CAN_Frame1.ID = 0x100;
RAW_CAN_Frame1.rate = _5Hz_Rate;

//add to the scheduler
CANport0.addMessage(&RAW_CAN_Frame1, TRANSMIT);

// call the scheduler in a 2mS timer interrupt
CANport0.run(TIMER_2mS);

// manipulate CAN payload in loop() or wherever appropriate
RAW_CAN_Frame1.U.b[0] = i;
In this code snippet, cAcquireCAN initializes the CAN port, and cCANFrame defines a CAN message frame. CANport0.initialize(_500K) sets the CAN bus baud rate to 500 Kbps. The RAW_CAN_Frame1 is configured with an ID of 0x100 and a transmission rate of 5Hz (_5Hz_Rate). The CANport0.run(TIMER_2mS) function, intended to be called within a 2ms timer interrupt, manages the scheduled transmission. You can then modify the payload data RAW_CAN_Frame1.U.b[0] as needed in your main loop or other parts of your code.
Working with OBD2 PIDs
OBD2 (On-Board Diagnostics II) is a standardized system used in vehicles for diagnostics and monitoring. It uses PIDs to request specific parameters from the vehicle’s ECU (Engine Control Unit). The due_can library provides functionality to work with OBD2 PIDs.
To retrieve engine RPM using OBD2 PIDs:
//create the CANport acqisition schedulers
cAcquireCAN CANport0(CAN_PORT_0);

//define an OBDParameter object
cOBDParameter OBD_Speed("Speed ", " KPH" , SPEED , _8BITS, false, CURRENT, 1, 0, &CANport0);

//start CAN ports, set the baud rate here
CANport0.initialize(_500K);

// call the scheduler, preferable in an interrupt
CANport0.run(TIMER_2mS);

//show acquired data in loop() wherever appropriate
Serial.print(OBD_EngineSpeed.getName());
Serial.print(OBD_EngineSpeed.getData());
Serial.println(OBD_EngineSpeed.getUnits());
Here, cOBDParameter is used to define an OBD2 parameter object. In this example, it’s set up for “Speed” (though the comment mentions engine RPM, the code is for speed – for RPM you’d use ENGINE_RPM instead of SPEED). The parameters include name, units, PID (SPEED), data size (_8BITS), and scaling factors. Similar to the Free Running CAN example, CANport0.run(TIMER_2mS) schedules the OBD2 request. The acquired data for engine speed can then be accessed and printed using OBD_EngineSpeed.getData(), along with its name and units.
Tips and Important Considerations
- Optimization: The initial version of the
due_canlibrary prioritized functionality over speed. There are potential areas for optimization, especially regarding mailbox usage. - Underlying CAN Library: The
due_can.*library included might not always be the absolute latest version from the DUE forum. Check for updates if needed. - OBD2 Testing: The provided OBD2 implementation has been tested on a limited number of vehicles with 11-bit identifiers. Compatibility may vary across different makes and models.
- Custom OBD2 PIDs: For implementing non-standard or extended OBD2 PIDs, refer to the enums defined in the
OBD2.hfile within the library. - Library Credits: The
due_canlibrary builds upon the originaldue_can.*libraries by collin80 and the DUETimer libraries by ivanseidel. - Wiring and Termination: Always double-check your CAN bus wiring and ensure proper termination resistors are in place for reliable communication.
Hardware Resources
For compatible hardware, including CAN shields and protoshields designed for Arduino DUE, visit Togglebit’s website. They offer hardware specifically designed to work with these libraries, simplifying your CAN bus projects.
Version History
1.0 (2014-18-03): Original release of thedue_canlibrary and examples.
This guide provides a starting point for utilizing the due_can library with Arduino DUE for both free-running CAN and OBD2 applications. Explore the example codes further and adapt them to your specific automotive data acquisition needs.
