The dreaded check engine light – seeing it illuminate on your dashboard can instantly trigger anxiety. It signals that your car’s onboard diagnostic system has detected a potential issue. While it’s crucial not to ignore this warning, it doesn’t always necessitate an immediate, expensive trip to the mechanic. Often, the first step in diagnosing and sometimes resolving the problem yourself involves understanding and clearing the engine light using an OBD2 scanner.
This guide, brought to you by the auto repair experts at techcarusa.com, will walk you through the process of using an OBD2 scanner to clear your check engine light. We’ll explain why this tool is essential, how to use it effectively, and what to do after you’ve cleared the code. Empower yourself with the knowledge and tools to take control of your car’s diagnostics and potentially save time and money.
Understanding the Check Engine Light and OBD2 Scanners
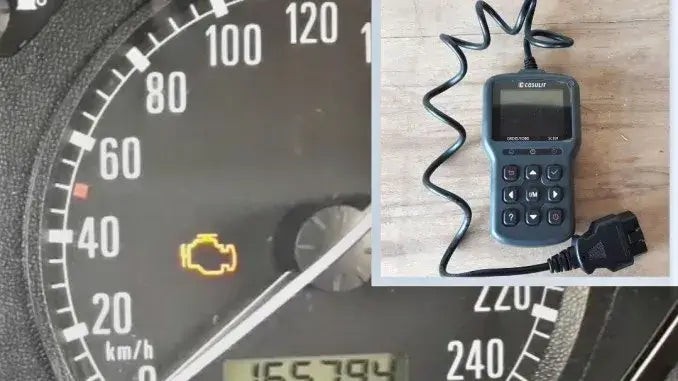
The check engine light, also known as the malfunction indicator lamp (MIL), is part of your vehicle’s On-Board Diagnostics system, specifically OBD2 (On-Board Diagnostics II) in modern cars. This system monitors various aspects of your car’s performance, from engine emissions to sensor readings. When it detects a problem that could affect emissions or vehicle operation, it illuminates the check engine light and stores a diagnostic trouble code (DTC).
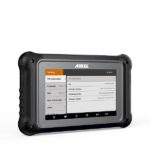
An OBD2 scanner is a handheld device that plugs into your car’s OBD2 port, typically located under the dashboard on the driver’s side. This scanner allows you to communicate with your car’s computer, read these stored DTCs, and, importantly for our focus today, clear them. While basic code readers might only read codes, for clearing the check engine light, you’ll need a scanner that specifically offers the “clear codes” or similar function.
Why Clear the Check Engine Light?
Clearing the check engine light can be beneficial in several situations:
- Post-Repair Verification: After you’ve made a repair, clearing the code allows you to confirm if the issue is truly resolved. If the light stays off, the problem might be fixed. If it returns, further investigation is needed.
- Minor or Intermittent Issues: Sometimes, the check engine light can trigger due to a temporary glitch or a minor issue like a loose gas cap. Clearing the code can reset the system. If the issue was indeed minor and resolved itself, the light may not reappear.
- DIY Diagnostics: Clearing the code is a crucial step in a DIY diagnostic process. By clearing the initial code and seeing if it returns, you can narrow down the problem and focus your troubleshooting efforts.
Important Note: Clearing the check engine light without addressing the underlying issue is only a temporary fix. The light will likely return if the problem persists. Therefore, always read and understand the error codes before clearing them.
Step-by-Step Guide to Clear Engine Light with an OBD2 Scanner
Here’s a detailed guide on how to use an OBD2 scanner to clear the check engine light. While specific scanners may have slight variations in menu navigation, the general process remains consistent.
1. Locate the OBD2 Port
The first step is to find your car’s OBD2 port. It’s usually located under the dashboard on the driver’s side. Common locations include beneath the steering column or near the pedals. Refer to your vehicle’s owner’s manual if you have trouble locating it.
2. Connect the OBD2 Scanner
Plug your OBD2 scanner into the port. Ensure it’s firmly connected. Most scanners will power on automatically once connected to the OBD2 port, drawing power from the vehicle.
3. Turn the Ignition to “Accessory” or “ON”
Turn your car’s ignition to the “Accessory” or “ON” position. This means turning the key to the position just before you start the engine. You need to provide power to the car’s computer system so the scanner can communicate with it. Do not start the engine at this stage.
4. Allow the OBD2 Scanner to Scan for Codes
Once powered on and connected, your OBD2 scanner will typically initiate a scan automatically or prompt you to start one. Follow the scanner’s on-screen instructions to begin the diagnostic scan. This process allows the scanner to read any stored DTCs.
5. Read and Interpret the Error Codes
After the scan, the OBD2 scanner will display any error codes it has found. Record these codes. It’s crucial to understand what these codes mean. Many scanners have a built-in DTC library that provides a brief description of the code. Alternatively, you can use online resources or smartphone apps to look up the codes and understand the potential issues they indicate.
Understanding the codes is vital. Some codes might indicate minor issues (like a loose gas cap), while others can point to more serious problems (like engine misfires or catalytic converter issues). This interpretation will guide your next steps.
6. Navigate to the “Clear Codes” or “Erase Codes” Menu
Once you’ve reviewed and understood the error codes and decided to proceed with clearing them (especially after addressing the underlying issue or if you believe it’s a minor or resolved problem), navigate through your OBD2 scanner’s menu to find the option to “Clear Codes,” “Erase Codes,” or similar phrasing. This is usually found within a “Tools” or “Diagnostic Functions” menu.
7. Confirm Code Clearing
The scanner will likely ask you to confirm if you want to clear the codes. Select “Yes” or “OK” to proceed with clearing the codes and resetting the check engine light.
8. Return to the Main Menu
After confirming, the scanner will process the request and typically return to the main menu or a screen indicating successful code clearing.
9. Disconnect the OBD2 Scanner
Turn off the OBD2 scanner if it has a power button. Then, carefully disconnect it from the OBD2 port.
10. Turn Off the Ignition
Turn the ignition key back to the “OFF” position.
11. Start the Engine and Check for the Check Engine Light
Now, start your car’s engine. Observe the dashboard. If the check engine light is off, you have successfully cleared the code.
To further confirm, let the engine run and reach its normal operating temperature. You can also restart the engine a few times. If the check engine light remains off, it indicates that the issue may be resolved, or at least the system is no longer detecting it immediately.
After Clearing the Light: What’s Next?
Clearing the check engine light is a helpful step, but it’s not the end of the process. Consider these points:
- Monitor for Recurrence: Pay close attention to your car’s performance and dashboard in the days and weeks following the reset. If the check engine light comes back on, it signifies that the underlying problem persists.
- Address the Root Cause: If the check engine light returns, or if the initial error codes indicated a serious issue, it’s essential to diagnose and repair the root cause of the problem. Ignoring persistent check engine lights can lead to more significant and costly repairs down the line.
- Professional Diagnosis: If you are unsure about interpreting the error codes, or if the check engine light keeps returning, consult a professional mechanic. They have advanced diagnostic tools and expertise to pinpoint the problem accurately and perform the necessary repairs.
Conclusion
Using an OBD2 scanner to clear your check engine light is a straightforward process that empowers car owners to take a proactive role in vehicle maintenance. It’s a valuable tool for DIY diagnostics, post-repair verification, and dealing with minor, intermittent issues. However, remember that clearing the light is often just the first step. Always prioritize understanding and addressing the underlying cause of any check engine light warning to ensure your vehicle’s long-term health and performance.