Upgrading your car’s head unit can dramatically enhance your driving experience, bringing in features like wireless Apple CarPlay, Android Auto, and superior audio quality. Pioneer and Kenwood are leading brands known for their innovative car audio solutions. If you’re considering installing a new Pioneer or Kenwood head unit, particularly one that boasts direct OBD2 USB read capabilities, this guide is for you. We’ll walk you through essential installation tips to ensure a smooth setup and maximize your new system’s potential, focusing on features that leverage your vehicle’s data directly.
1. Utilize the Provided GPS Antenna for Enhanced Accuracy
Modern aftermarket head units often come with their own GPS antennas, and for good reason. These antennas are typically designed to access a wider range of satellites compared to factory antennas, leading to more accurate and reliable navigation. During installation, instruct your installer to use the GPS antenna included with your Pioneer or Kenwood unit. A discreet and effective location for placement is often under the center dash speaker cover, as shown in the image below. This ensures optimal signal reception without being visually intrusive.
2. Request a Firmware Update for Peak Performance
Firmware updates are crucial for any electronic device, and car head units are no exception. Requesting a firmware update for your new Pioneer or Kenwood unit from your installer can significantly improve its performance. Updates often include optimizations that enhance speed, stability, and compatibility, especially with features like Apple CarPlay and Android Auto. A fresh firmware can resolve initial glitches and ensure seamless operation right from the start.
3. Optimize Power with Remote Starter Integration for Quick Boot-Up
For those with remote starters, there’s a smart way to minimize boot-up time on your new head unit. Ask your installer to power the accessories circuit through your remote starter system. This way, when you remotely start your vehicle, your Pioneer or Kenwood unit will also power up. By the time you get into your car, the head unit will already be booted and ready to go, eliminating the typical wait time. This is especially convenient for features like the backup camera, which will be instantly available.
4. Customize Steering Wheel Controls for Intuitive Command
Integrating your factory steering wheel controls with your new head unit enhances safety and convenience. While systems like iDatalink Maestro generally pre-program steering wheel button functions based on your vehicle trim, customization is often possible and desirable. For example, ensure the mute function is mapped to a convenient button like the ‘Mode’ button, rather than a less intuitive hold function on the volume down button. Utilize resources like the iDatalink Maestro website to visualize and customize your steering wheel control mappings for a truly personalized experience.
5. Secure Your Rebate: Verify Box Contents
Promotional rebates can offer significant savings on new car audio equipment. If your Pioneer or Kenwood purchase qualifies for a rebate, double-check that your unit box includes the exterior sticker with the serial number and UPC. This sticker is essential for processing your rebate claim. Inspect the box upon receipt and address any discrepancies with the seller immediately to avoid missing out on potential savings.
6. Strategically Wire USB Ports for Connectivity
Modern head units often feature multiple USB ports for smartphone integration and media playback. To maintain a clean and functional setup, request that your installer wire the Apple CarPlay/Android Auto compatible USB port to your factory USB port location, if feasible. Additionally, consider adding a flush-mounted USB extension cable for the secondary USB port on the head unit. This provides extra connectivity without cluttering your dashboard. These additional USB ports can often be neatly installed in place of unused cigarette lighter sockets.
7. Protect Dash Trims During Installation
The installation process, while generally straightforward for professionals, can pose a risk to your vehicle’s interior trim. The plastic trims around your dashboard, particularly the L-shaped pieces with vents, are susceptible to scratches from the sharp metal edges of head units and installation tools. Insist that your installer uses painter’s tape or protective coverings on these vulnerable trim pieces before starting the installation. This simple precaution can prevent unsightly scratches and maintain your car’s interior aesthetics.
8. Unlock Video Playback Capability (Where Permitted and Safe)
While safety should always be paramount, there may be situations where you want to access video playback while the vehicle is not in park, for passenger entertainment or audio-only use. Discuss with your installer the possibility of grounding the appropriate wire to enable video playback even when the vehicle is in motion. Understand and comply with local laws and prioritize safe driving practices. This modification is intended for passenger viewing and audio enjoyment, not for driver distraction.
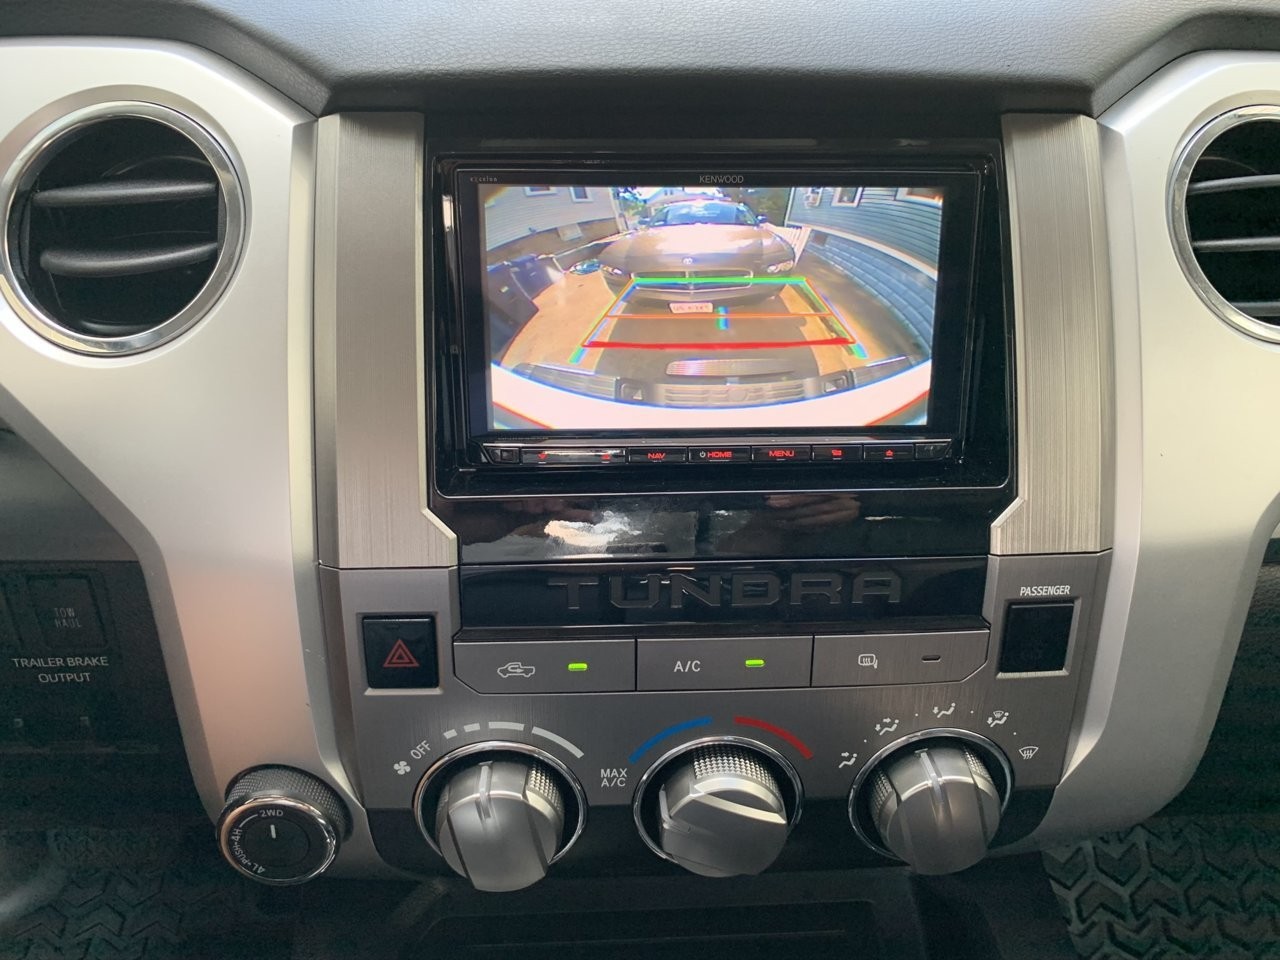
9. Optimize OBD2 Connection for Direct Data Access
One of the most advanced features of select Pioneer and Kenwood head units is their ability to directly read vehicle data via the OBD2 port. Instead of using a separate OBD2 adapter, request your installer to hardwire the head unit’s OBD2 cable directly to your vehicle’s OBD2 port. This often involves depinning a single wire from the OBD2 adapter that may come with the head unit. This direct connection allows your head unit to display real-time vehicle information, diagnostics, and performance data directly on the screen, enhancing your driving awareness. For vehicle inspections, the OBD2 connection may need to be temporarily unplugged. Consider the placement if you already use your OBD2 port for other devices, like plug-and-play accessories.
10. Position Microphone for Optimal Call Clarity
For hands-free calling and voice commands, microphone placement is critical. While you might assume you can use the factory microphone, aftermarket head units typically require their own for optimal performance. The manufacturer-recommended location for the microphone is often behind the rearview mirror. This position is discreet and provides excellent sound quality by minimizing wind and road noise, ensuring clear communication during calls.
11. Enable iPhone Mirroring with the Right Cables
For iPhone users wanting to mirror their phone screen on the head unit display, additional cables are necessary. Purchase a compatible HDMI/USB combo cable and have it installed during the head unit setup. These cables can often be neatly routed to existing dash openings, like cigarette lighter sockets, for a clean and accessible connection point. This allows you to display apps, videos, and other content from your iPhone directly on your Pioneer or Kenwood screen.
12. Conduct a Pre-Installation Walkaround
Before any work begins, it’s essential to perform a thorough walkaround of your vehicle’s interior with the installer. Pay close attention to existing scratches or blemishes, especially on interior plastic trims, as these areas are most likely to be affected during a head unit installation. Documenting the pre-existing condition of your interior helps prevent any disputes about damage that may occur during the installation process. This proactive step ensures a transparent and agreeable service experience.
By following these tips, you can ensure a professional and satisfying installation of your new Pioneer or Kenwood head unit, unlocking its full potential and enjoying enhanced connectivity, entertainment, and vehicle integration. Remember to prioritize safety and consult with qualified professionals for any complex installations.