Enhancing your truck’s performance with a tuner like the Mini Maxx V2 can significantly improve its power and efficiency. For truck enthusiasts looking to get the most out of their vehicles, understanding the installation process and how these devices interact with your truck’s systems is crucial. A common question that arises when considering performance tuners is whether they can function without being plugged into the OBD2 port. This article will explore this question in detail, provide a comprehensive installation guide for the Mini Maxx V2 tuner, and answer frequently asked questions to ensure you have all the information you need.
Mini Maxx V2 Tuner Overview
The Mini Maxx V2 Tuner is a popular choice for diesel truck owners seeking to boost their vehicle’s performance. It’s designed to optimize engine parameters, often resulting in increased horsepower, torque, and improved fuel economy. This tuner is particularly favored for its ability to support EGR, DPF, and DEF delete kits, which are modifications aimed at enhancing engine efficiency and reducing emissions system complexity in off-road or competition settings. The Mini Maxx V2 is compatible with a range of heavy-duty trucks, including:
- GM Duramax (2007-2016)
- Ford Power Stroke (2008-2019)
- Dodge RAM Cummins (2007.5-2021)
This device offers pre-loaded tunes and monitoring capabilities, allowing users to customize their truck’s performance and keep an eye on vital engine metrics.
Preparing for Installation
Before you begin the installation of your Mini Maxx V2 tuner, it’s essential to ensure you have all the necessary components and tools. Proper preparation will make the installation process smoother and help avoid any unnecessary delays.
Parts & Checklist
Verify that your kit includes all of the following parts:
- Mini Maxx V2 Device
- OBD II Adapter Plug: This is crucial for connecting the tuner to your vehicle’s computer system.
- Windshield Mount: For securely mounting the device in your cabin.
- HDMI Cable: Used for connecting the display unit to the adapter.
- SD Card Reader & SD Card: For updating the device software and loading tunes.
- Mini USB Cable: Another option for device updates and connectivity.
- Fuse Tap & Fuse Spade: Necessary for wiring the tuner to your truck’s power source.
Tools Needed:
Gather these tools to assist with the installation:
- Fuse Puller: For safely removing fuses from the fuse box.
- Voltage Tester: To identify the correct fuse to tap into for power.
- Battery Charger: To maintain consistent voltage during the tuning process, which is critical.
- Pliers: For handling fuses and wire connections.
Step-by-Step Mini Maxx V2 Installation Guide
The installation of the Mini Maxx V2 tuner involves several key steps, from initial setup to final mounting. Follow this section carefully to ensure a successful installation.
Section 1: Pre-Install Checklist
Before you start the installation process, there are a few critical checks to perform:
- Use a Battery Charger: It is imperative to connect your vehicle to a battery charger before flashing your PCM. A stable power supply is crucial during the tuning process to prevent errors or damage to your vehicle’s computer. Do not proceed if your battery is not adequately charged.
- Allow Time for Initial Setup: The entire setup and installation can take up to 30 minutes. Ensure you allocate enough time to complete the process without interruptions.
Section 2: Updating the h&s Mini Maxx V2
Keeping your Mini Maxx V2 updated is important for optimal performance and compatibility. Here’s how to update it:
- Power On: Wait for the main screen of the Mini Maxx V2 to load.
- Change Vehicle: Scroll up in the menu and select “Change Vehicle”.
- Select Vehicle Make: Choose the make of your vehicle from the list.
- Select Vehicle Year and Model: Select the correct year and model of your truck.
- Confirm Selection: Press YES to confirm your vehicle selection.
- USB Mode: The Mini Maxx V2 will automatically load the necessary files and reboot into USB mode, preparing it for updates via a computer.
Section 3: Mini Maxx V2 Installation
This section covers the core installation steps within your vehicle:
- Turn Key to “On” Position: Turn your vehicle’s key to the “On” position, but do not start the engine.
- Navigate to Main Menu: Press the top left button to access the Main Menu.
- Select “Install Download”: Choose the “Install Download” option from the menu.
- Follow On-Screen Instructions: The device will guide you through the installation process with on-screen prompts.
- Key Position Prompts: You may be asked to switch the key between the “Off” and “On” positions. Follow these prompts carefully and press Continue as instructed.
- Important Engine Status: Do not start the engine at any point during the download process unless explicitly instructed by the tuner.
- Vehicle-Specific Settings: The tuner may prompt you to set vehicle-specific options like the speed limiter. Configure these settings as desired.
- Replace Removed Fuses: Once the installation is complete, remember to replace any fuses that you may have removed as part of the pre-installation checklist for certain GM vehicles.
Section 4: h&s Mini Maxx V2 Main Menu Navigation
Understanding the main menu navigation is key to using your Mini Maxx V2 effectively:
- Touch to Navigate: Use touch inputs to enter menus or return to the previous screen.
- Scroll Buttons: Utilize the physical buttons to scroll through the menu options.
- Touch to Select: Touch the screen to select the highlighted menu item and confirm your choice.
Section 5: Before Installation (GM Vehicles Specific Fuse Check)
For GM vehicles, there’s an additional step to consider before proceeding with the tune installation:
-
Check Fuses (GM Vehicles Only): Some GM vehicles may require fuse removal before tuning. While the original guide mentions a fuse check card, it notes this is a typo in early packaging and no fuse card exists, nor is fuse removal necessary for all GM vehicles. However, it is still recommended to check your vehicle’s specific requirements or consult with support if you encounter issues related to fuses during installation on a GM vehicle.
-
Ensure Battery Charge: Re-confirm that your vehicle is connected to a battery charger before starting the installation to maintain voltage stability.
-
Turn Electronics Off: Ensure all vehicle electronics, including the stereo, are turned off during the installation process. This minimizes potential electrical interference and ensures a smooth tuning process.
-
Uninterrupted Download: Do not interrupt or disconnect the Mini Maxx V2 at any point during the download process. Keep all electronics off throughout the entire process to prevent any issues.
Section 6: Installation Process (Key Toggle)
This section reiterates the key steps during the installation download:
- Turn Key to “On” Position: Ensure the engine is not started.
- Go to Main Menu: Access the Main Menu using the top left button.
- Select “Install Download”: Choose “Install Download” from the menu options.
- Follow On-Screen Instructions: Continue to follow the prompts displayed on the Mini Maxx V2 screen.
- Key Cycling: The system might prompt you to toggle the key between the “Off” and “On” positions. Respond to these prompts as directed.
- Engine Status: Do not start the engine during the installation process unless specifically instructed.
- Vehicle Options: The system may ask you to set vehicle-specific options, such as the speed limiter. Configure these settings according to your preferences.
- Replace Fuses: After the installation is finished, replace any removed fuses if applicable to your vehicle.
Section 7: Finalizing the Installation (Fuse Tap Connection)
To ensure the Mini Maxx V2 powers on and off correctly with your vehicle’s ignition, you’ll need to finalize the power connection using a fuse tap:
- Locate the Key-On Fuse: Use a 12-volt test light or your vehicle’s manual to locate a fuse that is powered only when the key is in the “On” (or “Run”) position.
- Test Fuse Socket: With the key in the “On” position, use the 12-volt test light to probe both sides of the fuse socket. Identify and mark the side that does not light up; this is the unpowered side.
- Connect Power Cable to Fuse Box: Crimp the fuse spade onto the power wire of the Mini Maxx V2 cable. Place the fuse tap over one metal prong of the identified key-on fuse.
- Secure the Fuse Tap: Slide the fuse spade onto the fuse tap prong and re-insert the tapped fuse into the fuse box, making sure it’s placed into the unpowered (accessory) side of the fuse socket you identified earlier.
- Ground Wire: The black ground wire in the power cable is typically not required for most installations but can be grounded to a suitable chassis point if needed.
- Connect Power Cable to Adapter: Attach the power cable to the OBD2 adapter and set the adapter switch to KEY. This setting ensures the tuner powers on and off with the ignition.
- Run the HDMI Cable: Neatly route the HDMI cable under the dash or weather stripping to keep it hidden and protect the Mini Maxx V2 setup from damage and keep your cabin tidy.
Section 8: Mounting the Mini Maxx V2
The final physical step is mounting the Mini Maxx V2 in your truck’s cabin:
- Clean the Windshield: Ensure the windshield area where you plan to mount the device is clean and dry for optimal suction cup adhesion.
- Test HDMI Cable Length: Before mounting, stretch out the HDMI cable to ensure it reaches from the OBD2 port to your desired mounting location on the windshield with a little slack.
- Attach to Mount: Attach the Mini Maxx V2 device to the Universal Windshield Mount (UWM) using the T-slot on the back of the device.
- Secure Mount to Windshield: Position the suction cup mount on the cleaned windshield area and press the lever down to secure it in place.
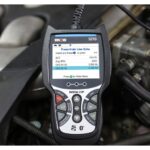
 Mini Maxx V2 Device and OBDII Adapter Plug
Mini Maxx V2 FAQs and Troubleshooting
This section addresses common questions and issues that users may encounter with the Mini Maxx V2 tuner.
Q: Can a Mini Maxx tuner work without plugging into the OBD2 port?
A: No, the Mini Maxx V2 tuner requires a connection to your vehicle’s OBD2 port to function. The OBD2 port is the communication gateway between the tuner and your truck’s engine control unit (ECU) or powertrain control module (PCM). This connection is essential for the tuner to read engine data, apply performance tunes, and monitor vehicle parameters. Without the OBD2 connection, the Mini Maxx V2 cannot interact with your vehicle’s computer system to deliver any performance enhancements or monitoring features. The keyword “Can A Minimaxx Tuner Work Not Pluggrf Into Obd2” likely stems from a misunderstanding or a question about alternative installation methods, but for the Mini Maxx V2 and similar performance tuners, the OBD2 port connection is mandatory.
Q: The h&s mini maxx tuner install instructions mention a fuse removal list for GM products that I can’t find. Is there another source?
A: The “fuse card” reference in some older h&s mini maxx tuner installation guides is a misprint from early packaging batches. There is no fuse card, and typically, no fuses need to be removed for GM vehicles during installation. You only need to wire the power wire into a switched 12V fuse to control the tuner’s power with the ignition. To locate a suitable fuse, use a 12V test light or multimeter to find a fuse in your fuse box that receives 12V power when the ignition is on and loses power when the ignition is off.
Q: I tried updating my Mini Maxx V2, but it’s stuck on “initializing communication.” What should I do?
A: If your tuner is stuck on “initializing communication,” first ensure that the SD card is fully inserted into the device. If the issue persists, try these methods:
Method #1 (Battery Disconnect)
- Disconnect the tuner from the OBD-II port and turn off the ignition.
- Disconnect both battery cables from your vehicle’s batteries.
- Charge both batteries to full capacity while disconnected.
- Reconnect the battery cables, reinstall the h&s mini maxx tuner, and turn the ignition to the ‘On’ position.
- Navigate to Diagnostics and clear any diagnostic trouble codes (DTCs).
- Select Install Download and proceed with the on-screen prompts, but do not turn off the ignition when prompted. Instead, press Continue while the ignition remains on.
Method #2 (Partial OBD Port Connection)
- Unplug the tuner cable from the OBD port, specifically the power supply part of the connection.
- Slowly plug the cable back in until the tuner powers on and beeps, ensuring only the power pins make contact initially.
- Once powered up, press the top-left menu button and navigate to “Change Vehicle.”
- Fully plug in the tuner cable into the OBD port and attempt to tune the vehicle again.
Q: My programmer constantly loses connection at startup, cruise control is not working, and I get a low coolant level warning. What’s wrong?
A: First, check all cables and connections to ensure they are properly seated and functional. If the issue persists, and you notice that cruise control works again after uninstalling the device, it’s possible that the Mini Maxx V2 is incompatible with your vehicle’s operating system or there is a conflict. Contact technical support to verify compatibility or troubleshoot further.
Q: After installing the Mini Maxx on my LML Duramax 2012 GMC Sierra 3500HD, I can’t change the power level anymore. How do I adjust it?
A: For 2011-2016 Duramax models, the Mini Maxx V2 does not support Shift-On-The-Fly (SOTF) power level adjustments. To change the power level, you need to go to the menu, select “Install Download,” and then choose the desired tuning level to load onto your vehicle.
Q: I installed a Mini Maxx on a 2015.5 Duramax, and now the fuel gauge bounces and cruise control doesn’t work. Is this normal?
A: A bouncing fuel gauge and non-functional cruise control after installation on a 2015.5 Duramax might indicate a compatibility issue, particularly if your truck has dual fuel tanks. The Mini Maxx V2 for 2015.5 models may only support single fuel tank configurations. Verify your vehicle’s fuel tank configuration and consult with support to ensure compatibility.
Q: I have a 2014 RAM 6.7 Cummins, and after tuning, I got a U12A4 code. What does this mean?
A: The U12A4 code is not commonly associated with Mini Maxx V2 installations on 2014 RAM 6.7 Cummins. While one user mentioned coolant fault cleared after adding coolant, U12A4 itself requires proper diagnosis. It’s advisable to have this code professionally diagnosed to determine the root cause, as it may not directly relate to the tuner installation.
Q: I’m getting DTC fault codes P051C, P04E2, P1478, and P1474 after installation. How do I clear them, and why do they reappear?
A: These DTC codes (P051C, P04E2, P1478, P1474) suggest issues possibly related to Crankcase Ventilation (CCV) system deletes, which are not directly supported by the Mini Maxx V2. While the tuner can clear codes, they will reappear if the underlying issue persists. If you have performed a CCV delete, the Mini Maxx V2 may not be compatible with this modification. These DTCs should be professionally diagnosed, as they may indicate system incompatibilities or other mechanical issues.
Q: The update link for the tuner isn’t working. It gets stuck on ‘Downloading latest update.’ What should I do?
A: If the updater is freezing during download, try using a different computer, preferably one running Windows 10 or 11. Ensure your internet connection is stable and retry the update process. If issues persist, check the Mini Maxx support website for alternative update methods or contact customer support for assistance.
Q: Should the tuner remain on at all times if the power cord is hooked to a 12-volt switch during installation, even when the truck is off?
A: No, the tuner does not need to remain on at all times. Wiring it to a switched 12-volt source means it will power on and off with your vehicle’s ignition. This is the recommended setup as it prevents unnecessary battery drain and ensures the tuner is only active when the vehicle is in use.
Q: After installing the tune, I have no cruise control, and the boost gauge always reads zero. How can I fix this?
A: The boost gauge reading zero on LML Duramax models is a known issue with the Mini Maxx V2. Regarding cruise control, if it stops working after installation and returns to normal upon uninstalling the device, it suggests a conflict between the tuner and your vehicle’s cruise control system. Check for any software updates for the Mini Maxx V2 that may address this or consult technical support for vehicle-specific advice.
Q: What should I do if the tuner says it’s in engine recovery mode during installation?
A: Engine Recovery Mode usually indicates a failed tuning process. This can happen due to voltage drops or interruptions during flashing. Only the same tuner that initiated the tuning process can resolve recovery mode on the same truck. Try reinstalling the tune using the same device. This should revert the truck to stock and allow you to attempt the tuning process again. If the tuner cannot get the truck out of recovery mode, and the vehicle won’t start, you may need to have the vehicle flashed back to stock by a dealership.
Q: Will installing a Fleece CP3 conversion and having a DEF delete already done cause issues with tuner installation?
A: Having a DEF delete already performed might cause issues because the intended installation sequence is typically to flash the tuner first and then install emission delete components. A service message or DTCs might occur. The Fleece CP3 conversion itself should be compatible as long as it does not require custom tuning beyond what the Mini Maxx V2 provides. Monitor for any error codes or unusual behavior after installation and consult support if needed.
Q: After using the tuner to increase horsepower, my HVAC controls on the dash stopped working. Is there a fix?
A: HVAC control issues are not commonly reported with Mini Maxx V2 installations. Ensure that the tuner is correctly wired and not interfering with other electronic accessories. Try updating the Mini Maxx V2 to the latest firmware. If the problem persists, the device may be defective and require replacement.
Q: My tuner screen stopped turning on and just beeps. What could be the issue?
A: A black screen with beeping suggests a hardware issue. Try powering the device via the USB port on the side, connected to a PC or laptop. If it still doesn’t power on, the unit is likely defective and needs replacement. Contact support for troubleshooting steps or to arrange a replacement.
Q: I’m getting a P2457 exhaust gas recirculation coolant performance issue fault. What is the corrective action?
A: The P2457 code is not commonly encountered. First, try disconnecting the vehicle batteries for about 10 minutes, then reconnect them. If the code returns, it’s likely that the EGR temperature sensor is still plugged in, which should be disconnected when using the Mini Maxx V2 for emissions-deleted setups. Ensure all emission-related sensors that are meant to be disconnected are indeed unplugged.
Q: After installing the h&s mini maxx tuner, bank 1 injectors are not working, and I get codes P1291 and P060A. What should I do?
A: Codes P1291 and P060A, especially injector issues appearing immediately after tuner installation, suggest a potential incompatibility between the tuner and your vehicle’s software. If returning to the stock tune resolves these codes, it indicates the Mini Maxx V2 may not be compatible with your specific vehicle software or OS. Further investigation or a different tuning solution may be needed.
Q: Everything seems to work, but I’m not getting readouts for RPM and boost. Do I need the unlock cable connected at all times?
A: No, the unlock cable is only needed for initial programming on certain RAM models and not for continuous operation or gauge readouts. Missing RPM and boost readouts are unusual. Reinstall the device, ensuring all cable connections, especially at the OBDII port, are secure and functioning correctly. If the issue persists, there might be a problem with the OBDII connection or the tuner’s data reading capability.
Q: Will the tune delete the 2-crank ventilation sensor? I keep getting a check engine light and codes P04DB and P0868 after installation.
A: The Mini Maxx device does not support Crankcase Ventilation (CCV) deletes, only CCV reroutes. Codes P04DB and P0868 indicate other issues; P0868 is related to low transmission fluid pressure, which is a serious concern and should be investigated immediately. The check engine light and these codes are not related to CCV sensor deletion by the tuner, as it does not perform this function. Address the P0868 code urgently and consult a mechanic for the transmission issue.
Q: After installing the Mini Maxx V2, I’m experiencing interference with Bluetooth, compass, radio volume, and heated seats. Unplugging the unit resolves these issues. Is my unit faulty?
A: Interference with vehicle electronics like Bluetooth, compass, radio, and heated seats is unusual and suggests potential electronic interference from the Mini Maxx V2. The heated seats and steering wheel issues might be due to the vehicle trim level, as the Mini Maxx V2 may not fully support all electronic accessories in certain trims. However, broader interference issues could indicate a faulty Mini Maxx V2 module. Contact support to investigate if your unit is causing electronic interference.
Q: The tuner reads 241 percent throttle constantly and won’t shut off. Is this normal?
A: A constant 241 percent throttle reading is normal and is due to the throttle valve being unplugged, as is required for emissions-deleted setups. The tuner remaining on until unplugged suggests it might not be wired correctly to a switched ignition source. Double-check your fuse tap and wiring to ensure it’s connected to a key-on fuse and that the adapter switch is set to ‘KEY’.
Q: During initial setup, I chose “return to stock” instead of “shift on the fly.” Can I change this to access the tunes now that I’ve done a complete delete?
A: Yes, you can change this setting. You can go back into the tuner menu and select the Shift-On-The-Fly (SOTF) option to access and apply the performance tunes. Navigate through the menu to find the tuning setup options and change your selection to SOTF to enable tune selection.
Q: What are the differences between the Mini Maxx V1 and V2?
A: The V2 is the newer model, released in 2022, while the V1 is discontinued. Key differences include:
- Emissions Support: V2 does not support emissions systems; emission removal is required. V1 had some support but was often used for deletes as well.
- Vehicle Compatibility: V2 supports later model years (up to 2019 Ford, 2021 RAM, 2016 Duramax), expanding compatibility.
- Features: V2 does not support custom tuning, overdrive transmission tuning, or all special functions of the V1.
- Part Numbers: V1 = 109003, V2 = 209003.
The V2 is designed as a more streamlined, delete-focused tuner for newer vehicles within its compatibility range.
Q: Why didn’t my tuner ask about emissions removal during setup?
A: The h&s mini maxx V2 is designed for emissions-deleted vehicles and does not support emissions systems. Therefore, it does not prompt about emissions equipment during setup because it assumes that emissions components will be removed or are already removed when using this tuner.
Q: Do I need to remove my emissions when running the h&s mini maxx V2?
A: Yes, emissions removal is mandatory when using the h&s mini maxx V2. The DPF, DEF, and SCR sections of your exhaust system must be removed, and sensors in these pipes should be disconnected (ideally left in the exhaust and disconnected upon removal). The EGR system can be left installed but must be disconnected. The throttle valve also needs to be unplugged or removed for proper operation with the Mini Maxx V2.
Q: How do I use the security bypass cable on my 2018+ RAM?
A: For 2018+ RAM trucks, a security bypass cable (#42215) is required. This cable kit includes a replacement OBD box (with a red stripe) and a USB cable. Replace the standard OBD box from the Mini Maxx V2 kit with the bypass version. Connect the USB cable from the bypass OBD box to the green connector behind the dash, specifically the 5th port down on the connector closest to the driver’s seat. Ensure you are using the correct port, as incorrect port connection can cause the tuner to freeze during installation. Important: Only use update files from authorized sources; do not update with files from other websites.
Q: Why am I getting Error 294?
A: Error 294 indicates that you are attempting to install the tuner on an unsupported vehicle. This error commonly occurs if you are trying to install it on a 2010-2012 RAM 4500-5500, as these models are not supported by the Mini Maxx V2. Verify the compatibility list to ensure your vehicle is supported.
Q: Can the Mini Maxx V2 be unlocked?
A: No, the Mini Maxx V2 cannot be remotely unlocked. It is VIN-locked to the vehicle it is initially installed on and cannot be transferred or unlocked for use on another vehicle.
Q: Can I use the update for the V2 on a V1 tuner?
A: No, do not use the h&s mini maxx V2 update on an h&s mini maxx V1. Doing so will render your V1 tuner inoperable. Updates are not cross-compatible between V1 and V2 models. There are no official updates available for the discontinued h&s mini maxx V1.
Q: Does the Mini Maxx need to stay plugged in after I tune my truck?
A: No, the Mini Maxx tuner does not need to remain plugged in after tuning your truck. Once the tune is installed, you can unplug the device. If removed, the tune will remain active, but the power level will default to the “no power” setting after a few drive cycles. The delete tuning will remain in effect, but you will effectively be running at the base tune level.
Q: Where should I wire the fuse tap?
A: Wire the fuse tap to a fuse location in your vehicle’s fuse box that provides switched ignition power. This means the fuse should receive 12V power when the key is in the ON position and 0V when the key is OFF. Use a circuit tester to identify such a fuse in your fuse box.
Q: Why does my tuner display “warm-up mode”?
A: “Warm-up mode” is a feature designed to limit engine power until the engine reaches its optimal operating temperature. This is controlled by refueling parameters within the tune. You can adjust these settings in the tuner menu under [Menu>Vehicle Setup>Defueling] to customize how warm-up mode behaves.
Q: While installing with shift-on-the-fly, all tunes feel like stock. There’s no difference between stock, tow, performance, and extreme. Why?
A: Ensure that there is no grease or water on the radio Data Link Interface (DLI) connector, which could cause electronic glitches. Clean the radio DLI connector thoroughly. If the issue persists, the device may be causing electronic interference with your vehicle’s radio or ECU communication. Also, ensure you are correctly selecting and loading different tune levels through the tuner’s menu as simply selecting SOTF during setup does not automatically switch between tunes.
Q: The tuner display sometimes changes color from blue to red. What causes this?
A: The color change from blue to red is a known display glitch. It is a cosmetic issue with the display and does not affect the tuner’s functionality. The device itself is operating correctly, even if the display color inverts or flips unexpectedly.
Q: My tuner was working, but now the screen is black and just beeps. What’s wrong?
A: A black screen with continuous beeping usually indicates a hardware malfunction or loose connection. First, try replacing the HDMI cable and check all cable connections to ensure nothing is loose or disconnected. If the issue persists after checking connections and cables, the device may have an internal hardware failure and might require replacement.
Q: After updating, it shows “VIN mismatch,” software version 2.0.0.1, and I can’t update further. What does this mean?
A: A “VIN mismatch” error suggests that the tuner is locked to a different vehicle’s VIN. This can occur if you are trying to install the tuner on a vehicle different from the one it was initially installed and VIN-locked to. To resolve this, the tuner needs to be fully uninstalled from the original vehicle it was locked to before it can be used on a different one—though Mini Maxx V2 is generally VIN-locked and not intended for transfer between vehicles.
Q: I checked power levels and noticed no change. The tuner reads my truck as a 2001, but it’s a 2017. What’s the solution?
A: The “2001” year display might be a cosmetic display error, as long as the tuner is correctly VIN-locked to your actual vehicle. For power level changes not being noticeable and incorrect year display, ensure you are correctly changing tune levels through the menu: Menu > Install Download > Pick Tune Level to Load. For 2017 Fords and similar models without SOTF, power level changes are applied by re-flashing with a different tune level, not by real-time switching. Regarding update issues, the updater may not recognize the SD card if it’s not named “MINI MAXX.” Ensure the SD card is named exactly “MINI MAXX” for the updater to recognize it.
Final Remarks
Proper installation and understanding of your Mini Maxx V2 tuner are essential to maximizing your truck’s performance and enjoying the benefits of custom tuning. Always follow each step carefully, and for any persistent issues or questions not covered in this guide, it is recommended to refer to the troubleshooting section or reach out to customer support for expert assistance.