Embarking on an OBD2 to OBD1 conversion for your BMW E36 M3 might seem like venturing into complex territory, but for enthusiasts seeking enhanced performance and a more direct tuning experience, it’s a worthwhile journey. Discussions across platforms like bimmerforums.com reveal a wealth of knowledge, yet often the process is simplified as just an “electronics swap.” Having navigated this conversion myself, relying heavily on bimmerforums and countless hours poring over Bentley manual wiring schematics, I can attest that it’s a significantly more involved undertaking.
This guide aims to provide a comprehensive, experience-based walkthrough of the OBD2 to OBD1 conversion for your E36 M3, drawing upon insights gleaned from the bimmerforums community and practical application. We’ll delve into each step, ensuring you’re well-equipped to tackle this upgrade, moving beyond the oversimplified narratives often encountered.
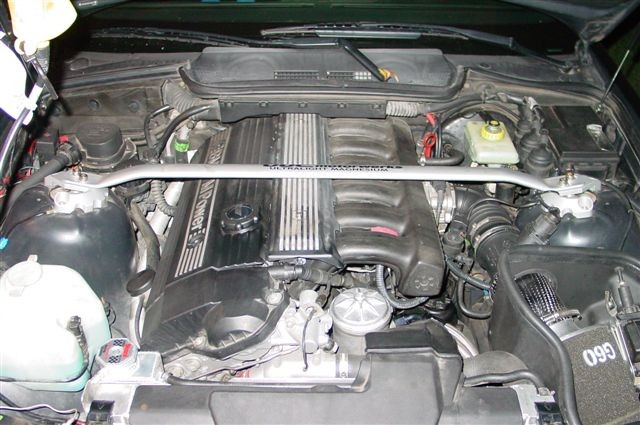
Here’s a glimpse of what an OBD2 S52 engine looks like before the conversion process begins:
My project car was a 1999 M3, originally equipped with OBD2 engine management and the EWS (Electronic Immobilizer System). To perform the conversion, I sourced an OBD1 engine wiring harness from a 1994 325i, paired with the highly sought-after red-label 413 ECU. For engine management software, I opted for a performance chip from Active Autowerkes, a popular choice discussed within bimmerforums for OBD1 conversions.
Essential Parts for Your OBD2 to OBD1 Conversion
To successfully convert your OBD2 E36 M3 to OBD1, you’ll need a specific set of components. Gathering these parts is the first crucial step in the conversion process. Here’s a comprehensive list of the essential items:
- OBD1 Engine Wiring Harness: The backbone of the electrical conversion, this harness is designed for the OBD1 system.
- OBD1 ECU (413 “Red Label” Preferred): The engine control unit. The “red label” 413 ECU is favored for its origin in non-EWS vehicles, simplifying installation.
- OBD1 Performance Chip: Essential for optimizing engine performance with the OBD1 system.
- OBD1 Intake Manifold: Known for its superior airflow compared to OBD2 manifolds, contributing to performance gains.
- OBD1 Fuel Rail: Necessary to accommodate the OBD1 fuel delivery system and fuel pressure regulator setup.
- OBD1 Crank Position Sensor: Different in location and type from OBD2, this sensor is crucial for OBD1 engine management.
- OBD1 Cam Position Sensor: Required for OBD1-specific camshaft position detection.
- OBD1 Knock Sensors (x2): For engine protection, OBD1 knock sensors are essential.
- OBD1 Oxygen Sensor: OBD1 systems utilize a single pre-catalyst oxygen sensor, unlike the multiple sensors in OBD2.
- OBD1 HFM (Hot-Film Air Mass Meter): The air mass meter compatible with the OBD1 system.
- OBD1 Main Engine Coolant Hose: The larger hose connecting the coolant pipe to the timing cover, heater core, and expansion tank, differing from OBD2.
- OBD1 Throttle Boot: Designed to connect the OBD1 throttle body and air intake system.
- OBD1 Throttle Body (Optional): While optional, using an OBD1 throttle body can simplify the throttle body gasket and adapter issues.
- OBD1 Valve Cover and Coil Packs (Optional): Optional, but can streamline coil pack wiring and aesthetics.
While conceptually straightforward, the OBD1 conversion involves numerous details that require careful attention. Let’s break down the critical steps:
Step-by-Step OBD2 to OBD1 Conversion Guide
1. Valve Cover and Coil Packs: OBD2 vs OBD1 Considerations
The OBD2 valve cover lacks the necessary routing provisions for OBD1 coil pack connectors. OBD2 wiring enters from the passenger side, while OBD1 wiring enters from the driver’s side. You have two primary choices here: retain your OBD2 valve cover and coil packs, or switch to OBD1 components. Both OBD2 and OBD1 coil packs are compatible with the OBD1 harness.
I opted to keep my OBD2 valve cover and carefully modify it using a Dremel tool to accommodate the OBD1 wiring routing.
Here’s a comparison of the OBD2 and OBD1 coil setups:
2. Vanos Solenoid Wiring: Extending the OBD2 Connector
The OBD2 Vanos solenoid wire connector is shorter than its OBD1 counterpart. To address this, you can either replace your OBD2 solenoid with an OBD1 version or extend the OBD2 wiring. I chose to extend the existing OBD2 solenoid wiring using BMW part # 12-52-2-274-971. Interestingly, this BMW part is actually a transmission harness intended for connecting the engine harness to the reverse light switch, but its connectors are perfectly compatible with the Vanos solenoid.
3. Coolant Pipe Adapter: Bridging the OBD1/OBD2 Difference
The main coolant pipe originating from the timing cover differs between OBD1 and OBD2 configurations. OBD2 models utilize a metal pipe fixed within the timing case cover with sealant, whereas OBD1 systems employ a rubber hose connected to an aluminum neck protruding from the timing case cover.
You have options here: replace your OBD2 timing cover with an OBD1 version (costlier at around $100) or use a coolant pipe adapter (approximately $20) available from vendors like Bimmerworld, Active Autowerkes, or Turner Motorsport. The adapter fits into the OBD2 timing case cover and is secured using JB Weld, allowing you to then clamp the OBD1 coolant hose. I opted for the coolant adapter for its cost-effectiveness and ease of installation.
4. Intake Manifold Swap: Unlocking Performance Gains
A key advantage of the OBD1 conversion lies in the intake manifold. The OBD1 M50 intake manifold boasts superior airflow compared to the OBD2 (M52/S52) intake manifold. This swap is essential for realizing the performance gains from an OBD1 conversion. The OBD1 manifold includes an air temperature sensor and a vacuum port for the fuel pressure regulator on its underside, near the firewall. Notably, the M50 intake manifold is a direct bolt-on to M52/S52 cylinder heads, requiring no modifications.
5. Throttle Body Solutions: Adapters and Gaskets
You can reuse your OBD2 throttle body, but it necessitates an adapter for proper gasket sealing. The OBD1 throttle body features a flat mating surface designed for a gasket on the OBD1 intake manifold. Conversely, the OBD2 throttle body has a gasket within the throttle body itself, clamping to a flat surface on the OBD2 intake manifold.
Two solutions exist: an adapter plate (around $20) placed between the OBD2 throttle body and OBD1 manifold, providing mating surfaces for both gasket types, or an extended gasket (about $15) allowing direct clamping of the OBD2 throttle body to the OBD1 intake manifold. Naturally, using an OBD1 throttle body eliminates the need for any adapters. I chose the adapter plate for its straightforward installation.
6. Coolant Temp Sender Wiring: Plug and Play or Splice
OBD2 management uses a single coolant temperature sender located on the cylinder head, beneath the intake runner for cylinder #1. OBD1 systems, however, utilize two temperature senders situated on the cylinder head under intake runners #1 and #2.
To accommodate this, you can splice the main engine harness wiring and repurpose the OBD2 plug connector from your original harness for connection to the single OBD2 temp sender. Alternatively, for a cleaner, plug-and-play solution, Turner Motorsport offers a coolant temperature sender wiring adapter (around $50). I opted for the cleaner adapter solution for a more professional and reliable connection.
7. Crank Position Sensor: OBD1 Sensor is a Must
The OBD2 crank position sensor is positioned on the engine block in front of the starter motor. In contrast, the OBD1 crank position sensor is located on the timing cover, mounting on a circular tab with a 6mm Allen bolt. For the OBD1 conversion, using an OBD1 crank position sensor is mandatory. Simply leave the OBD2 sensor in its original location to plug the hole; it will no longer be functional.
8. Fuel Line Modifications: Adapting to OBD1 Fuel Rail
The fuel delivery system differs significantly between OBD2 and OBD1. OBD2 fuel rails have both fuel lines connected at the rear, near the firewall, and the fuel pressure regulator is located under the car, forward of the fuel filter. OBD1 fuel rails have the supply line at the front and the return line at the back, near the firewall. Moreover, the OBD1 fuel pressure regulator is integrated into the fuel rail itself.
Using the OBD1 fuel rail is essential for this conversion, necessitating modifications to your fuel lines. You’ll need to remove the OBD2 fuel pressure regulator from under the car and run new 8mm fuel lines to the OBD1 fuel rail. Hard lines on the chassis between the OBD2 fuel filter and engine bay need to be bridged with new fuel line, connecting the fuel filter feed to the front of the OBD1 fuel rail and the return line from the back of the fuel rail to the under-car return line. Don’t forget to connect the OBD1 fuel pressure regulator vacuum line to the one-way valve on the underside of the OBD1 intake manifold, located at the back corner closest to the firewall.
9. PCV System: OBD2, OBD1, or Catch Can Options
The crankcase ventilation (PCV) system also differs between OBD2 and OBD1. Several approaches can address this:
- OBD2 Valve Cover (Retained): If you keep your OBD2 valve cover, you can retain the OBD2 PCV setup. This requires devising a method to mount the breather valve (the cone-shaped plastic valve with a round breather top) under the intake manifold.
- OBD1 Valve Cover (Swapped): If you switch to an OBD1 valve cover, utilize the OBD1 breather valve, which clips onto the crankcase vent port. The OBD1 valve connects via a vacuum line to the plug joining the ICV to the intake manifold, and a larger oil drain line runs to the dipstick.
- Breather Catch Can: A third option is to connect a hose to the crankcase vent and install a breather catch can system.
I opted for a hybrid approach, utilizing a short length of 1” rubber hose to connect my OBD2 valve cover to the OBD1 breather valve. I then used a barbed connector to join the oil drain line to my dipstick.
10. Idle Control Valve (ICV): Reusing Your OBD2 ICV
Good news – the OBD1 and OBD2 Idle Control Valves (ICVs) are identical. You can reuse your OBD2 ICV. You will, however, need to acquire the correct connector and hose for the ICV-to-intake manifold connection, along with the hose connecting the ICV to the throttle boot vacuum port, ensuring compatibility with the OBD1 intake and throttle body setup.
11. Fuel Tank Breather Valve: Adapting Vacuum Hoses
Similarly, you can reuse your OBD2 fuel tank breather valve. Adaptation involves sourcing fittings to connect the vacuum hose to the vacuum port on the throttle boot. A trip to the hardware store for 3/8” and 5/8” barb fittings should provide the necessary components to rig up a connection to the throttle body vacuum port.
12. Oxygen Sensors and Secondary Air Pump: Streamlining Emissions
Only OBD2 systems incorporate secondary air pumps. This emission control system is entirely eliminated during the OBD1 conversion, a point often discussed on bimmerforums for its simplification. Furthermore, you’ll remove your two pre-catalyst OBD2 O2 sensors in the OBD2 exhaust headers and the two post-catalyst OBD2 O2 sensors in the catalytic converter. Remember to plug the O2 sensor ports; M18 bolts are suitable plugs, readily available at auto parts stores (FYI, Toyota Land Cruiser oil pan drain bolts are M18). OBD1 management uses only a single pre-catalyst OBD1 oxygen sensor, simplifying the O2 sensor setup significantly.
13. Oil Pan and Dipstick: OBD2 Compatibility
Contrary to some information circulating, including discussions on bimmerforums, you do not need an OBD1 oil pan and dipstick for this conversion. Your OBD2 oil pan and dipstick are fully compatible and can be used without any issues or modifications, saving unnecessary expense and labor.
14. EWS (Immobilizer) Considerations: Wire #66 Modification
The presence of EWS (Electronic Immobilizer System) varies across E36 models. My ECU source was a non-EWS vehicle, yet ignition issues persisted post-conversion. A straightforward modification to the main engine harness resolves EWS-related problems. Remove the protective rubber boot from the ECU connector and cut wire #66. While typically solid green, Bentley wiring diagrams indicate it may also be black/violet. Cut the wire and insulate both ends with electrical tape. This modification is a common workaround discussed on bimmerforums for using non-EWS ECUs in EWS-equipped cars.
15. Power Distribution and Grounding: Careful Relocation and Connections
Crucially, ensure the negative battery terminal is disconnected before undertaking any power or grounding work. The OBD2 main battery positive post is located on the passenger side, near the ECU compartment. The OBD2 distribution box is mounted parallel to the fender with two M10 bolts.
Relocation of this distribution box is necessary to reach the power connections on the OBD1 harness. Removing the secondary air pump frees up two screw holes, allowing you to reuse the M10 bolts to reposition the distribution box closer to the engine, parallel to the firewall. It’s a tight fit, but it will reach, enabling connection to the main power feed for the OBD1 harness.
A ground connection will be found under the OBD diagnostics port. Carefully verify power and ground connections: power feeds are typically RED, and grounds are BROWN or BLACK. If unsure, peel back wiring sheath to confirm wire colors. A large power feed goes to the starter, and a smaller power feed goes to the fuse box. Another ground connection to note is a small wire (with a round terminal connector) originating from the spark plug rail, which needs to be grounded to the bolt securing the engine hoist loop on the Vanos unit.
16. General Wiring Tips: Labeling is Key
Label connectors meticulously before attempting harness installation. Utilize Bentley wiring schematics and methodically check and label each plug on the harness using painter’s tape and a marker, clearly indicating its intended connection. The harness can appear as a jumbled mess, and connectors can become indistinguishable once in the engine bay. Fortunately, wire lengths are generally practical, and connectors are located in the general vicinity of their connection points.
Taking photographs of power and ground connections during OBD2 wiring disassembly is highly recommended. Also, photograph the starter wiring connections to prevent later confusion—four wires can indeed cause considerable head-scratching!
Conclusion: OBD1 Conversion Achieved
The OBD1 conversion is undoubtedly an involved process, demanding meticulous planning and execution, as you might gather from discussions on bimmerforums. However, the rewards are tangible: enhanced engine management simplicity, improved tuning capabilities, and for many, a step closer to the raw driving experience sought in earlier BMW models.
Remember, thorough research, leveraging resources like bimmerforums.com, and careful attention to detail are paramount for a successful conversion. While this guide provides a detailed roadmap, your specific experience may vary. Don’t hesitate to consult bimmerforums and other online communities for further insights and support as you undertake your own OBD1 conversion.
Here’s the final configuration of my converted setup:
1999 M3 OBD1 S52 AA Cam Chip Sunbelt Cams Euro 3.5″ HFM Conforti 3.5″ Intake 24lb Injectors Sunbelt Valve Springs ARP Headstuds AA Race Headers AA Race Exhaust Zionsville Competition Radiator Euro Oil Cooler
And here’s how the OBD1 S52 engine looks after the conversion:
Dyno Results and Performance Tuning
9-24-06 Dyno Update:
Initial dyno results after the conversion yielded 253 rear-wheel horsepower (RWHP) and 228 lb-ft of torque (TQ). These figures aligned with my expectations for the setup. The air-fuel ratio indicated a rich condition, suggesting further optimization was possible. I sent the dyno results to Active Autowerkes for software revision to lean out the mixture, anticipating further performance gains. Another dyno session was planned to assess the final output with the revised software.
10-19-06 Dyno Update:
Following software revisions from Active Autowerkes, a subsequent dyno run resulted in 262 RWHP and 230 TQ. The air-fuel ratio was optimized, and I was pleased with the final results. The OBD1 conversion, combined with performance modifications and tuning, delivered a noticeable power increase.