Maintaining your vehicle is crucial for its longevity and performance. For Toyota owners, understanding how to perform routine maintenance, especially on complex systems like automatic transmissions, can save money and ensure your car runs smoothly. One often overlooked but vital service is the automatic transmission fluid (ATF) change. Modern vehicles, like many Toyota models, require a specific procedure for ATF changes, often involving monitoring the transmission fluid temperature using the On-Board Diagnostics (OBD2) system. This guide will walk you through how to perform an automatic transmission fluid drain and fill on your Toyota, utilizing the OBD2 system for accurate maintenance.
This DIY guide is tailored for car enthusiasts and Toyota owners who are comfortable with basic car maintenance. While this procedure is within reach for those with moderate mechanical skills, it’s essential to proceed with caution. Incorrect procedures can lead to serious transmission damage. Always consult your Toyota Factory Service Manual for your specific model for detailed instructions and safety information. We are not responsible for any damage resulting from attempting this procedure.
One of the key differences in servicing modern Toyota automatic transmissions compared to older models is the absence of a transmission fluid dipstick. Instead of relying on a dipstick, Toyota uses an overflow plug system to ensure the correct fluid level. Crucially, the ATF temperature must be within a specific range, typically between 115°F (46°C) and 130°F (56°C), to accurately check the fluid level. Toyota technicians use specialized scan tools to read the ATF temperature. However, for DIYers, the vehicle’s built-in OBD2 system can be utilized to enter a “temperature check mode,” indicated by the “AT TEMP” light on your dashboard.
Materials You’ll Need for Automatic Obd2 Maintenance:
Before starting your automatic transmission fluid change, gather all the necessary tools and materials. Having everything ready will make the process smoother and more efficient.
- Sockets and Wrenches:
- 24mm socket or wrench (for the fill plug)
- 14mm socket or wrench (for the drain plug)
- 5mm hex socket or Allen key (for the overflow plug)
- Toyota ATF WS Fluid: Purchase 4-5 quarts of genuine Toyota ATF WS (World Standard) fluid. Using the correct fluid is critical for your transmission’s performance and longevity. Do not use aftermarket fluids unless they are explicitly certified as Toyota ATF WS compatible.
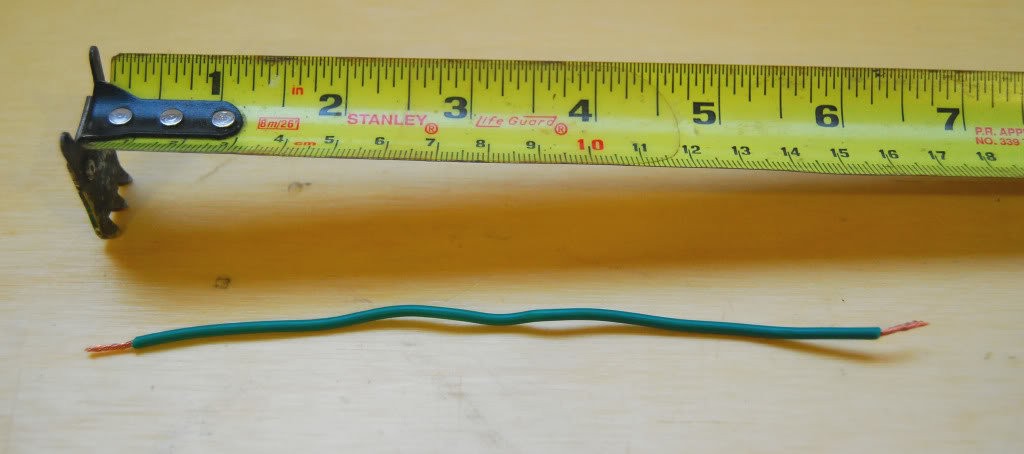
- Copper Wire: A small piece of copper wire to jump the OBD2 connector for entering temperature check mode.
- New Crush Washers (Recommended): While not strictly necessary, replacing the crush washers for the drain plug and overflow plug is a good practice to prevent leaks. Obtain the correct crush washers from your Toyota dealer.
- Fluid Pump or Funnel and Hose: A bottle pump or a long-neck funnel with a hose to easily add new ATF into the transmission fill port. These are readily available at auto parts stores or general retailers.
- Drain Pan: A drain pan to collect the old transmission fluid.
- Measuring Container (Optional but Recommended): To measure the amount of fluid drained. This helps estimate how much new fluid to add initially.
Step-by-Step Procedure for Toyota ATF Drain and Fill with OBD2 Temperature Check:
Follow these steps carefully to perform your Toyota ATF drain and fill correctly. Remember to prioritize safety and double-check each step before proceeding.
-
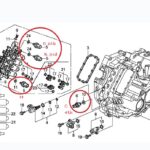
Locate and Loosen the Fill Plug: The fill plug (24mm) is typically located on the passenger side of the automatic transmission. Crucially, before draining any fluid, ensure you can remove the fill plug. If you cannot remove it, you won’t be able to refill the transmission, and your vehicle will be immobile. Attempting to remove the fill plug first prevents this potential issue.
-
Loosen the Overflow Plug: Locate the overflow plug (5mm hex) at the bottom of the transmission fluid pan and loosen it. Do not remove it completely at this stage, just ensure it can be removed later when needed. Having it loose will allow for easier removal when checking the fluid level.
-
Drain the Old ATF: Position your drain pan under the transmission fluid pan and remove the 14mm drain plug. Allow the old ATF to drain completely. You can measure the drained fluid to get an idea of how much new fluid to add initially – in many cases, it’s around 3 quarts.
-
Replace Drain Plug and Refill Initial ATF: Once the old fluid has drained, replace the drain plug with a new crush washer if you have them. Torque the drain plug to the specification in your service manual (typically around 15-20 ft/lbs). Now, using your bottle pump or funnel and hose, add slightly more new ATF than you drained out (e.g., if you drained 3 quarts, add approximately 3.3 quarts). This overfilling is intentional, as you will adjust to the correct level later. Replace the fill plug loosely for now.
-
Circulate the New ATF: Start your engine. With the vehicle idling, move the gear selector through all gear positions (P-R-N-D-S, etc.), pausing briefly in each position. This circulates the new fluid throughout the transmission. Return the gear selector to Park (P).
-
Enter Temperature Check Mode Using OBD2: This is the key step for accurate fluid level setting.
-
Locate the OBD2 Connector: The OBD2 connector is usually located under the driver’s side dashboard, near the steering column or driver’s side kick panel.
-
Jump OBD2 Pins: Using your copper wire, jump pin #4 and pin #13 on the OBD2 connector. Refer to your vehicle’s wiring diagram or online resources to confirm the exact pin locations for your Toyota model. Pin #1 is typically top left, and pin #8 is top right, pin #9 is bottom left, and pin #16 is bottom right. Count them like reading a book, left to right, top row then bottom row.
-
Observe Warning Lights: After jumping the pins and starting the engine (if not already running), several dashboard warning lights may flash – this is normal.
-
Initiate Temp Check Cycle: Shift the gear lever from “P” to “N,” pause briefly in “N,” then perform a series of six cycles from “N” to “D” and back to “N.”
-
Verify Temp Check Mode Entry: After the six cycles, the “AT TEMP” light on your instrument cluster should illuminate for 2 seconds. This confirms that your vehicle has successfully entered “Temperature Check Mode.” If it doesn’t illuminate for 2 seconds, repeat the shifting sequence or double-check your OBD2 pin connections. Place the gear selector back in “P”. The “AT TEMP” light may illuminate again for 2 seconds.
-
-
Check ATF Fluid Level: Allow the vehicle to idle until the “AT TEMP” light illuminates continuously. This indicates the ATF temperature is within the correct range (115°F – 130°F). With the engine running and in Park (P), remove the overflow plug at the bottom of the transmission pan.
-
Correct Fluid Level: If the fluid level is correct, a small trickle of ATF should drain from the overflow hole. This “small trickle” is what you’re looking for.
-
Too Much Fluid: If a steady stream of fluid comes out, allow it to drain until it reduces to a “small trickle.”
-
Not Enough Fluid: If no fluid drains out when you remove the overflow plug, you need to shut off the engine immediately, reinstall the overflow plug, and add more ATF through the fill plug. Then, repeat the temperature check mode procedure and fluid level check.
-
-
Final Steps: Once you have the correct fluid level (small trickle), reinstall the overflow plug with a new crush washer and torque it to specification (typically 15 ft/lbs). Remove the copper wire jumper from the OBD2 connector. Turn off the engine. Securely tighten the fill plug with a new crush washer and torque it to specification (typically 29 ft/lbs).
Important Notes for Automatic OBD2 Maintenance:
- Torque Specifications: Always use the correct torque specifications for all plugs to prevent leaks or damage. Refer to your Toyota Factory Service Manual for precise torque values.
- Safety First: Use wheel chocks and engage your parking brake before working under your vehicle. Be cautious of hot exhaust components.
- Service Intervals: Toyota typically recommends this service at 60,000 miles in the United States (check your owner’s manual for your specific model and driving conditions). Service intervals may vary in other regions.
- Practice Temperature Check Mode: It’s a good idea to practice entering the temperature check mode before starting the actual fluid change to familiarize yourself with the process.
- Vehicle Level: Ensure your vehicle is level when performing this procedure for accurate fluid level readings.
- Infrared Thermometer Caution: While some may suggest using an infrared thermometer to measure the pan temperature, this method is less accurate. The pan temperature can differ significantly from the actual ATF temperature, leading to incorrect fluid level adjustments. It is best to rely on the OBD2 temperature check method for accuracy.
By following this guide, you can confidently perform an automatic transmission fluid drain and fill on your Toyota using the OBD2 temperature check method. This DIY maintenance task can help extend the life of your transmission and ensure optimal vehicle performance. Always prioritize safety and consult your vehicle’s service manual for specific details and recommendations.