Introduction to Audew OBD2 Scanners
In today’s automotive landscape, understanding your vehicle’s health is becoming increasingly crucial. Gone are the days of relying solely on mechanics for every little car issue. With the advent of user-friendly OBD2 scanners, car owners now have the power to diagnose problems themselves, saving both time and money. Audew has emerged as a popular brand in this space, offering a range of OBD2 scanners known for their reliability and ease of use. This guide will provide you with comprehensive Audew Obd2 Instructions, enabling you to effectively utilize your scanner for car diagnostics and maintenance.
Understanding OBD2 and Your Audew Scanner
Before diving into the instructions, it’s important to grasp the basics. OBD2 (On-Board Diagnostics II) is a standardized system that allows you to access your vehicle’s computer and retrieve diagnostic information. An Audew OBD2 scanner is a tool that plugs into your car’s OBD2 port, typically located under the dashboard, and communicates with the car’s computer. This communication allows you to read error codes, view live data, and perform various diagnostic tests.
Key Features of Audew OBD2 Scanners
Audew scanners come with various features, depending on the model. Common features include:
- Reading Diagnostic Trouble Codes (DTCs): These codes are generated by your car’s computer when it detects a problem. The scanner translates these codes into descriptions, helping you understand the issue.
- Clearing DTCs and Turning Off the Check Engine Light: Once a problem is resolved, you can use the scanner to clear the codes and turn off the annoying check engine light.
- Live Data Stream: View real-time data from your car’s sensors, such as engine temperature, RPM, and vehicle speed. This is invaluable for monitoring performance and identifying intermittent issues.
- Freeze Frame Data: When a DTC is triggered, the scanner can capture a “snapshot” of sensor data at that moment, providing context for the problem.
- I/M Readiness: Check the status of your vehicle’s emission systems to ensure it will pass an emissions test.
- Vehicle Information (VIN): Retrieve your vehicle’s identification number and other identifying information.
- O2 Sensor Test: Monitor the performance of your oxygen sensors, crucial for fuel efficiency and emissions.
- On-Board Monitor Test: Access results for on-board diagnostic monitoring tests of specific components/systems.
Step-by-Step Audew OBD2 Instructions
Now, let’s walk through the process of using your Audew OBD2 scanner:
1. Locate the OBD2 Port
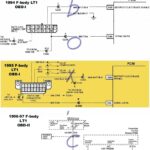
The first step is to find your car’s OBD2 port. It’s typically located under the dashboard on the driver’s side. Look for a 16-pin connector, often trapezoidal in shape. Common locations include:
- Under the steering column
- Above the pedals
- Inside the glove box (less common)
Refer to your vehicle’s owner’s manual if you have trouble locating it.
2. Connect the Audew OBD2 Scanner
Alt text: Locating the OBD2 port under the dashboard of a car, a crucial step in using an Audew OBD2 scanner for vehicle diagnostics.
With your car turned off, plug the Audew OBD2 scanner firmly into the OBD2 port. Ensure it’s securely connected. Some scanners may have a power button that needs to be switched on.
3. Turn On Your Vehicle’s Ignition (Key On, Engine Off)
Turn your car’s ignition to the “Key On, Engine Off” (KOEO) position. This means turning the key to the position just before you start the engine. You should see the dashboard lights illuminate. Do not start the engine yet. This provides power to the OBD2 system and allows the scanner to communicate with the vehicle’s computer.
4. Power On the Audew OBD2 Scanner (If Necessary)
Some Audew scanners will power on automatically once connected and the ignition is turned on. Others may have a separate power button. If your scanner has a power button, turn it on now.
5. Navigate the Scanner Menu
Alt text: The main menu interface of an Audew OBD2 scanner, showcasing options for diagnostics and vehicle information retrieval for car maintenance.
Once powered on, your Audew scanner will typically display a main menu. Use the scanner’s buttons to navigate through the menu options. The menu layout may vary slightly depending on your specific Audew model, but common options include:
- Read Codes: This option allows you to retrieve Diagnostic Trouble Codes (DTCs).
- Erase Codes: Used to clear DTCs and turn off the check engine light (use with caution after addressing the underlying issue).
- Live Data: Displays real-time sensor data.
- Freeze Frame: Shows data captured when a DTC was triggered.
- I/M Readiness: Checks emission system readiness.
- Vehicle Info: Retrieves VIN and other vehicle information.
- O2 Sensor Test: Tests oxygen sensor performance.
- On-Board Monitor Test: Accesses on-board monitor test results.
6. Read Diagnostic Trouble Codes (DTCs)
To check for error codes, select the “Read Codes” or a similar option from the main menu. The scanner will communicate with your car’s computer and display any stored DTCs.
Alt text: An Audew OBD2 scanner screen displaying diagnostic trouble codes, crucial information for understanding car malfunctions and initiating repairs.
- Code Display: The scanner will show the DTC codes (e.g., P0171, P0300) and often a brief description of the code.
- Record Codes: Note down all the displayed codes. You can use online resources or your vehicle’s repair manual to get detailed information about each code. Websites like OBD-Codes.com are excellent resources for looking up OBD2 codes.
7. Understand and Interpret DTCs
DTCs are five-character alphanumeric codes. Here’s a breakdown of the code structure:
-
First Character (Letter): Indicates the system:
- P – Powertrain (Engine, Transmission)
- B – Body (Body control modules)
- C – Chassis (Brakes, Suspension)
- U – Network/Communication (Communication systems)
-
Second Character (Digit): Indicates code type:
- 0 – Generic OBD2 code (Standardized across manufacturers)
- 1, 2, 3 – Manufacturer-specific code (Enhanced codes, vary by brand)
-
Third Character (Digit): Indicates subsystem:
- 1 – Fuel and Air Metering
- 2 – Fuel and Air Metering (Injector Circuit)
- 3 – Ignition System or Misfire
- 4 – Auxiliary Emission Controls
- 5 – Vehicle Speed Controls, Idle Control System
- 6 – Computer Output Circuit
- 7 – Transmission
- 8 – Transmission
- 9 – Transmission
- A, B, C – Hybrid Propulsion System
-
Fourth and Fifth Characters (Digits): Specific fault code number.
For example, P0300 indicates a generic powertrain code (P), standard OBD2 code (0), related to ignition system or misfire (3), and a specific misfire code (00) – in this case, Random/Multiple Cylinder Misfire Detected.
8. Utilize Live Data (Optional but Recommended)
For deeper diagnostics, especially for intermittent issues or performance monitoring, use the “Live Data” or “Data Stream” function.
- Select Data Parameters: The scanner will likely present a list of parameters you can monitor (e.g., engine RPM, coolant temperature, oxygen sensor voltage, fuel trim). Select the parameters relevant to your diagnosis.
- View Real-Time Data: The scanner will display real-time values for the selected parameters. Observe the data while the engine is running (if appropriate and safe) or during different driving conditions.
- Analyze Data: Compare the live data readings to expected values (refer to repair manuals or online resources). Anomalies can pinpoint problems. For example, unusual oxygen sensor readings can indicate issues with the sensor itself or related systems.
9. Erase Codes (Use with Caution)
Once you have identified and addressed the problem indicated by the DTCs, you can use the “Erase Codes” function to clear the codes and turn off the check engine light.
Important Considerations Before Erasing Codes:
- Fix the Underlying Issue: Erasing codes without fixing the problem is like turning off a fire alarm without putting out the fire. The check engine light will likely return, and the problem will persist or worsen.
- Record Codes First: Always record the DTCs before erasing them. This provides a history of the issues and can be helpful for future diagnostics if the problem recurs.
- Emissions Testing: Erasing codes may reset your vehicle’s emission system monitors. In some areas, your vehicle may need to complete a drive cycle to reset these monitors before it can pass an emissions test. Check your local regulations.
To erase codes, select “Erase Codes” from the menu and follow the scanner’s prompts.
10. Disconnect the Audew OBD2 Scanner
After you have finished your diagnostic tasks, turn off your vehicle’s ignition and disconnect the Audew OBD2 scanner from the OBD2 port. Store your scanner in a safe place for future use.
Advanced Tips and Troubleshooting
- Consult Your Vehicle’s Repair Manual: For detailed information about specific DTCs, expected sensor values, and repair procedures, always refer to your vehicle’s repair manual (paper or online versions).
- Online OBD2 Resources: Websites like OBD-Codes.com, YouTube channels dedicated to car repair, and automotive forums are invaluable resources for understanding DTCs, troubleshooting, and getting repair advice.
- Scanner Updates: Check the Audew website for software updates for your scanner model. Updates can improve functionality, add features, and enhance compatibility with newer vehicles.
- Scanner Compatibility: Ensure your Audew scanner is compatible with your vehicle’s make, model, and year. Most OBD2 scanners are compatible with all vehicles sold in the US after 1996 and in Europe after 2001 (gasoline) or 2004 (diesel). However, it’s always best to verify compatibility.
- No Codes Found but Still Issues: If your car is experiencing problems but the scanner finds no DTCs, the issue might be mechanical, not electronic, or it might be a problem that the OBD2 system doesn’t detect. In such cases, further professional diagnosis might be needed.
- Scanner Not Connecting: If the scanner fails to connect, check the following:
- Ensure the scanner is firmly plugged into the OBD2 port.
- Verify the vehicle’s ignition is in the “Key On, Engine Off” position.
- Check the OBD2 port for damage or debris.
- Consult your scanner’s manual for troubleshooting steps.
- Battery Voltage: A low car battery can sometimes interfere with OBD2 scanner operation. Ensure your car battery is adequately charged.
Conclusion: Empowering Car Owners with Audew OBD2 Scanners
Audew OBD2 scanners are powerful tools that empower car owners to take control of their vehicle’s maintenance. By following these Audew OBD2 instructions, you can confidently diagnose car problems, understand error codes, monitor live data, and make informed decisions about repairs. While an OBD2 scanner is not a substitute for professional mechanic services for complex issues, it’s an invaluable asset for routine diagnostics, preventative maintenance, and saving money on unnecessary trips to the repair shop. Embrace the power of DIY car diagnostics with your Audew OBD2 scanner and keep your vehicle running smoothly for years to come.
Disclaimer: This guide provides general instructions for using Audew OBD2 scanners. Specific features and procedures may vary depending on your scanner model and vehicle. Always consult your scanner’s manual and your vehicle’s repair manual for detailed information and safety precautions. If you are unsure about any diagnostic or repair procedure, consult a qualified automotive technician.