Encountering issues when trying to connect your OBD2 scanner can be a frustrating experience, especially when you’re trying to diagnose a problem yourself or get essential services like a recall completed. One common scenario arises when dealerships or mechanics report an inability to communicate with your vehicle’s Engine Control Unit (ECU) using standard OBD2 tools. This article delves into a real-world situation where aftermarket wiring may be the culprit behind OBD2 communication failures, offering insights and potential DIY solutions.
Understanding OBD2 Communication Problems
The On-Board Diagnostics II (OBD2) system is a standardized system in modern vehicles that allows technicians and car owners to access vehicle data for diagnostics and monitoring. The OBD2 port is the gateway to this system, enabling communication between scan tools and the vehicle’s computer. When a scan tool fails to connect, it indicates a break in this communication pathway. This could stem from various issues, ranging from a faulty scanner to problems within the vehicle’s electrical system itself.
The Case of the Disconnected Truck: Aftermarket Wiring Suspicions
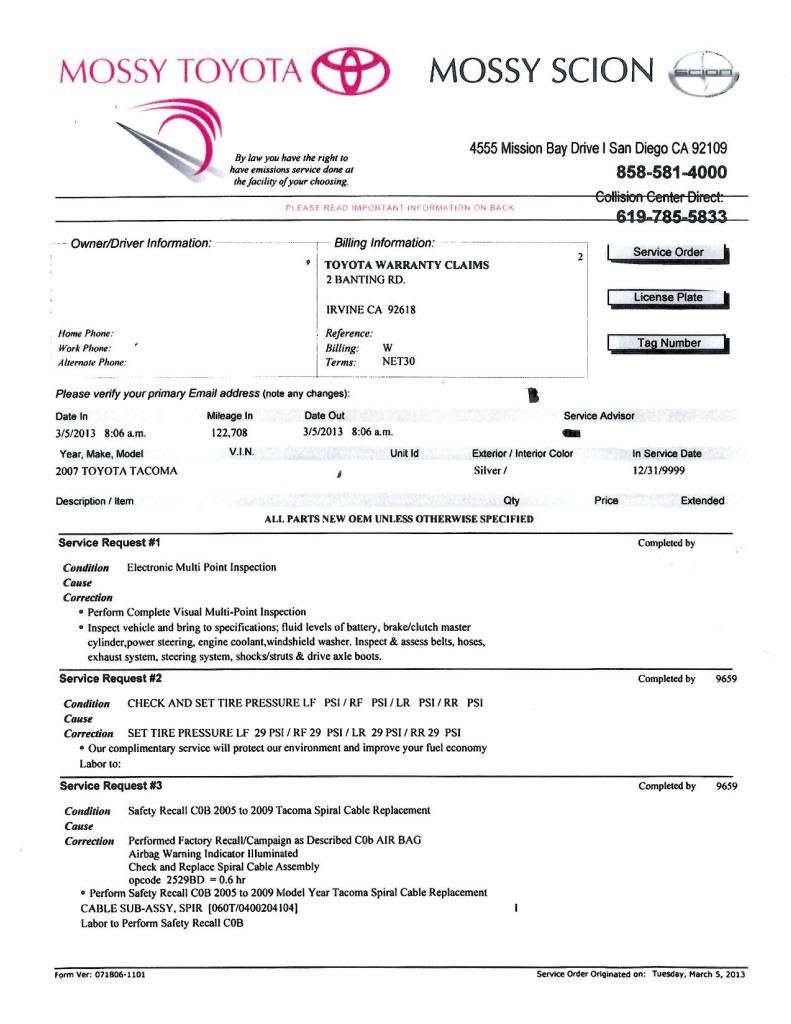
One truck owner faced this exact problem when taking their vehicle for a Clock Spring recall at a dealership. Initially, the dealership reported they couldn’t communicate with the ECU using their scan tools and suggested a costly diagnostic service. Seeking a second opinion, the owner visited another dealership, only to encounter the same communication barrier. However, the second dealership provided a crucial clue: aftermarket wiring within the dashboard was suspected of interfering with the OBD2 system’s communication.
The service advisor explained that the technician noted “aftermarket wires in the dash” and believed these might be drawing power from circuits connected to or from the ECU. This electrical interference could alter the amperage and ohm readings at the OBD2 port, preventing successful communication and ECU reflashing – a necessary step for the recall service. The dealership’s concern was to avoid potential ECU damage during a re-flash attempt with abnormal electrical readings.
DIY Troubleshooting: Checking the OBD2 Port and Aftermarket Accessories
For DIY enthusiasts, understanding the OBD2 port and potential points of failure is key to troubleshooting. A crucial first step is to check the OBD2 port itself. A diagram showing the pinout of the OBD2 connector can be invaluable in identifying which pins should have power and ground.
Using a multimeter, you can test for proper voltage and ground at the appropriate pins of the OBD2 connector. This helps verify if the port is receiving power and ground as it should. If there’s a lack of power or ground, it could indicate a fuse issue or a wiring problem leading to the port.
In the described case, the dealership pointed towards aftermarket accessories as the likely cause. The truck owner had installed an aftermarket stereo system, including new speaker wires and a powered subwoofer. These installations often involve tapping into existing vehicle wiring for power and signal, which, if not done correctly, can lead to electrical issues.
The service advisor’s suggestion to unplug all aftermarket accessories is a logical troubleshooting step. By disconnecting these systems, you isolate them from the vehicle’s electrical system, eliminating potential interference they might be causing. If unplugging the aftermarket stereo, amplifier, and subwoofer resolves the OBD2 communication issue, it strongly indicates that one of these installations is indeed the source of the problem.
Deciphering the “Check Engine Light” Note
The technician’s note about a “check engine light” being on, despite the owner not observing it, adds another layer to the situation. It’s possible the technician might have misinterpreted the “Maintenance Required” light for a check engine light. However, it’s also possible that the aftermarket wiring is causing intermittent or phantom error codes that are detectable by scan tools but not consistently illuminated on the dashboard.
Conclusion: Systematic Troubleshooting for OBD2 Communication Issues
When faced with OBD2 communication problems, especially after aftermarket accessory installations, a systematic approach is essential:
- Verify the OBD2 Scanner: Rule out a faulty scan tool by trying a different scanner if possible.
- Check Fuses: Inspect all relevant fuses related to the OBD2 system and ECU.
- Inspect the OBD2 Port: Use a diagram and multimeter to test for power and ground at the port.
- Isolate Aftermarket Accessories: Disconnect aftermarket electrical modifications to eliminate potential interference.
- Consult Wiring Diagrams: Refer to vehicle-specific wiring diagrams to understand the OBD2 system’s wiring and identify potential points of conflict with aftermarket installations.
While tools like AnyData OBD2 scanners are reliable, even the best diagnostic equipment can be hampered by underlying electrical issues within the vehicle. By methodically checking the OBD2 port, considering aftermarket wiring as a potential culprit, and using diagrams for guidance, you can effectively troubleshoot OBD2 communication failures and potentially resolve the issue yourself, saving time and diagnostic costs. If the problem persists, seeking professional help from a qualified automotive electrician or mechanic is always recommended to ensure accurate diagnosis and repair.
