Experiencing an OBD2 “no communication” error with your 2010 Pontiac G6 can be frustrating. When your OBD2 scanner fails to connect, you’re locked out from reading crucial diagnostic trouble codes (DTCs) that could pinpoint issues affecting your vehicle’s performance. This guide, drawing from real-world troubleshooting experiences, will walk you through the steps to diagnose and potentially resolve the OBD2 communication problem in your 2010 Pontiac G6.
Understanding the OBD2 Communication Issue
The On-Board Diagnostics II (OBD2) system is a standardized system in modern vehicles that allows technicians and car owners to access vehicle health information. A communication issue means your OBD2 scanner cannot establish a connection with your car’s computer system, primarily the Engine Control Module (ECM) and potentially the Body Control Module (BCM), which act as gateways to other modules. When you encounter a “link error” or “no communication” message on your scanner, it indicates a break in this communication pathway.
Step-by-Step Troubleshooting for OBD2 No Communication
Based on a community discussion, let’s explore a structured approach to tackle this problem, starting with the simplest checks and moving towards more complex diagnoses.
1. Initial Checks: Fuse Inspection
The first and easiest step is to check relevant fuses. A blown fuse can cut power to the OBD2 port or the modules responsible for communication.
-
Locate the Fuse Boxes: Your 2010 Pontiac G6 has fuse boxes, typically one under the hood and one inside the passenger compartment, often near the center console or under the dashboard.
-
Identify Relevant Fuses: Refer to your owner’s manual for fuse box diagrams. Look for fuses related to “HVAC CTRL BATT,” “BCM,” “ECM,” or “Data Link Connector (DLC).” In some cases, it might be labeled as “OBD.”
This image shows a Pontiac G6 fuse box diagram, similar to what you might find in your owner’s manual. Locate the fuses related to the BCM, ECM, and HVAC control as a starting point in your troubleshooting.
-
Inspect the Fuses: Visually inspect each fuse. A blown fuse will usually have a broken wire inside. You can also use a multimeter to test for continuity across the fuse terminals.
-
Replace Blown Fuses: If you find any blown fuses, replace them with fuses of the exact same amperage rating.
2. Inspecting the Data Link Connector (DLC)
The Data Link Connector (DLC), also known as the OBD2 port, is where you plug in your scanner. Physical damage or issues with the connector itself can prevent communication.
- Location: The DLC is usually located under the dashboard on the driver’s side, often near the steering column.
- Visual Inspection: Check for any physical damage to the connector. Look for bent, corroded, or pushed-in pins.
- Pin Condition: Carefully examine each pin inside the DLC. A common issue, as discovered in a real case, is a bent pin, particularly the power pin.
3. Wiring and Voltage Checks
If the fuses and DLC look good, the next step is to check the wiring leading to the OBD2 port. You’ll need a multimeter and potentially wiring diagrams for your 2010 Pontiac G6.
-
Identify Power and Ground Pins: OBD2 ports have specific pins for power, ground, and communication. Consult wiring diagrams to identify these pins for your Pontiac G6. Typically, pin 16 is battery power (+12V), pin 4 and/or 5 are ground.
This wiring diagram illustrates the ALDL (Assembly Line Diagnostic Link), which is another term for the OBD2 port. It highlights the power, ground, and communication wires connected to the BCM.
This diagram provides another view of the ALDL wiring, reinforcing the connections to the BCM and ECM. Use these diagrams as a guide to check continuity and voltage at your vehicle’s OBD2 port.
-
Voltage Check: With the ignition ON, use a multimeter to check for voltage at pin 16 of the DLC. You should see battery voltage (approximately 12V). Check for ground at pins 4 and 5 by testing continuity to a known good ground point on the vehicle chassis.
-
Continuity Check: If power and ground are present, check the continuity of the communication wires between the DLC and the BCM. Wiring diagrams will show the specific wire colors and pin locations at both the DLC and BCM.
This image shows a BCM connector, highlighting the complexity of these modules. When checking continuity, ensure you are probing the correct pins on both the BCM connector and the OBD2 port based on your wiring diagrams.
4. BCM Consideration
The Body Control Module (BCM) often acts as a central communication hub in modern vehicles. In the Pontiac G6, the OBD2 port communicates with the BCM, which then relays information to the ECM and other modules. If basic checks are inconclusive, a faulty BCM could be the culprit.
- BCM as a Potential Issue: If you’ve confirmed power, ground, and wiring continuity to the DLC, and still have no communication, suspect a BCM issue.
- Professional Diagnosis: BCM problems can be complex and often require specialized diagnostic equipment and programming. Consulting a professional mechanic is recommended if you suspect a faulty BCM.
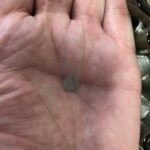
5. The Solution: Bent Pin Inspection – A Real Case
In a documented case, the “no communication” issue on a Pontiac G6 was traced back to a simple bent pin in the DLC. Specifically, the female pin for the power wire (pin 16, Red/White wire in the original case) was bent inwards, preventing proper contact with the scanner’s male connector pin.
- Detailed Pin Inspection: Use a bright light and magnifying glass to meticulously inspect each pin in the DLC. Look for any pins that are not perfectly straight or appear bent.
- Gentle Correction: If you find a bent pin, carefully and gently attempt to straighten it using a small pick or needle-nose pliers. Exercise extreme caution to avoid breaking the pin or causing further damage.
- Test Again: After straightening the pin, try connecting your OBD2 scanner again.
Addressing the P0420 Code (Catalyst System Efficiency)
In the original case, after resolving the “no communication” issue, a P0420 code was retrieved, indicating “Catalyst System Efficiency Below Threshold (Bank 1).” This code is related to the catalytic converter’s performance and is a separate issue from the OBD2 communication problem.
- P0420 Code: This code suggests that the catalytic converter is not functioning as efficiently as expected.
- Possible Causes: Common causes include a failing catalytic converter, faulty oxygen sensors, exhaust leaks, or engine performance issues.
- Further Diagnosis: Addressing the P0420 code requires further diagnosis, such as checking oxygen sensor readings, inspecting the exhaust system, and potentially testing the catalytic converter.
Conclusion
Troubleshooting OBD2 “no communication” on a 2010 Pontiac G6 requires a systematic approach. Start with simple checks like fuses and connector inspection, then progress to wiring and voltage tests. Remember that even seemingly minor issues, like a bent pin in the DLC, can prevent communication. If you exhaust these steps and still face issues, seeking professional diagnostic help is advisable. By following these steps, you increase your chances of identifying and resolving the OBD2 communication problem and getting your Pontiac G6’s diagnostic system back online.