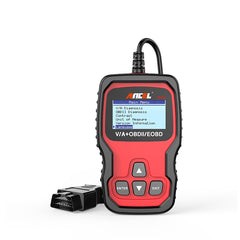
Keeping your Ancel VD500 OBD2 scanner updated is crucial for optimal performance and access to the latest features. Just like any electronic device, the Ancel VD500 receives firmware updates to improve functionality, add vehicle coverage, and fix potential bugs. If you’ve been using your Ancel VD500 for a while, you might be wondering how to ensure it’s running the most current software. This comprehensive guide will walk you through each step of the update process, ensuring your OBD2 scan tool is always ready to accurately diagnose your vehicle’s health.
Step 1: Download the Latest Firmware Update from Ancel
Your first step is to obtain the necessary firmware files directly from Ancel’s official website. This ensures you’re getting a legitimate and safe update for your Ancel VD500 OBD2 diagnostic tool. Navigate to the official Ancel support or downloads page, specifically looking for the section dedicated to the VD500 model. You should find a downloadable firmware update package there. The file size is typically small, so the download should be quick and easy.
Step 2: Extract the Update Files to Your Computer
Once the download is complete, you’ll have a compressed ZIP file containing the firmware update. To access the files, you’ll need to extract them using software like WinRAR, 7-Zip, or even the built-in extraction tool in Windows. It’s recommended to create a new folder on your computer desktop and extract the contents of the ZIP file into this folder. This will keep everything organized and easily accessible for the next steps. The extraction process should only take a few moments.
Step 3: Install or Update Your Computer’s USB Drivers (If Needed)
This step is crucial for your computer to properly communicate with your Ancel VD500 OBD2 scanner. Drivers are software components that allow your operating system to recognize and interact with hardware devices. While often automatic, older operating systems like Windows 7 or 8 might require manual driver updates. Even if you use a newer system like Windows 10 or 11, updating drivers is a good precautionary measure.
Inside the extracted update folder on your desktop, you should find a “Drivers” subfolder. Locate and run the “install_driver.bat” file within this folder. This batch file will automatically install or update the necessary USB drivers on your computer. Follow any on-screen prompts to complete the driver installation process.
Step 4: Begin the Firmware Update Installation
Now that your computer is prepared, it’s time to update your Ancel VD500 OBD2 scanner itself. Connect your VD500 to your computer using the provided USB cable. Ensure the scanner is properly connected. Once connected, the VD500 screen should display a message indicating it’s ready for computer operations, typically saying something like “Please perform related operations on your computer.” This confirms a successful connection and driver installation.
Within the main update folder you extracted earlier, locate and run the “Update.exe” file. This will launch the firmware update tool. A new window will appear, guiding you through the update process. Click the “Update” button within the tool to initiate the firmware installation onto your Ancel VD500.
The update process usually takes just a minute or two. During the update, it is vital to maintain the USB connection and avoid interrupting the process. Your VD500 screen should display a message like “Keep USB connected! Processing…” indicating the update is in progress. Your computer’s security software might prompt you for permission to allow the update tool to make changes; grant the necessary permissions to proceed.
Once the update is complete, the update tool will typically display a confirmation message. You can then close the update tool window, safely disconnect your Ancel VD500 from your computer, and delete the update files from your desktop if desired. Your Ancel VD500 OBD2 scanner is now updated with the latest firmware and ready for use.
Troubleshooting USB Connection Issues
Occasionally, you might encounter issues where your computer doesn’t recognize your Ancel VD500 OBD2 scanner when connected via USB. Here are some common troubleshooting steps to resolve this:
- Try Different USB Ports and Cables: Sometimes, a specific USB port or cable might be faulty or have compatibility issues. Try using different USB ports on your computer, preferably USB 2.0 ports if available, and try a different USB cable to rule out these potential problems.
-
Run as Administrator: Granting administrator privileges to the update tool and driver installer can resolve permission-related issues. Right-click on both the “install_driver.bat” and “Update.exe” files and select “Run as administrator” from the context menu.
-
Manual Driver Installation: If automatic driver installation fails, you can manually install the drivers through Device Manager.
- Open Device Manager (search for “Device Manager” in the Windows search bar).
- Connect your Ancel VD500 to your computer.
- Look for an “Unknown USB Device” or a device with a yellow exclamation mark in the list. This is likely your Ancel VD500.
- Right-click on the unknown device and select “Update driver software.”
- Choose “Browse my computer for driver software.”
- Navigate to the “Drivers” subfolder within the extracted update folder on your desktop and select it.
- Click “Next” to install the drivers manually.
After manually installing the drivers, your computer should recognize your Ancel VD500 OBD2 scanner, and you can proceed with the firmware update process as described earlier.
Benefit from Lifetime Free Updates
Ancel is committed to providing ongoing support for your Ancel VD500 OBD2 scanner. Like other Ancel diagnostic tools, the VD500 comes with lifetime free firmware updates. This ensures your tool remains compatible with newer vehicles and continues to offer accurate and reliable diagnostic capabilities for years to come. It’s recommended to periodically check the official Ancel website for new updates, ideally once or twice a year, to keep your VD500 performing at its peak.
Conclusion
Updating your Ancel VD500 OBD2 scanner is a straightforward process that ensures you always have the latest features and vehicle coverage. By following these simple steps, you can keep your diagnostic tool in optimal condition and confidently diagnose vehicle issues. Regularly updating your firmware is a proactive step in maintaining the effectiveness and longevity of your Ancel VD500.
FAQs
How do I update the firmware on my Ancel VD500 OBD2 scanner?
To update your Ancel VD500, download the firmware from the official Ancel website, extract the downloaded files, install the USB drivers if necessary, connect your VD500 to your computer, and run the “Update.exe” tool to begin the firmware installation.
What should I do if my Ancel VD500 is not recognized by my computer?
If your Ancel VD500 isn’t connecting, try different USB ports and cables. If that doesn’t work, run the driver installer and update tool as administrator. For persistent issues, manually install the drivers through Device Manager by pointing to the “Drivers” folder in the extracted update files.
Are firmware updates free for the Ancel VD500 OBD2 scanner?
Yes, Ancel VD500 owners are entitled to lifetime free firmware updates. Check the official Ancel website periodically for the latest updates to ensure your scanner is up-to-date.