For car enthusiasts and tech hobbyists, creating custom car gauges using Arduino and OBD2 connectivity is an exciting project. Leveraging the On-Board Diagnostics II (OBD2) system in modern vehicles opens up a wealth of real-time data that you can display in a way that suits your needs. This guide explores how you can build your own Arduino Obd2 Gauges, drawing inspiration from projects within the DIY automotive community.
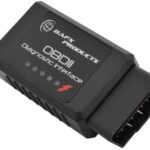
At the heart of this project is the ELM327 chip, a common interface that allows you to communicate with your car’s OBD2 system. Combined with an Arduino microcontroller, you can read various parameters from your vehicle’s engine and systems. Projects like creating a Heads Up Display (HUD) showcasing speed and RPM demonstrate the potential of this setup.
Libraries like ELMduino simplify the process of interacting with ELM327 scanners. ELMduino, for instance, provides a straightforward way to query Parameter IDs (PIDs) and retrieve data such as:
const uint8_t ENGINE_RPM = 12;
const uint8_t VEHICLE_SPEED = 13;
const uint8_t ENGINE_COOLANT_TEMP = 5;
const uint8_t INTAKE_AIR_TEMP = 15;
const uint8_t THROTTLE_POSITION = 17;
const uint8_t ENGINE_LOAD = 4;
These PIDs represent just a fraction of the data points accessible through OBD2. With Arduino, you can select the PIDs that are most relevant to you and display them on various outputs like LCD screens, OLED displays, or even create a custom dashboard interface. Whether you want to monitor fuel consumption, engine temperature, or boost pressure, Arduino OBD2 gauges offer a customizable solution.
Building your own Arduino OBD2 gauges not only provides valuable insights into your vehicle’s performance but also offers a hands-on learning experience in automotive electronics and programming. By utilizing libraries and readily available components, you can create a personalized car monitoring system tailored to your specific interests.