For those venturing into the world of DIY car maintenance, Ancel has long been a trusted name, renowned for its user-friendly OBD2 scanners and engine code readers. The Ancel AD410 model stands out as a prime example, bridging the gap between complex automotive diagnostics and accessibility for everyday car owners. You don’t need to be a seasoned mechanic to effectively utilize this car diagnostic tool.
The Ancel AD410 isn’t just another gadget; it’s designed to save you both time and money on car repairs. Let’s delve into why the AD410 is considered a valuable tool for car owners and how simple it is to use.
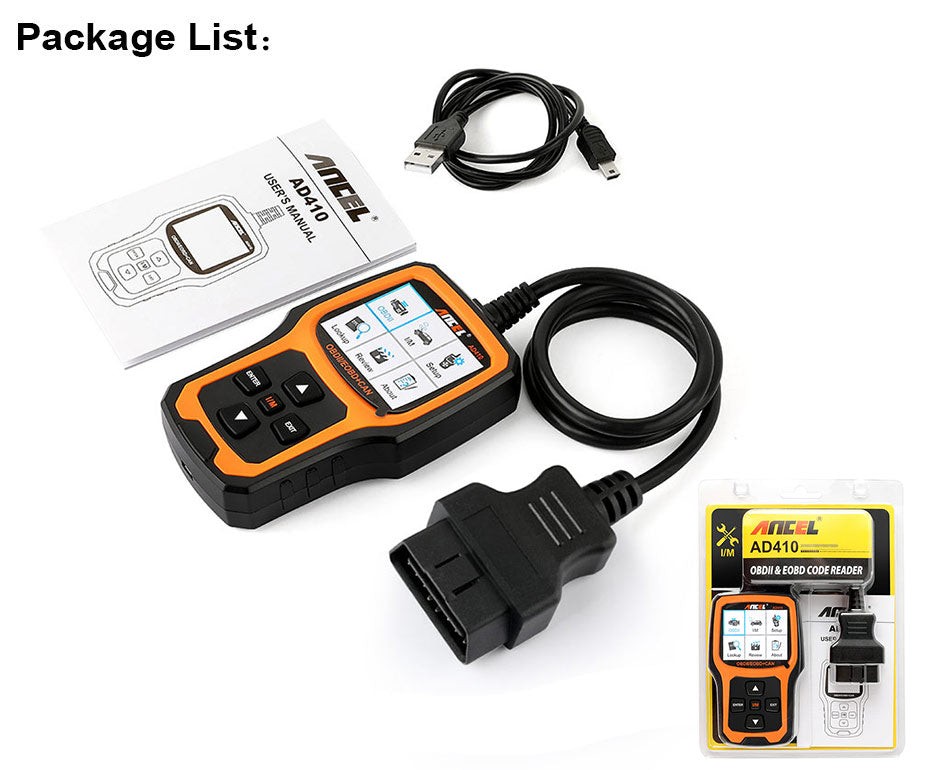
Unboxing the Ancel AD410: Simple Design for Everyone
The Ancel AD410 is presented as an enhanced iteration of previous Ancel models, notably the Ancel AD310. The upgrades focus on user experience, primarily through a color screen and the introduction of the I/M Readiness button.
Older OBD2 scanners often featured monochrome screens, limiting visual clarity. The AD410 breaks away from this with a color display, making graphs and menus significantly more vibrant and easier to interpret. This color enhancement isn’t just aesthetic; it improves the speed at which users can read and understand diagnostic information.
Navigating menus becomes more intuitive with the AD410’s updated interface. The incorporation of graphics and icons alongside text-based options allows for quicker function identification, reducing the learning curve for new users.
The inclusion of the I/M Readiness button is another key improvement. This dedicated button provides instant access to essential functions like emissions testing, misfire monitoring, and fuel system checks. This direct access streamlines the diagnostic process, particularly for users focused on vehicle emissions and basic system health.
Step-by-Step Directions: Using the Ancel AD410 Scanner
Despite its diagnostic capabilities, the Ancel AD410 is designed for straightforward operation. Think of it as simpler than operating a smartphone once you grasp the basic [Ancel Obd2 Scanner Directions Ad410]. The process is intuitive and quickly memorized.
Your first step is locating the Diagnostic Link Connector (DLC) port in your vehicle. The AD410 comes with an attached cable – the DLC cable – that connects to this port. While older vehicles sometimes positioned the DLC port in less accessible areas like the center console, modern cars typically place it under the dashboard on the driver’s side.
Before connecting the AD410, ensure your vehicle’s ignition is turned off. Once connected to the DLC port, the AD410 will power on and prompt you to turn on the ignition.
With the ignition on, the Ancel AD410 automatically begins scanning for diagnostic trouble codes, especially if your car’s Check Engine Light is illuminated. Upon completion of the scan, any detected Diagnostic Trouble Codes (DTCs) will be displayed.
A standout feature of the Ancel AD410 is its integrated DTC lookup database. Instead of needing to search online for code definitions, you can directly input the error code into the AD410.
Diagnostic codes are standardized and consist of a letter followed by four numbers. Inputting the code into the AD410 provides you with a detailed description of the issue within your vehicle, right on the scanner’s screen.
 Ancel AD410 OBD2 Scanner Displaying Diagnostic Information
Keeping Your Scanner Updated: Firmware Directions
Just as important as ease of use is keeping your Ancel AD410 software up-to-date. The update process mirrors the scanner’s overall simplicity. Here’s a quick guide to ensure your AD410 is running the latest firmware.
Begin by navigating to the official Ancel update webpage. Locate and select the “Ancel AD410” tab to download the necessary update package.
After downloading, you’ll need file extraction software like Winrar or 7zip to unpack the downloaded folder. Extract the contents to an easily accessible location, such as your desktop.
Before initiating the update, it’s crucial to verify driver installation. Connect your Ancel AD410 to your computer. If drivers are missing, your computer may recognize it as an unrecognized USB device.
Within the extracted Update folder, find the “drivers” subdirectory and run the “install_driver.bat” file. This will install the necessary drivers if they are not already present. This step is particularly important for older operating systems like Windows 7 or 8, while Windows 10 users may find the drivers install automatically, running the .bat file is a good precaution.
Once driver verification is complete, and your AD410 is connected, run the “update.exe” file located in the main Update folder. In the new window that appears, click “Install”.
The firmware update process for your Ancel AD410 will commence. While it may take a few minutes, ensure the AD410 remains connected throughout the process. Grant any permissions requested by Windows Security during the installation.
Once the update is complete, your AD410 will now be updated with the latest firmware. You can then disconnect it and return to using it for vehicle diagnostics.
Conclusion
Understanding [ancel obd2 scanner directions ad410] and using the Ancel AD410 code reader is remarkably straightforward. Its user-friendly design and features are aimed at empowering car owners to take control of basic vehicle diagnostics. By providing easy access to crucial vehicle health information, the Ancel AD410 can indeed save you significant money on car maintenance and provide peace of mind. Keeping this tool in your car ensures you’re always prepared to understand and address minor car issues promptly.