The Honda Civic, particularly the 1999 model year, remains a favorite among car enthusiasts for its reliability and modification potential. A key aspect of any engine swap or performance upgrade in a 99 Civic is understanding the 99 Civic Obd2 Engine Harness. This intricate network of wires is the lifeline of your engine, connecting vital sensors, actuators, and the ECU (Engine Control Unit). Whether you’re facing wiring issues, planning an engine swap, or simply upgrading components, a solid grasp of your OBD2 engine harness is crucial.
This guide serves as your ultimate resource for navigating the complexities of the 99 Civic OBD2 engine harness. We’ll delve into common wiring scenarios, swap considerations, and troubleshooting tips to ensure your project runs smoothly.
Comparison of OBD2A and OBD2B engine harness connectors, highlighting the differences relevant to 99-00 Civic models.
Understanding OBD2 and Your 99 Civic
The ’99 Civic falls under the OBD2 (On-Board Diagnostics II) standard, specifically OBD2B for the 1999-2000 models. OBD2 is a standardized system that provides self-diagnostic and reporting capabilities for your vehicle. It’s essential to know that 1996-1998 Civics use OBD2A, which has different ECU connectors than the 99-00 OBD2B. Mixing 96-98 OBD2A and 99-00 OBD2B engine and dash harnesses is not possible due to these ECU connector differences. Always verify you are working with the correct harness type for your 1999 Civic.
Common 99 Civic Engine Swap Wiring Scenarios
Engine swaps are a popular modification for 99 Civics, often to enhance performance. Here are common scenarios and wiring considerations when dealing with your 99 Civic OBD2 engine harness:
OBD2 Engine into OBD2 99 Civic (Using OBD2 ECU)
This is generally the most straightforward swap, but even within OBD2, there are nuances depending on the engine and Civic trim (DX, LX, CX, EX, HX). The 99-00 Civic utilizes the OBD2B standard, so ensure your replacement engine and ECU are also OBD2B for easier integration.
1. D16Y8 (OBD2) into 99 Civic DX/LX/CX (Originally D16Y7)
- Mostly Plug and Play: For the most part, this swap is relatively simple.
- VTEC Wiring: If your 99 Civic was originally a non-VTEC model (DX, LX, CX with D16Y7), you will need to wire in the VTEC solenoid, VTEC pressure switch, and knock sensor to your P2P (D16Y8 ECU). Refer to Figure 7 (OBD2B hybrid pinouts) for specific wiring locations.
- IACV Wiring: The Idle Air Control Valve (IACV) on the D16Y7 is a 3-wire system, while the D16Y8 uses a 2-wire IACV. You will need to adapt the wiring accordingly, as shown in Figure 7.
- Secondary O2 Sensor: If using an EX-style catalytic converter, you may need to extend the secondary O2 sensor wiring using an O2 adapter.
- IAT Sensor Relocation: The Intake Air Temperature (IAT) sensor is not located on the D16Y8 manifold. You’ll need to relocate it to the intake arm, as depicted in Figure 8, or use a D16Y7 manifold which will bolt onto the Y8 head.
2. B16A2/B18C1/B18C5 (OBD2) into 99 Civic EX (Originally D16Y8)
- Mostly Plug and Play: Similar to the D16Y8 swap, this is largely plug and play in terms of the 99 Civic OBD2 engine harness, especially in an EX model which already has VTEC wiring.
- IAB Wiring (B18C1): For B18C1 swaps utilizing the P72 ECU, you’ll need to wire in the Intake Air Bypass (IAB) system. Figure 7 provides guidance for OBD2B wiring.
- IAT Sensor Relocation: Like the D16Y8, the B16A2 manifold doesn’t have a location for the IAT sensor. Relocate it to the intake arm (Figure 8) or consider using a round-style IAT sensor that can be placed on the manifold (Figure 9).
- Secondary O2 Sensor: Check if the secondary O2 sensor wiring reaches with the new engine/catalytic converter setup and extend if necessary.
3. B18B/B20B/Z (OBD2) into 99 Civic DX/LX/CX/EX/HX
- Mostly Plug and Play: This swap into a 99 Civic is generally straightforward.
- Distributor: Use an OBD1 B18 distributor for plug-and-play compatibility or an OBD2 LS distributor with an adapter harness.
- Alternator: An OBD1 B-series alternator is recommended for plug-and-play installation.
- Injectors: For DX/LX/EX models, you can reuse your existing injectors. For CX/VX, consider upgrading to EX/DX/SI injectors for proper fuel flow.
- CKF Sensor: The Crankshaft Position Sensor (CKF) on these engines will not be used and can be tied out of the way.
- HX Specific (7-Wire O2): If swapping into an HX model, which may have a 7-wire O2 sensor, you will need to convert it to a 4-wire O2 sensor setup. Resources like eastcoasthondas.com offer diagrams for this conversion.
OBD2B ECU pinout diagram, essential for wiring modifications in 1999-2000 Honda Civics.
OBD1 Engine into OBD2 99 Civic (Using OBD1 ECU)
Swapping an older OBD1 engine into your OBD2 99 Civic requires more wiring adaptation. While it’s achievable, it’s crucial to understand the necessary modifications to your 99 Civic OBD2 engine harness.
1. D16Z6 (OBD1) into 99 Civic DX/LX/CX (Originally D16Y7)
- VTEC and IACV Wiring: Similar to the OBD2 D16Y8 swap into non-VTEC models, you will need to wire in VTEC components (solenoid, pressure switch) and adapt the 3-wire IACV to 2-wire. However, in this case, you’ll be wiring to an OBD1 P28 ECU. Refer to Figure 1 (OBD1 ECU Wiring) and Figure 7 (OBD2B hybrid pinouts) for combined guidance.
- IAT Sensor Relocation/Rewiring: You can relocate the IAT sensor to the intake arm (Figure 8) or rewire it to an OBD1-style sensor (Figure 9).
- Eliminating OBD2 Sensors: The CKF sensor, EVAP purge, and secondary O2 sensor (all OBD2 features) will be eliminated when using an OBD1 ECU.
- Distributor Adapter: The D16Z6 distributor requires an adapter to connect to the 99 Civic harness.
- Injector Clips: Use D16Z6 injectors and remove the injector “clips” for plug-and-play connection (Figure 10).
- Alternator: Reuse the 99 Civic (Y7) alternator for plug-and-play or use an adapter if needed.
2. B16A2/B18C1/B18C5 (OBD2) into 99 Civic DX/LX/CX (Using OBD1 P30 ECU)
- VTEC, Knock Sensor, IACV Wiring: Wiring for VTEC, knock sensor, and IACV (3-wire to 2-wire) will be necessary to connect to the OBD1 P30 ECU. Again, use Figure 1 and Figure 7 as combined references.
- IAT Sensor Relocation/Rewiring & OBD2 Sensor Elimination: Same as the D16Z6 OBD1 swap – relocate/rewire IAT, eliminate OBD2 sensors (CKF, EVAP, secondary O2).
- Distributor Adapters: For 99-00 Civics (OBD2B), you’ll need an OBD2B to OBD1/2 distributor adapter and an OBD1/2 B-series DOHC VTEC distributor.
- Injector Clips: Use B-series injectors and remove the injector “clips” (Figure 10).
- Alternator Adapter: Use an OBD2 B-series alternator for plug-and-play or an OBD2-to-OBD1 alternator adapter.
Example of relocating the OBD2 Intake Air Temperature (IAT) sensor to the intake arm, a common modification during engine swaps in 99 Civics.
Troubleshooting Your 99 Civic OBD2 Engine Harness
Even with careful planning, wiring issues can arise. Here are common troubleshooting points:
- Check Connections: Ensure all connectors are fully seated and locked. Loose connections are a frequent cause of problems.
- Inspect Wires: Look for damaged, frayed, or pinched wires. Pay attention to areas where the harness may have been routed improperly or come into contact with sharp edges.
- Grounding Issues: Proper grounding is critical. Verify all ground points are clean and securely connected to the chassis and engine.
- Fuse Checks: Blown fuses are often indicators of shorts or wiring faults. Check relevant fuses in both the engine bay and under-dash fuse boxes.
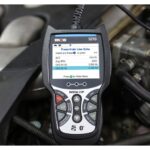
- OBD2 Scanner: Utilize an OBD2 scanner to read diagnostic trouble codes (DTCs). These codes can pinpoint sensor or circuit malfunctions, guiding your troubleshooting efforts.
Tips for a Successful 99 Civic Engine Swap Wiring Project
- Plan Ahead: Thoroughly research your specific engine swap combination and understand the wiring modifications required before you begin.
- Gather Diagrams: Collect all relevant wiring diagrams for your 99 Civic, the donor engine, and the ECU you are using. The figures in this guide and online resources are invaluable.
- Label Everything: As you disconnect wires, label them clearly. This will save you significant time and frustration during reassembly.
- Use Quality Connectors and Wiring: If you need to extend or modify wiring, use high-quality automotive-grade wire and connectors to ensure reliable connections and prevent future issues.
- Test Systematically: After completing wiring modifications, test systems incrementally. Don’t try to start the engine immediately. Check for power at the ECU, verify sensor readings with a multimeter, and ensure basic electrical functions are working before attempting to start the engine.
- Seek Professional Help if Needed: If you are uncomfortable with wiring or encounter complex issues, don’t hesitate to consult a professional mechanic or wiring specialist. Incorrect wiring can damage your ECU or engine.
Conclusion
Mastering the 99 Civic OBD2 engine harness is key to successful engine swaps and modifications. By understanding the nuances of OBD2B wiring, common swap scenarios, and troubleshooting techniques, you can confidently tackle your project. Remember to prioritize careful planning, utilize available resources like wiring diagrams, and always double-check your connections. With patience and attention to detail, you can navigate the wiring complexities and enjoy the enhanced performance of your modified 99 Civic.
Disclaimer: This guide is for informational purposes only and should not be considered a substitute for professional mechanical advice. Always consult service manuals and qualified technicians when performing engine swaps or electrical work on your vehicle. Working with automotive electrical systems can be dangerous. Take necessary safety precautions and disconnect the battery before working on any wiring.