Many Ford Ranger owners looking to diagnose engine issues naturally search for the OBD2 port. If you’re trying to find the 94 Ranger Obd2 Location, you might be in for a slight surprise. Unlike newer vehicles, the 1994 Ford Ranger is equipped with an OBD1 system, not OBD2. This means you won’t find the standard OBD2 port you might be expecting.
But don’t worry, diagnosing your 1994 Ranger is still achievable! Instead of an OBD2 scanner, you’ll use the Check Engine Light (CEL) to retrieve diagnostic trouble codes. This guide will walk you through locating the OBD1 connector on your 1994 Ford Ranger and reading the engine codes using just a simple jumper wire and your CEL.
Finding the OBD1 Connector on Your 1994 Ford Ranger
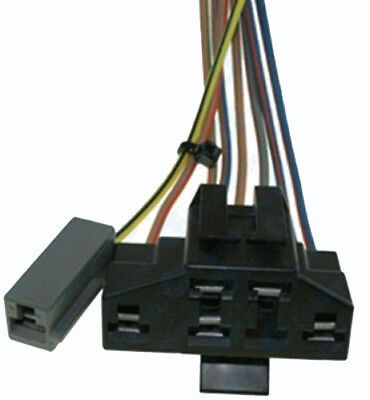
The OBD1 connector on your 1994 Ford Ranger is located in the engine bay. It’s a grey, elongated connector, often found near the engine fuse box.
Image: A close-up view of the OBD1 connector in the engine bay of a vehicle, showing its grey color and elongated shape. The connector is situated near wiring harnesses, indicating its location within the vehicle’s engine compartment.
You might find a protective cap on the connector, often marked with “EEC” (Electronic Engine Control). The OBD1 connector is typically attached to the same wiring harness as a single grey connector.
Reading OBD1 Codes on a 1994 Ford Ranger Using the CEL
To read the diagnostic codes, you’ll need a simple jumper wire or an unfolded paper clip. Here’s how to do it:
- Locate the OBD1 Connector Slots: Familiarize yourself with the connector layout. You’ll be using specific slots to initiate the self-test.
Image: A diagram illustrating the pin layout of a Ford OBD1 connector. The image highlights the “Self Test Input” and “Signal Return” slots, crucial for initiating the diagnostic test.
-
Prepare the Jumper Wire: Ensure the ignition key is turned off. Use your jumper wire or paper clip to connect the “Self Test Input” (the single grey connector) to the “Signal Return” slot on the larger OBD1 connector.
-
Enter Test Mode: Turn the ignition key to the “ON” position, but do not start the engine. This will power up the EEC and initiate the diagnostic test mode.
-
Observe the Check Engine Light (CEL): Watch the CEL on your dashboard. After a brief pause as the computer boots up, the CEL will begin to flash 3-digit codes.
-
Decipher the Codes: The CEL flashes indicate the codes. For example, “flash, short pause, flash, short pause, six flashes, LONG pause” represents code 116. The long pause separates individual codes. The system will cycle through all stored codes and then repeat them. Code 111 indicates “no codes in memory,” meaning no faults are currently stored.
-
Code List: Refer to a 1994 Ford Ranger OBD1 code list to understand the meaning of each 3-digit code. A helpful resource is available at https://www.therangerstation.com/tech_library/3digitcodes.shtml.
Clearing OBD1 Codes
Clearing codes is straightforward:
- Temporary Clear (Key Cycle): Simply turning off the key and removing the jumper will save the codes in memory.
- Permanent Clear (Jumper Method): To clear the codes while the key is still in the “ON” position, remove the jumper wire. This will erase the stored codes.
It’s advisable to clear the codes after diagnosis and then drive your Ranger to see if any codes reappear. This helps identify if the issue is resolved or if it’s an ongoing problem. For instance, if you had a temporary issue like “bad gas” causing a code, clearing the codes and seeing if they return after using good fuel can confirm the problem is gone.
By following these steps, you can effectively diagnose your 1994 Ford Ranger’s engine using its OBD1 system and the Check Engine Light, even without a dedicated OBD2 scanner.