Swapping engines in Honda CRXs is a popular modification for car enthusiasts looking to boost performance. While the original article provides a general overview of Honda engine swaps, this guide zeroes in on a specific and intriguing project: performing a complete OBD1 swap in a 1989 Honda CRX, but with an OBD2 engine. This might sound complex, but with the right knowledge and parts, it’s an achievable upgrade.
The 1989 Honda CRX originally came with an OBD0 system, which is quite outdated compared to the OBD2 systems found in later model engines. Upgrading to OBD1 is a common first step for many CRX owners as it offers better engine management and diagnostic capabilities. However, directly installing an OBD2 engine into an OBD0 car presents a unique set of challenges and opportunities.
Let’s clarify the terminology first. OBD (On-Board Diagnostics) is a system that provides vehicle self-diagnosis and reporting capabilities. OBD1 is an early version, while OBD2 is a more advanced and standardized system. OBD2 engines, typically from 1996 and newer vehicles, offer improved performance, efficiency, and often, more horsepower.
Why Consider an OBD2 Engine in an OBD1 Swapped CRX?
The primary reason for considering an OBD2 engine in an older CRX, even when doing an OBD1 conversion on the car itself, boils down to engine availability and performance. OBD2 engines, such as later B-series or even K-series engines (though K-series is a much more involved swap), are often more readily available and can offer a significant performance jump over older OBD1 or OBD0 engines.
Key Components and Considerations for this Swap:
To successfully complete an 89 CRX OBD1 swap with an OBD2 engine, you’ll need to carefully consider several components:
-
Engine Choice: While the original article lists various engines, for an OBD2 source, you might look at B16B-R or B18C-R engines from 96-01 Integras or Civic Type Rs as mentioned in the original document under “B18C-R 96-01 B16B-R 96-01”. These are potent B-series VTEC engines that are OBD2 originally. Alternatively, some might consider later D-series VTEC engines if aiming for a less complex but still OBD2 upgrade.
-
OBD1 Conversion Harness: Since your CRX is originally OBD0, and you’re aiming for an OBD1 management system in the car, you will need an OBD0 to OBD1 conversion harness. This allows you to use an OBD1 ECU in your 89 CRX.
-
OBD1 ECU: You’ll need an OBD1 ECU compatible with your chosen OBD2 engine. This is a crucial point. While the engine is OBD2, you will be running it using an OBD1 ECU in your OBD1 swapped CRX. This is often achieved by using specific OBD1 ECUs that are known to work well with certain OBD2 engines, sometimes requiring chipping or tuning for optimal performance.
-
Engine Mounts and Brackets: Engine mounts are critical for any swap. For an 88-91 CRX, engine mount kits are available for B-series engine swaps, as indicated in the original document. Verify compatibility based on your specific engine choice.
-
Transmission and Drivetrain: Depending on the engine, you may need a matching transmission. B-series engines generally require B-series transmissions. Half shafts, axles, and shift linkage will also need to be compatible with the chosen engine and transmission setup, as highlighted in the original article’s parts lists.
-
Wiring and Sensors: This is where the OBD1 vs. OBD2 engine aspect becomes critical. You will be using an OBD1 ECU to control an OBD2 engine. This often requires adapting or converting some sensors and wiring. You might need to use OBD1 sensors where possible or find ways to make the OBD2 sensors compatible with the OBD1 ECU. Detailed wiring diagrams for both the OBD1 ECU and the OBD2 engine will be essential.
-
Fuel System: Ensure your fuel system can support the demands of the new engine. OBD2 engines, especially higher-performance ones, might require higher fuel pressure or flow compared to the original CRX engine.
-
Exhaust System: An aftermarket exhaust system is often part of an engine swap to maximize performance. Ensure the exhaust manifold and system are compatible with the new engine and chassis.
-
Cooling System: Upgrading the radiator might be necessary to handle the increased heat output of a more powerful OBD2 engine.
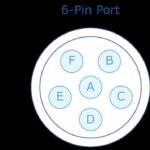
Understanding ECU pinouts is crucial for wiring any engine swap.
Wiring Considerations in Detail:
The most challenging part of this swap is likely the wiring. You are essentially “downgrading” the engine management system of a newer OBD2 engine to work with an older OBD1 system in the car. This is not a straightforward plug-and-play process.
Here’s a simplified approach to consider for wiring:
-
OBD1 ECU Wiring: Wire your CRX chassis to accept the OBD1 ECU using the OBD0 to OBD1 conversion harness. This establishes the basic OBD1 management system in the car.
-
OBD2 Engine Sensor Adaptation: Identify the sensors on your OBD2 engine and determine which ones are compatible with the OBD1 ECU. You may need to:
- Use OBD1 equivalent sensors on the OBD2 engine where possible (e.g., some temperature sensors, MAP sensors).
- Adapt the wiring from the OBD2 engine harness to match the OBD1 ECU pinouts for compatible sensors.
- In some cases, you might need to use resistors or signal converters to make sensor signals readable by the OBD1 ECU.
-
VTEC Wiring (if applicable): If you are using a VTEC OBD2 engine (like B16B or B18C), you’ll need to wire up the VTEC solenoid and oil pressure switch to the OBD1 ECU. The original article provides wiring information for VTEC in EG Civics, which can be a helpful reference point, though CRX wiring might have slight differences.
-
Distributor and Ignition: OBD2 engines might have different distributor or ignition systems compared to OBD1. You might need to adapt the distributor or ignition wiring to be compatible with the OBD1 ECU. Some swaps might even involve converting to an OBD1 distributor if necessary.
-
Check Engine Light (CEL): Ensure the Check Engine Light is properly wired to the OBD1 ECU so you can diagnose any issues after the swap.
Conclusion:
Performing an 89 Honda CRX OBD1 swap with an OBD2 engine is a complex but rewarding project. It combines the benefits of the lighter, classic CRX chassis with the performance potential of a more modern OBD2 engine, managed by a tunable OBD1 system. Careful planning, meticulous wiring, and a thorough understanding of both OBD1 and OBD2 systems are crucial for a successful swap. While the original article provides a starting point for Honda engine swaps, this guide highlights the specific considerations for this advanced modification, focusing on the key challenges and components involved in bringing an OBD2 engine into an older, OBD1 converted CRX. Remember to consult detailed wiring diagrams and potentially seek expert advice during this intricate engine swap endeavor.