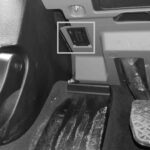
Many Honda and Acura D and B series engines are equipped with a 2-wire Idle Air Control Valve (IACV) system. This 2-wire setup is straightforward, utilizing one wire for power and the other for idle control signals from the Engine Control Unit (ECU). However, certain 1999-2000 Honda Civic models, specifically the DX, LX, and EX (automatic transmission), deviated from this standard by incorporating a 3-wire IACV. This 3-wire IACV system includes a power wire, a ground wire, and a third wire for ECU idle control.
If you’re looking to upgrade or replace the ECU in your 99-00 Civic DX, LX, or EX (automatic transmission) with a performance-oriented OBD1 ECU, you’ll encounter a compatibility issue. OBD1 ECU solutions designed for 99-00 Civics are typically configured exclusively for the 2-wire IACV system. Therefore, to ensure proper functionality with an OBD1 ECU, a conversion from the 3-wire IACV to a 2-wire IACV becomes necessary.
The initial step in this conversion process involves physically replacing your existing 3-wire IACV with a 2-wire IACV. Depending on your engine setup, this might necessitate changing the intake manifold and throttle body if you still have the original engine configuration. If you’ve already performed an engine swap using a B series or another D series engine that inherently uses a 2-wire IACV, this step might already be completed. If not, you will need to acquire and install an intake manifold, throttle body, and 2-wire IACV from a 1996-2000 Civic EX with manual transmission, or a compatible equivalent.
Once you have the 2-wire IACV components, the next crucial step is adapting the wiring. This involves modifying your existing 3-wire IACV harness to correctly interface with the 2-wire IACV and the OBD1 ECU. Here’s a detailed guide on how to accomplish the necessary wiring changes:
IACV Plug Wiring Modifications:
To begin, you’ll need to obtain a 2-wire IACV plug to replace the existing 3-wire plug on your Civic. Once you have the replacement plug, proceed with the following wiring steps at the IACV plug itself:
-
Isolate the Ground Wire: Locate the orange wire on your 3-wire IACV plug. This wire serves as the ground for the 3-wire IACV system. Carefully cut this orange wire and ensure it is safely insulated by taping off the exposed end. This wire will no longer be in use after the conversion.
-
Connect Power Wire: Identify the yellow/black wire on your engine harness. This wire provides the power supply to the IACV. Connect (solder and use heat shrink tubing for a secure and insulated connection) this yellow/black wire to the green/black wire on your newly sourced 2-wire IACV plug.
-
Connect Control Signal Wire: Locate the black/blue wire on your engine harness. This wire carries the idle control signal from the ECU. Connect (solder and heat shrink) the black/blue wire from your engine harness to the black wire on the 2-wire IACV plug.
ECU Wiring Modifications:
After completing the wiring adjustments at the IACV plug, you’ll need to re-pin two wires at the ECU connectors to finalize the 2-wire IACV conversion and ensure compatibility with your OBD1 ECU. Follow these steps at the ECU:
-
Locate Connector B: Identify connector “B” at your Civic’s ECU. The ECU connectors are typically labeled.
-
Move Signal Wire Pin: Find the black wire with a blue stripe currently located at pin B6 on connector B. Carefully depin this wire from pin B6 and re-insert it into pin B23 on the same connector B. Pin B23 is the correct location for the IACV signal wire for a 2-wire setup with an OBD1 ECU in this Civic model.
-
Remove Unused Ground Wire Pin: Locate the orange wire at pin B15 on connector B. This orange wire was originally used for the 3-wire IACV ground. Depin and remove this orange wire from pin B15. Tape off the end of this wire as it will no longer be needed.
With these wiring modifications completed at both the IACV plug and the ECU connectors, your 1999-2000 Honda Civic DX, LX, or EX (automatic transmission) is now properly configured to utilize a 2-wire IACV system. You can now proceed with connecting your OBD2B to OBD1 ECU Jumper Harness and installing your OBD1 ECU to take advantage of its tuning capabilities and performance enhancements.
