For owners of a 2013 Ford Transit Connect, diagnosing vehicle issues at home has become increasingly accessible thanks to OBD2 (On-Board Diagnostics II) scanners. These tools plug into your van’s OBD2 port, allowing you to read diagnostic trouble codes, monitor engine performance, and even clear check engine lights. However, if you’re experiencing trouble getting your OBD2 scanner to connect or power up in your 2013 Transit Connect, the first place to investigate is often the fuse related to the OBD2 port.
Understanding the OBD2 Port and Fuse Connection
The OBD2 port is not just a passive connector; it’s an active part of your vehicle’s electrical system, requiring power to operate correctly. This power is typically supplied through a fuse in your Transit Connect’s fuse box. The fuse acts as a safety device, protecting the OBD2 system and potentially other related circuits from electrical overload. If this fuse blows, it can cut power to the OBD2 port, preventing your scanner from working.
Think of it like a household appliance that suddenly stops working. Before assuming a major malfunction, you’d check if it’s plugged in and if the circuit breaker hasn’t tripped. Similarly, when your OBD2 scanner fails to power on in your 2013 Transit Connect, checking the OBD2 port fuse is a crucial first step in troubleshooting.
Locating and Checking the OBD2 Fuse in Your 2013 Transit Connect
Finding the exact fuse for the OBD2 port in your 2013 Transit Connect requires consulting your vehicle’s owner’s manual. The manual will contain a fuse box diagram, clearly indicating the location and function of each fuse. Fuse boxes are usually located in one of two places:
- Inside the cabin: Often found under the dashboard, on the driver’s side or passenger’s side footwell. You may need to remove a panel to access it.
- Under the hood: Typically near the engine bay, these fuse boxes contain fuses for more critical vehicle systems.
Once you’ve located the fuse box diagram for your 2013 Transit Connect, look for a fuse labeled “OBD,” “Diagnostic,” or something similar. The amperage rating of the fuse will also be indicated (e.g., 10A, 15A, 20A).
Checking the Fuse:
- Visual Inspection: Carefully remove the fuse using a fuse puller (often found in the fuse box). Hold the fuse up to the light and check the thin wire inside. If the wire is broken or melted, the fuse is blown and needs replacement.
- Continuity Test: For a more definitive check, use a multimeter set to the continuity setting. Place the probes on each of the metal contacts on the fuse. If the multimeter beeps or shows continuity, the fuse is good. If there’s no continuity, the fuse is blown.
Important Note: Always replace a blown fuse with one of the same type and amperage rating. Using a fuse with a higher amperage rating can potentially damage your vehicle’s electrical system.
Recommended OBD2 Scanners for Your 2013 Transit Connect
Assuming the OBD2 port fuse is intact and functioning, the next step is to ensure you’re using a compatible and reliable OBD2 scanner. For 2013 Transit Connect owners, several options are available, ranging from basic code readers to more advanced diagnostic tools.
For users looking for a cost-effective and user-friendly option, Bluetooth OBD2 scanners paired with smartphone apps are an excellent choice. As mentioned in the original text, tools like the BAFX Products Bluetooth OBD2 scan tool are compatible with Ford vehicles and work seamlessly with Android devices.
Image of BAFX Bluetooth OBD2 scanner, a recommended tool for diagnosing car issues on Android devices.
This type of scanner, when used with apps like ForScan (specifically mentioned for ABS codes in the original text and available on the Google Play Store) or Torque Pro, provides a wealth of diagnostic information and real-time data. Torque Pro, for instance, allows you to monitor parameters like transmission temperature and boost pressure, offering valuable insights into your Transit Connect’s performance without the need for permanently installed gauges.
For more comprehensive diagnostics, professional-grade tools like AutoEnginuity are available, though they come at a higher price point. However, for many DIY mechanics and Transit Connect owners, the combination of a Bluetooth OBD2 scanner and smartphone apps offers a powerful and convenient solution for most diagnostic needs.
Troubleshooting Persistent OBD2 Scanner Issues
If you’ve checked the OBD2 port fuse and confirmed it’s good, but your scanner still isn’t working, consider these additional troubleshooting steps:
- Scanner Compatibility: Double-check that your OBD2 scanner is compatible with the 2013 Ford Transit Connect and the OBD2 protocols it uses (typically CAN, PWM, VPW, ISO9141-2, and KWP2000).
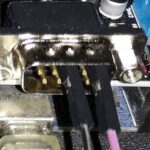
- Port Damage: Inspect the OBD2 port itself for any signs of damage, bent pins, or corrosion. A damaged port may prevent proper communication with the scanner.
- Software/App Issues: If using a Bluetooth scanner and app, ensure both are properly installed, updated, and configured to communicate with the scanner.
- Vehicle Battery: A weak or low vehicle battery can sometimes cause issues with OBD2 port functionality. Ensure your Transit Connect’s battery is in good condition.
Conclusion
Diagnosing issues with your 2013 Ford Transit Connect using an OBD2 scanner is a valuable skill for any vehicle owner. When facing scanner connectivity problems, always start with the basics: checking the OBD2 port fuse. This simple step can often resolve the issue and get you back on track to diagnosing and resolving your vehicle’s concerns. By understanding the OBD2 system, knowing how to check the fuse, and choosing the right scanner, you can take a proactive approach to maintaining your 2013 Transit Connect and ensure it remains reliable for years to come.