Experiencing trouble connecting your OBD2 scanner to your 2009 Saturn Aura? A common culprit could be a blown fuse in your OBD2 system. Understanding the 2009 Saturn Aura Obd2 Fuse Box Diagram is the first step in diagnosing and resolving power issues to your diagnostic port. This guide will walk you through how to locate the relevant fuse, check for common problems, and get your OBD2 port functioning again.
The OBD2 port, or On-Board Diagnostics II port, is essential for accessing your vehicle’s computer system for diagnostics and emissions testing. If this port isn’t working, you won’t be able to read trouble codes, monitor engine performance, or pass inspections. Before assuming a major electrical problem, checking the fuse is a simple and often overlooked step.
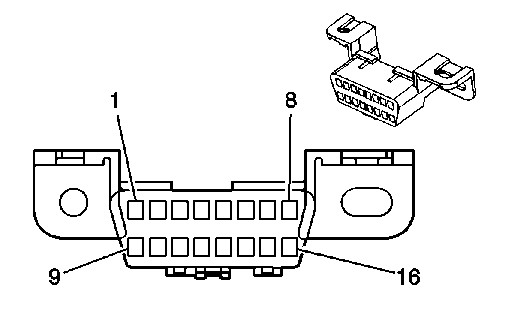
Locating the OBD2 Fuse Box in Your 2009 Saturn Aura
Your 2009 Saturn Aura, like most vehicles, houses fuse boxes in strategic locations. The primary fuse box related to the OBD2 system is typically located inside the car, often under the dashboard on the driver’s side. You may need to look under the dash panel, near the steering column, or consult your owner’s manual for the precise location of the interior fuse box.
Once you’ve located the fuse box, you’ll need the 2009 Saturn Aura OBD2 fuse box diagram. This diagram is usually printed on the inside cover of the fuse box itself. It provides a layout of each fuse and relay, along with labels indicating what system each fuse protects.
Identifying the OBD2 Fuse
Refer to the fuse box diagram to pinpoint the fuse associated with the OBD2 port. Look for labels such as:
- OBD
- Diagnostic
- DLC (Data Link Connector)
- Sometimes, it might be linked to the Cigar Lighter or Accessory Power fuse, as these circuits can sometimes share power.
Once you’ve identified the potential fuse, carefully inspect it. A blown fuse will often have a broken filament visible through the clear plastic casing.
Checking and Replacing the OBD2 Fuse
To check the fuse:
- Turn off your vehicle’s ignition.
- Locate the fuse identified from the diagram.
- Use a fuse puller (often found in the fuse box or your car’s toolkit) or needle-nose pliers to gently remove the fuse.
- Visually inspect the fuse. Look for a broken wire inside. If the wire is broken or the metal ends are blackened, the fuse is likely blown.
- Test with a multimeter (optional). For a more definitive test, use a multimeter in continuity mode to check if current flows through the fuse.
If the fuse is blown, replace it with a new fuse of the exact same amperage rating. Using a fuse with a higher amperage can be dangerous and potentially damage your vehicle’s electrical system. You can find the amperage rating printed on the fuse itself.
What if a New Fuse Blows Immediately?
If you replace the OBD2 fuse and it blows again immediately, this indicates a more serious underlying issue. It suggests a short circuit or excessive current draw in the OBD2 system or related circuits. In this case, further troubleshooting is needed, and it’s advisable to consult a qualified mechanic.
Beyond Fuses: Checking OBD2 Port Pins
If the fuse is intact or replacing it doesn’t solve the problem, the issue might lie within the OBD2 port itself, as described in the original article. Problems can include:
-
Pushed-back pins: Inspect the pins inside the OBD2 port. Shine a flashlight to see if any pins appear pushed back compared to others. A pushed-back pin might not make proper contact with your scanner.
If you find a pushed-back pin, carefully try to adjust the wire from behind the connector to bring the socket forward. Never insert anything into the socket from the front to pull it forward, as this can cause damage.
-
Bent scanner pins: Check your OBD2 scanner’s plug for bent pins. Bent pins can prevent proper connection and even damage the OBD2 port in your car. Gently straighten any bent pins on your scanner.
-
Ground issues: Problems with ground connections can also disrupt OBD2 communication. This is more complex to diagnose and often requires professional electrical testing.
Conclusion
Troubleshooting your 2009 Saturn Aura’s OBD2 port issues often starts with a simple fuse check. By understanding your 2009 Saturn Aura OBD2 fuse box diagram and following these steps, you may be able to resolve the problem quickly and get your diagnostic port working again. However, if fuse replacement and pin inspection don’t fix the issue, it’s crucial to seek professional diagnosis to avoid further electrical problems and ensure accurate vehicle diagnostics. Remember to always prioritize safety and consult your vehicle’s repair manual or a certified mechanic when dealing with electrical systems.