Diagnosing communication issues in modern vehicles can be complex, especially when dealing with systems like the Engine Control Module (ECM) or Powertrain Control Module (PCM). A common problem in 2008 Sprinter models is a “LOST COMMUNICATION WITH ECM/PCM” error, which can manifest in various ways and hinder vehicle operation. This guide provides a step-by-step approach to troubleshooting this issue, focusing on the use of an OBD2 scanner and essential battery checks, crucial first steps for any diagnostic process.
When you encounter a “LOST COMMUNICATION WITH ECM/PCM” error in your 2008 Sprinter, it indicates that the Body Control Module (BCM) is not receiving messages from the ECM/PCM. This lack of communication can stem from several potential causes, ranging from simple issues like a blown fuse to more complex problems within the vehicle’s network or the modules themselves. Before diving into deeper diagnostics, it’s essential to verify a few basic conditions.
First and foremost, ensure that the Ignition Off Draw (IOD) fuse is correctly installed and that your Sprinter’s battery voltage is within the acceptable range of 10 to 16 volts. Insufficient battery voltage or a missing IOD fuse can disrupt the entire vehicle’s electrical system and lead to communication errors. These are quick checks that can save significant diagnostic time.
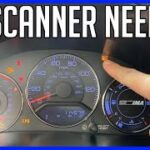
To begin the troubleshooting process, you’ll need an OBD2 scanner compatible with your 2008 Sprinter. Connect the scanner to the OBD2 port, typically located under the dashboard on the driver’s side. Once connected, power on the scanner and navigate to the DTC (Diagnostic Trouble Code) reading section.
Step 1: Verify Active DTC
Using your OBD2 scanner, read the active DTCs. Confirm if the “LOST COMMUNICATION WITH ECM/PCM” DTC is currently active.
- If Yes: Proceed to Step 2. The DTC is actively present, indicating an ongoing communication issue.
- If No: The fault might be intermittent or stored. Refer to the Stored Lost Communication test procedure and perform a BODY VERIFICATION TEST using your scan tool to ensure the BCM is functioning correctly.
Step 2: Check for Related Active DTCs
With the OBD2 scanner still connected, read all active DTCs from all available modules. Pay close attention to any codes related to:
-
BCM Configuration: Incorrect BCM configuration can lead to communication problems.
-
CAN Bus Circuits: Issues like open or shorted circuits in the CAN B or CAN C bus network, which are the communication pathways for vehicle modules.
-
VIN Missing/Mismatch: A missing or mismatched Vehicle Identification Number can disrupt module communication.
-
Battery or Ignition Related DTCs: Low battery voltage, ignition switch problems, or related electrical faults can trigger communication errors.
-
If Yes (Related DTCs Present): Diagnose and repair the related DTCs first. These issues might be the root cause of the “LOST COMMUNICATION WITH ECM/PCM” error. Refer to specific diagnostic procedures for each identified DTC and perform a BODY VERIFICATION TEST after repairs.
-
If No (No Related DTCs): Proceed to Step 3. No obvious related faults are present, indicating the issue might be more directly related to the ECM/PCM communication.
Step 3: Verify ECM/PCM Activity on the Bus
Turn the ignition to the “ON” position. Using your OBD2 scanner, navigate to the Network Diagnostics or similar section, depending on your scanner’s interface. Check if the ECM/PCM is listed as active on the communication bus.
- If Yes (ECM/PCM Active): Proceed to Step 4. The ECM/PCM is communicating on the bus, suggesting the issue might be intermittent or related to specific communication requests.
- If No (ECM/PCM Not Active): This indicates a more significant communication problem with the ECM/PCM. Refer to diagnostic procedures specifically for “No Response from ECM or PCM”. This could involve checking ECM/PCM power and ground circuits, CAN bus wiring integrity, or potentially a faulty ECM/PCM. Perform a BODY VERIFICATION TEST after diagnosis and repair.
Step 4: Check for Additional Communication Related DTCs
Using the OBD2 scanner’s Network Diagnostics, check if other modules are also logging active DTCs specifically “Logged Against” the ECM/PCM. This helps determine if the communication issue is isolated to the ECM/PCM or more widespread.
- If Yes (Multiple Modules with DTCs Against ECM/PCM): This could indicate a fault within the ECM/PCM itself or a broader network communication issue affecting multiple modules. In this scenario, consider replacing or updating the ECM/PCM as per service information. Perform an ECM VERIFICATION TEST or POWERTRAIN VERIFICATION TEST after replacement/update to ensure proper function.
- If No (Only BCM with DTC Against ECM/PCM): The issue is likely isolated to the communication between the BCM and ECM/PCM. Consider replacing or updating the module that initially set the DTC (in this case, likely the BCM, but always confirm based on the specific DTC and diagnostic context) according to service information. Perform a BODY VERIFICATION TEST after replacement/update.
Conclusion
Troubleshooting “LOST COMMUNICATION WITH ECM/PCM” on a 2008 Sprinter requires a systematic approach, starting with basic checks like battery voltage and fuse integrity, and progressing through OBD2 scanner diagnostics to pinpoint the root cause. By following these steps and utilizing an OBD2 scanner effectively, you can efficiently diagnose and address communication errors, ensuring your Sprinter operates reliably. Remember to always consult the vehicle’s service information for detailed procedures and specifications, and consider professional assistance if the diagnosis and repair become complex.